
I have a problem where if there’s a difficulty setting in a game, I’ll always go for the hardest mode - without a challenge I end up getting really bored. The problem is that I always end up punching above my weight and fail miserably. On that note, I decided to go for the holy grail of dumplings this week - the 小籠包 (soup dumpling, xiao long bao, XLB) and almost failed miserably.
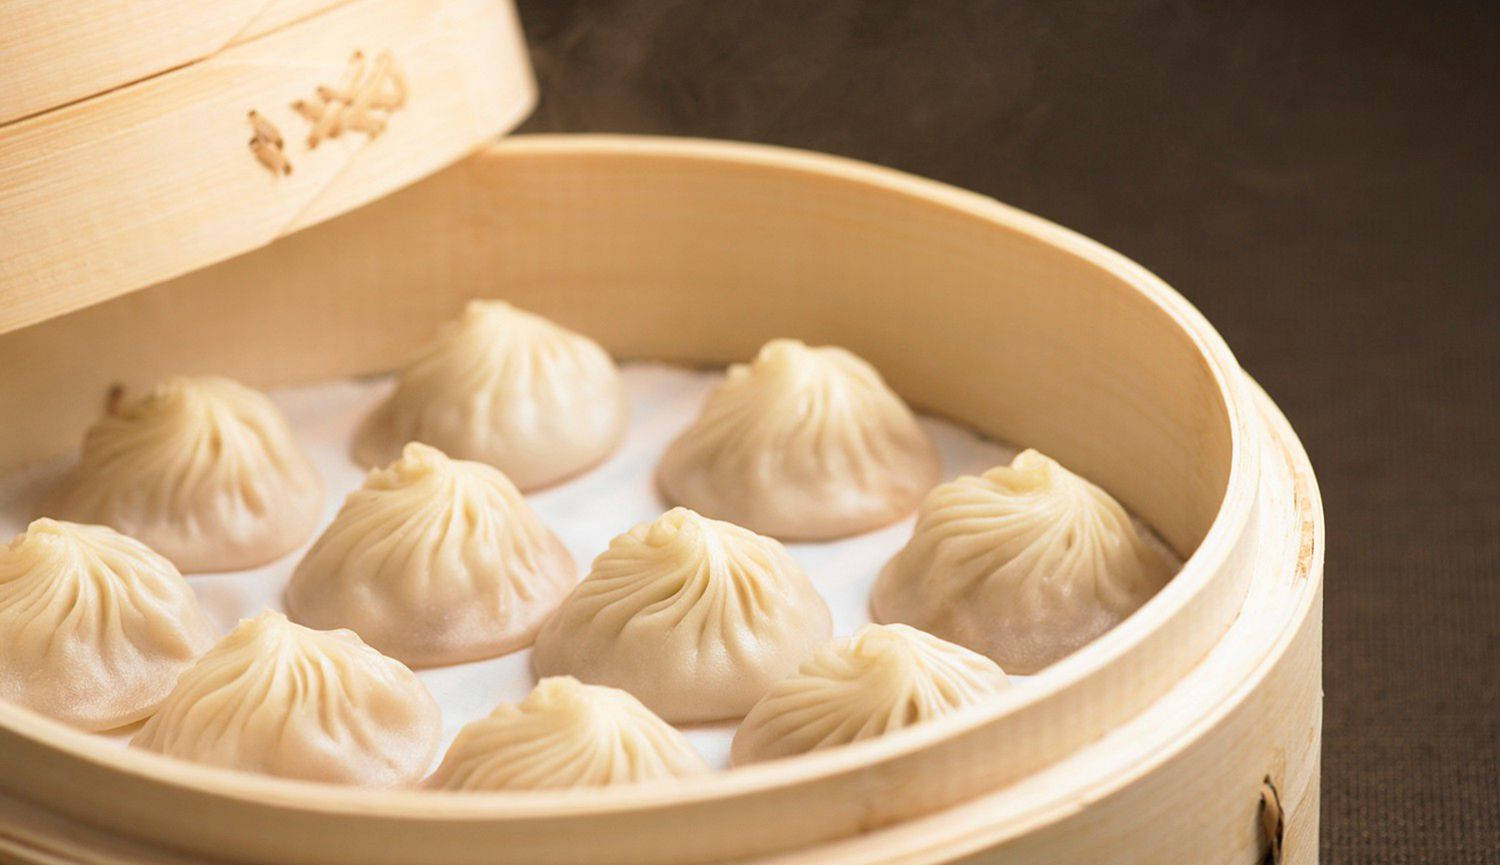
For those of you who don’t know what a 小籠包 (xiao long bao) is, it’s basically a small circularly twisted dumpling which along with its filling, contains delicious soup broth within. Though arguably made internationally famous by Din Tai Fung, a Taiwanese restaurant chain 🎉, the 小籠包 Din Tai Fung serves, the kind you’re salivating over with the deliciously thin skin and savory soup filling is actually a 南京湯包 (nan jing tang bao). A true 小籠包 has thicker skin, less soup, and well I don’t nobody cares about them so going forward in this post, 小籠包 == 南京湯包.
You’re probably asking how do you make this godly dumpling? If you’re not, close your tab and leave thanks. And if you are asking because you’re about to try to make some 小籠包, close your tab and leave, it’ll save you a day of suffering.
5 STEPS TO MAKE A 小籠包
- Make dough
- Make gelatinized broth
- Make meat filling
- Wrap gelatinized broth and filling
- Steam
Seems simple except every one of those steps is not simple at all. My Sunday was completely wasted on these little piece of shits cause I underestimated how difficult this process is. Here’s a tip if you’re ever trying to make 小籠包: Don’t.
We’ll start with step 1.
STEP 1: Make dough
Not much to say here, but if you’ve never worked with flour and water before, don’t add too much water. You’ll end up looking like your hands just got caked except the cake doesn’t come off and will now stick semi-permanently to everything including the sink at which you’re trying to wash this shit off.
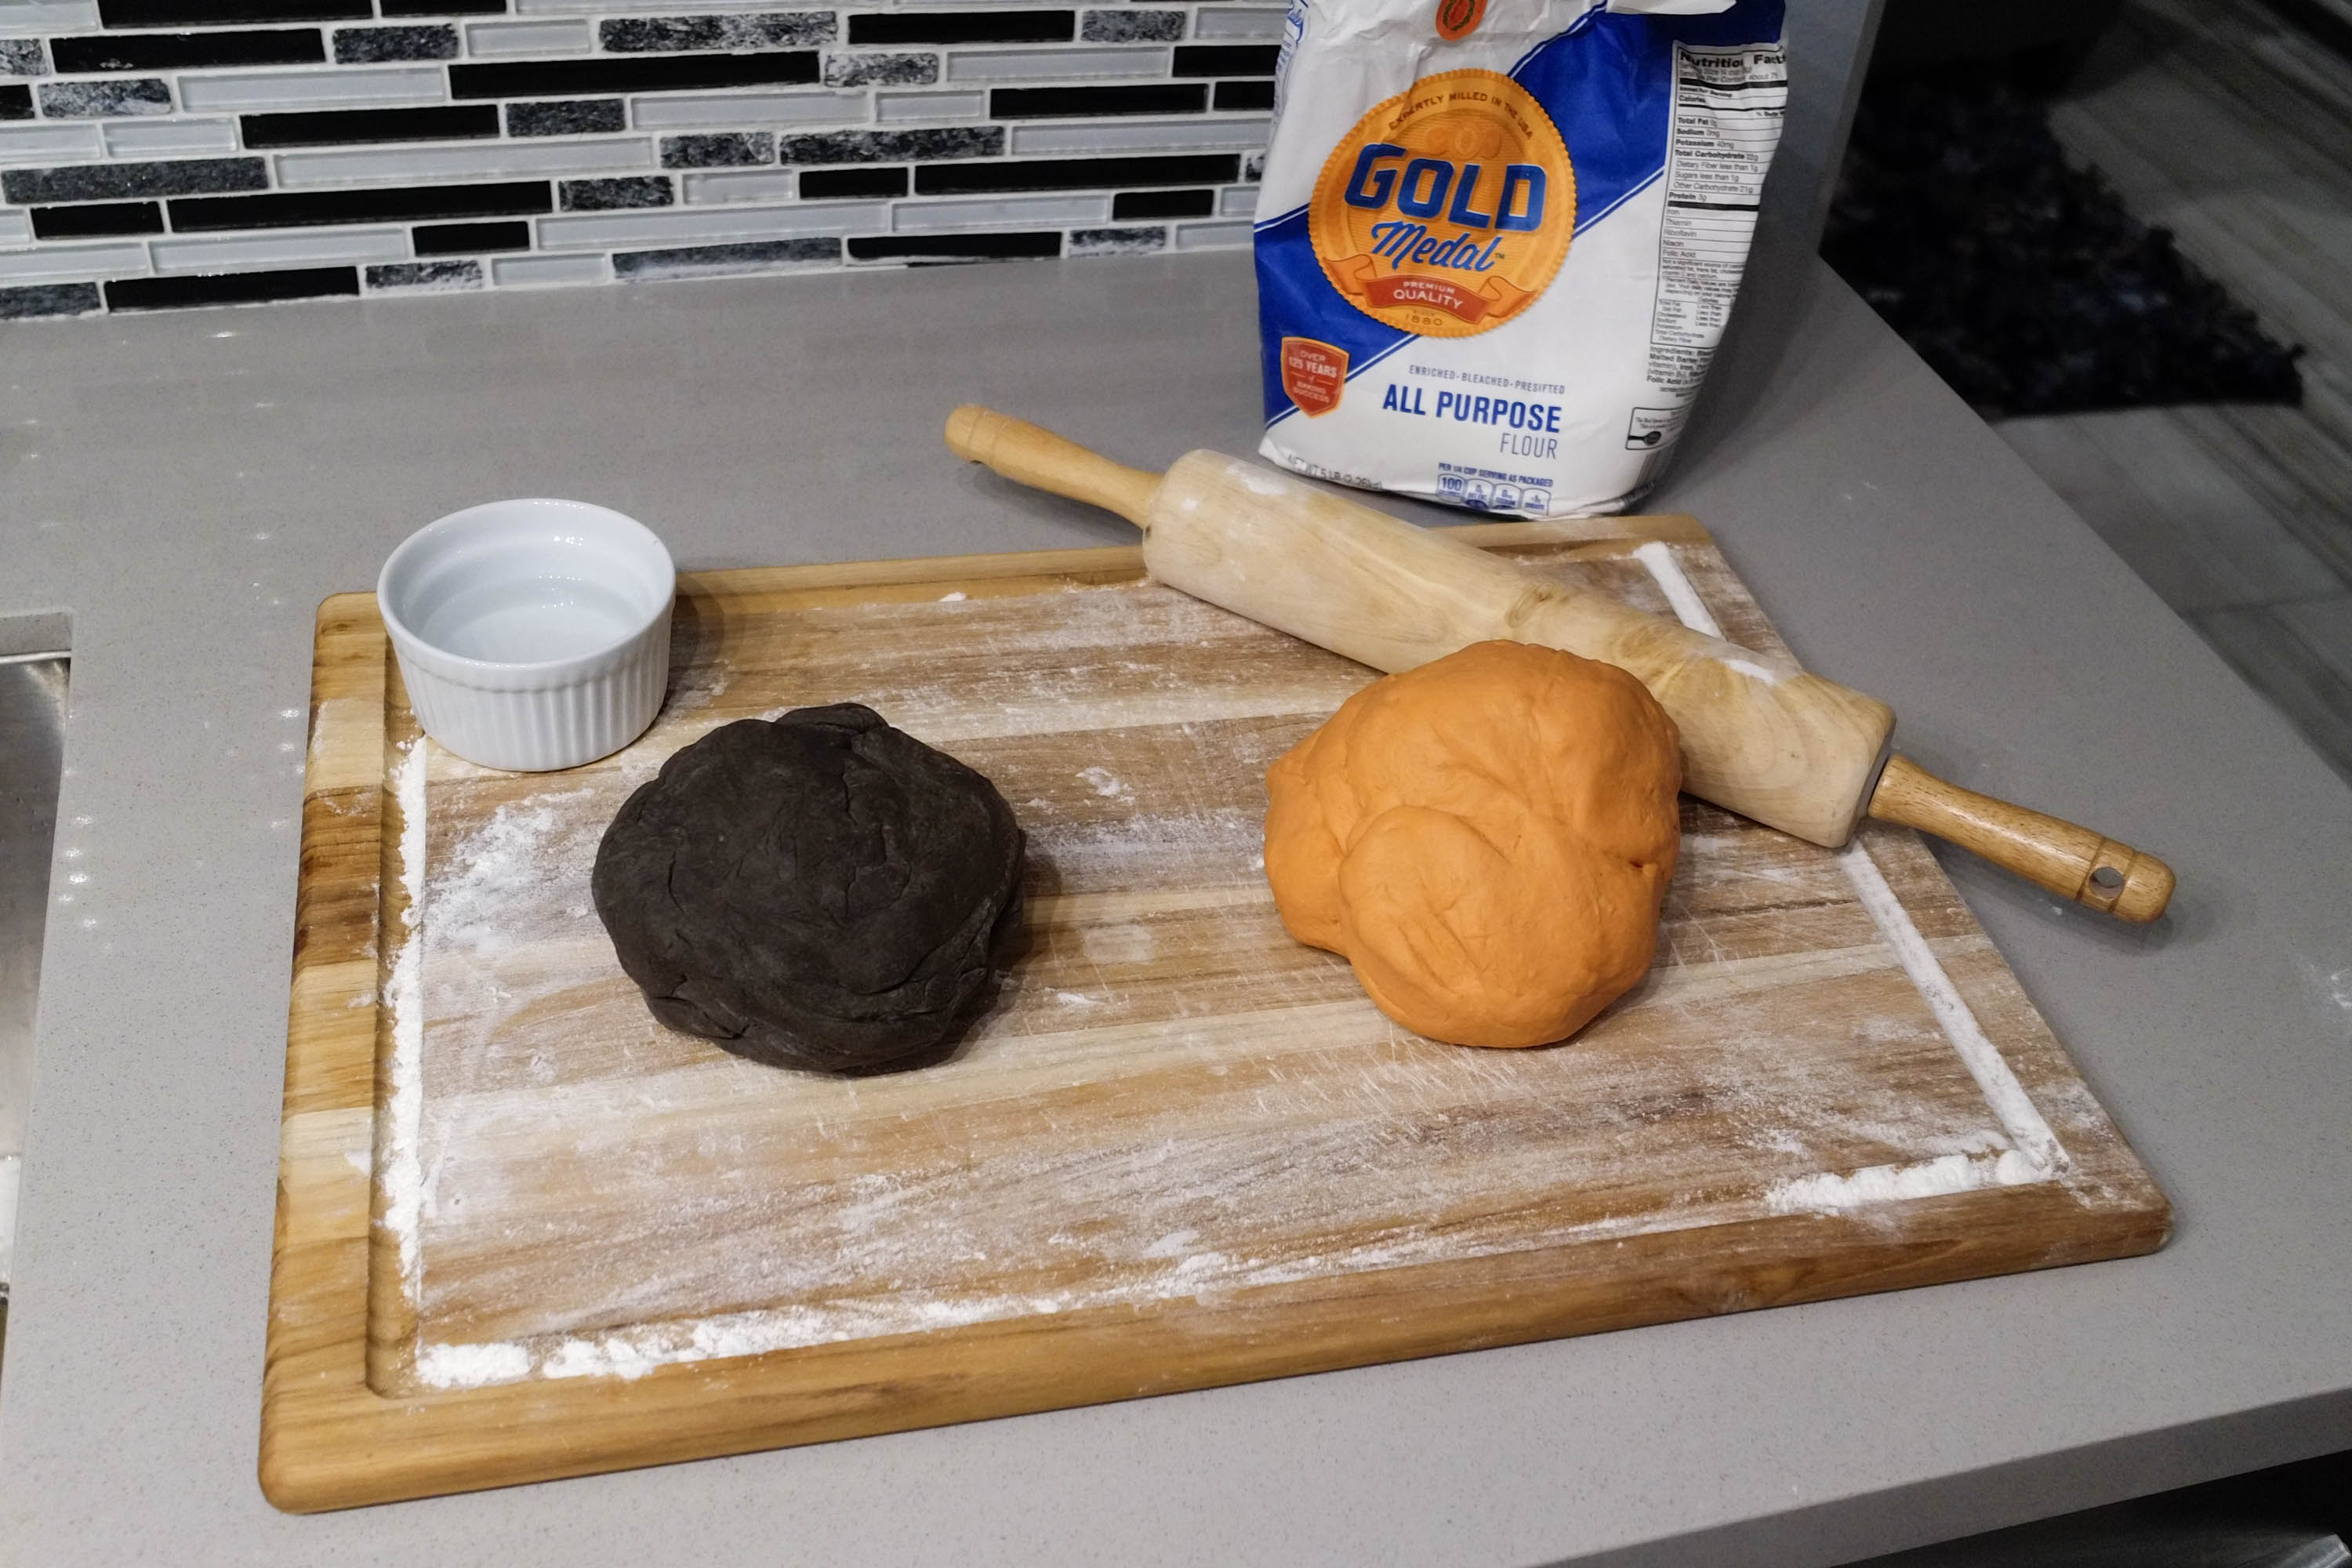
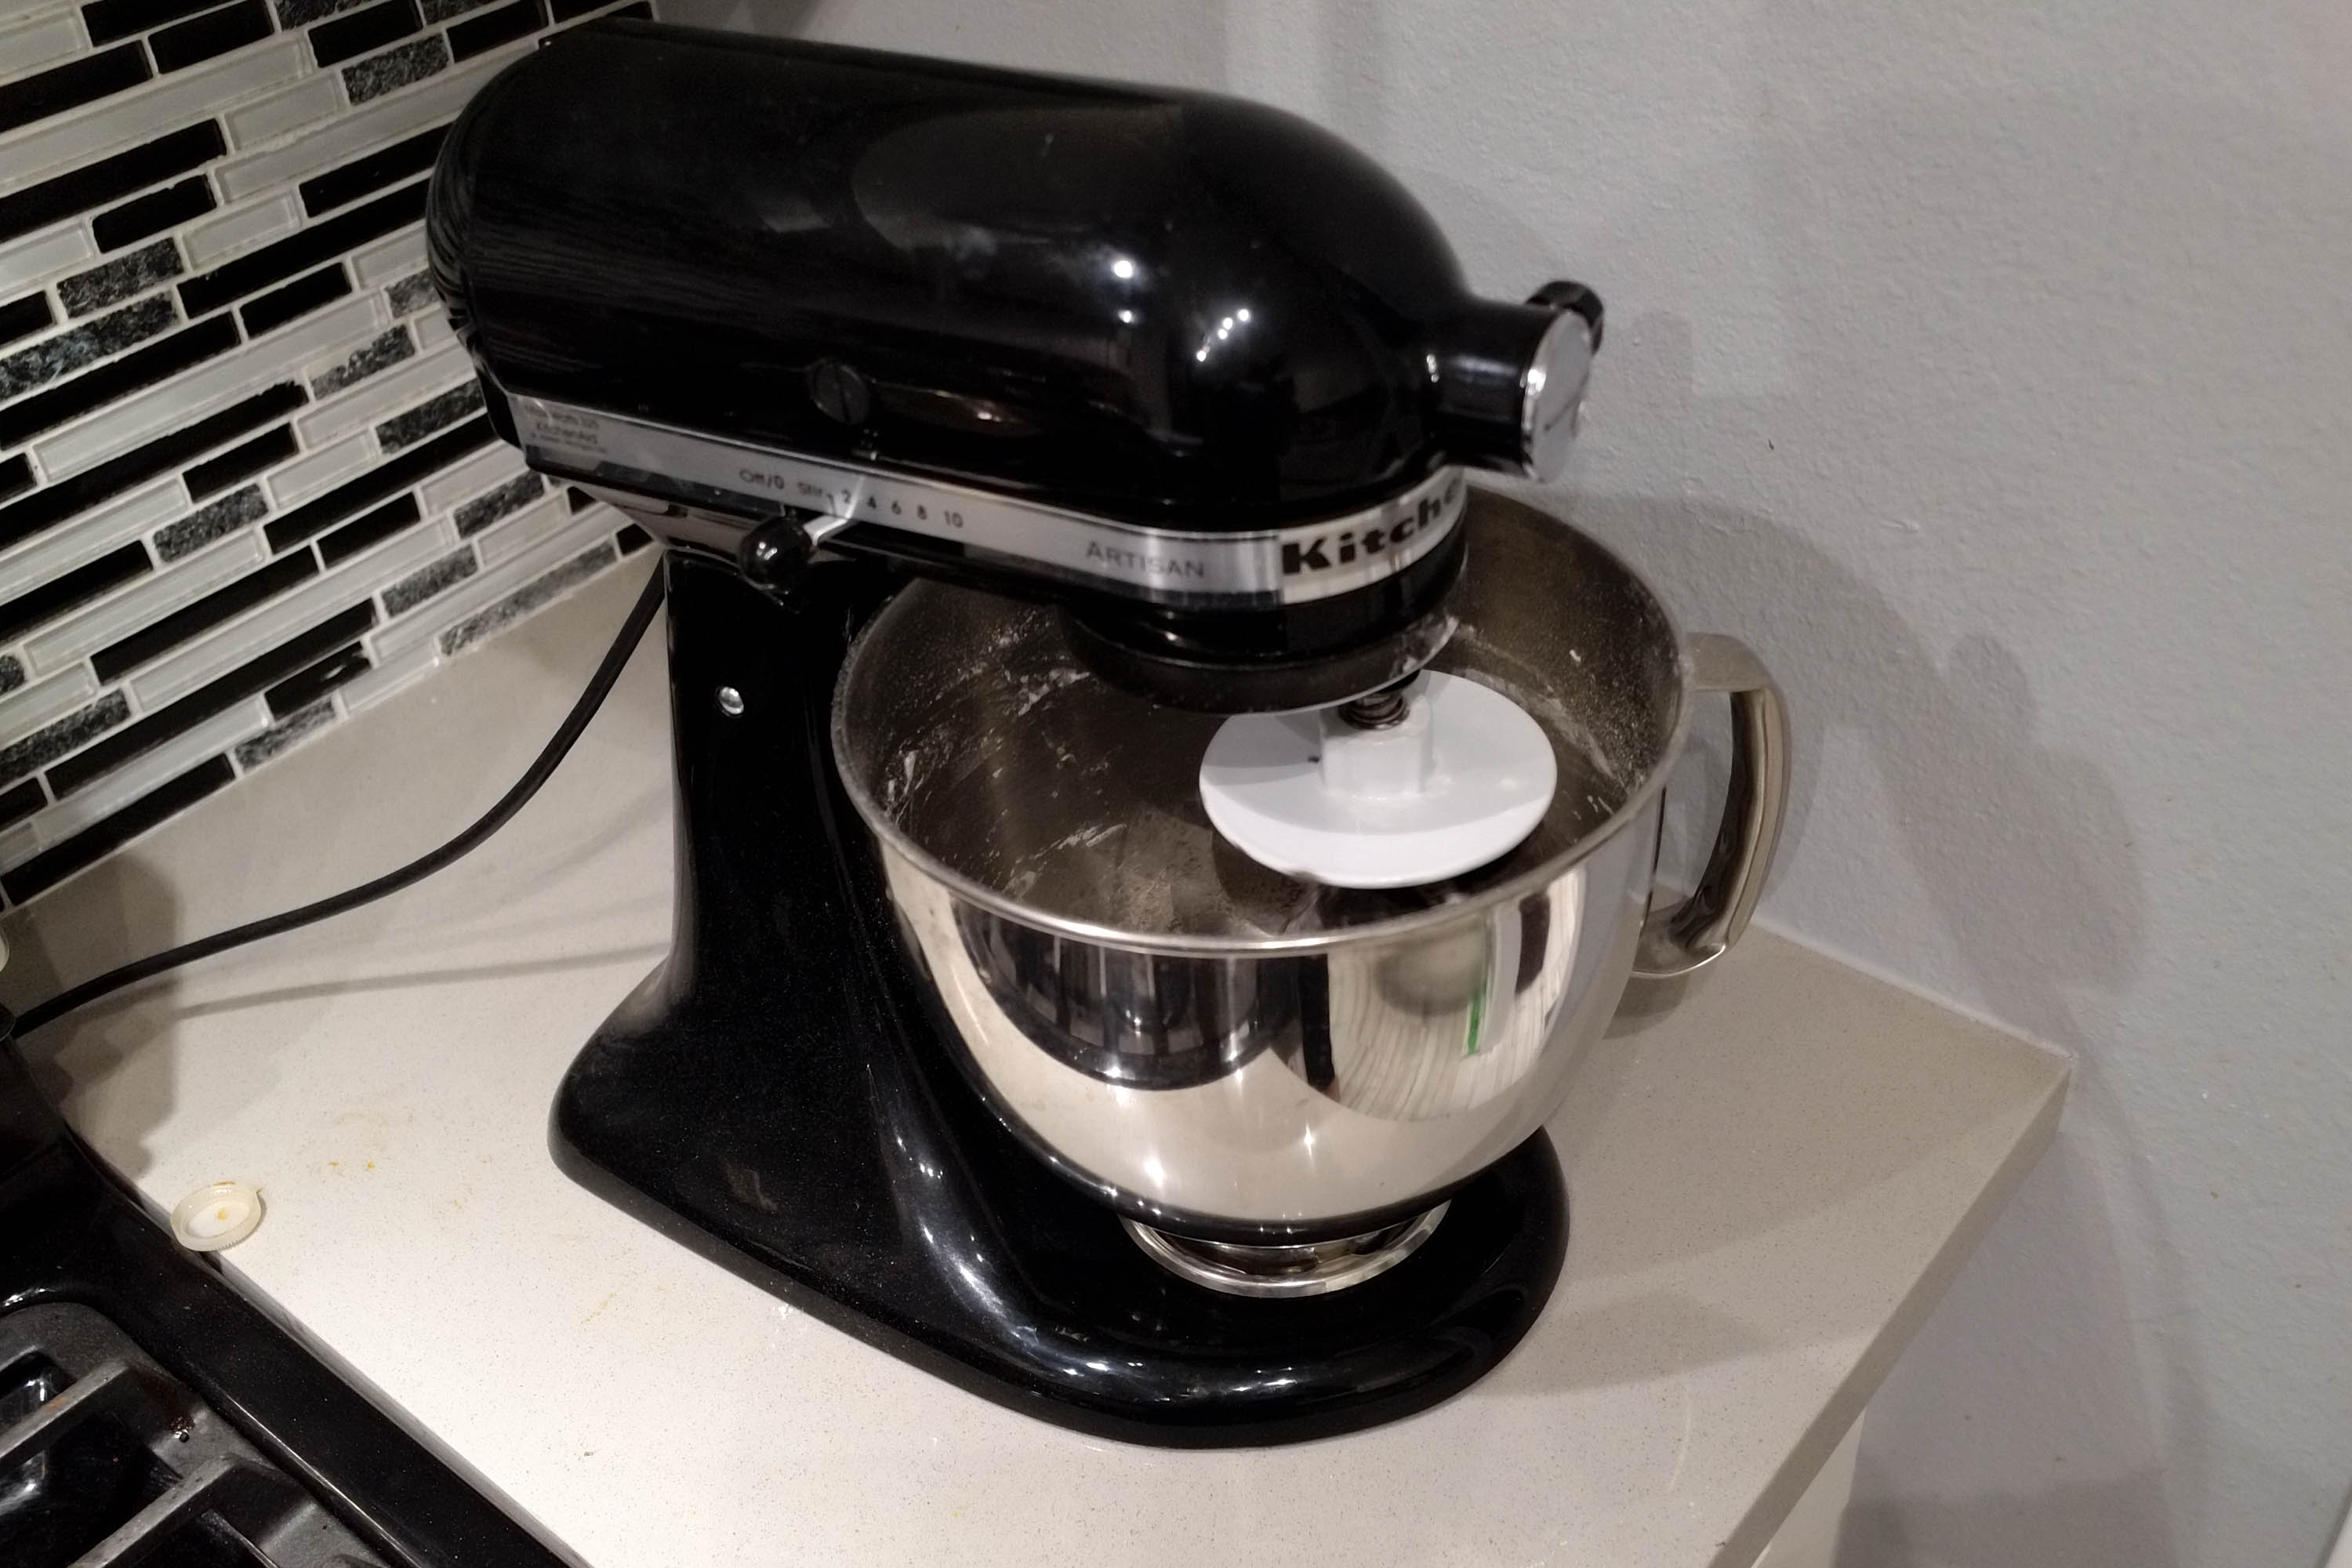
Just add flour, water, mix. If you have to knead (I always thought this was pronounced ned but it’s actually pronounced need) by hand it’s laborious, but if you have a KitchenAid mixer, it’ll save you a ton of work and headache. Thankfully I’m lucky enough to have access to this bougie ass symbol of domestication and created some dough relatively simply. For those of you less fortunate to have to knead by hand, it’s possible but just tiring - I did my first batch by hand.
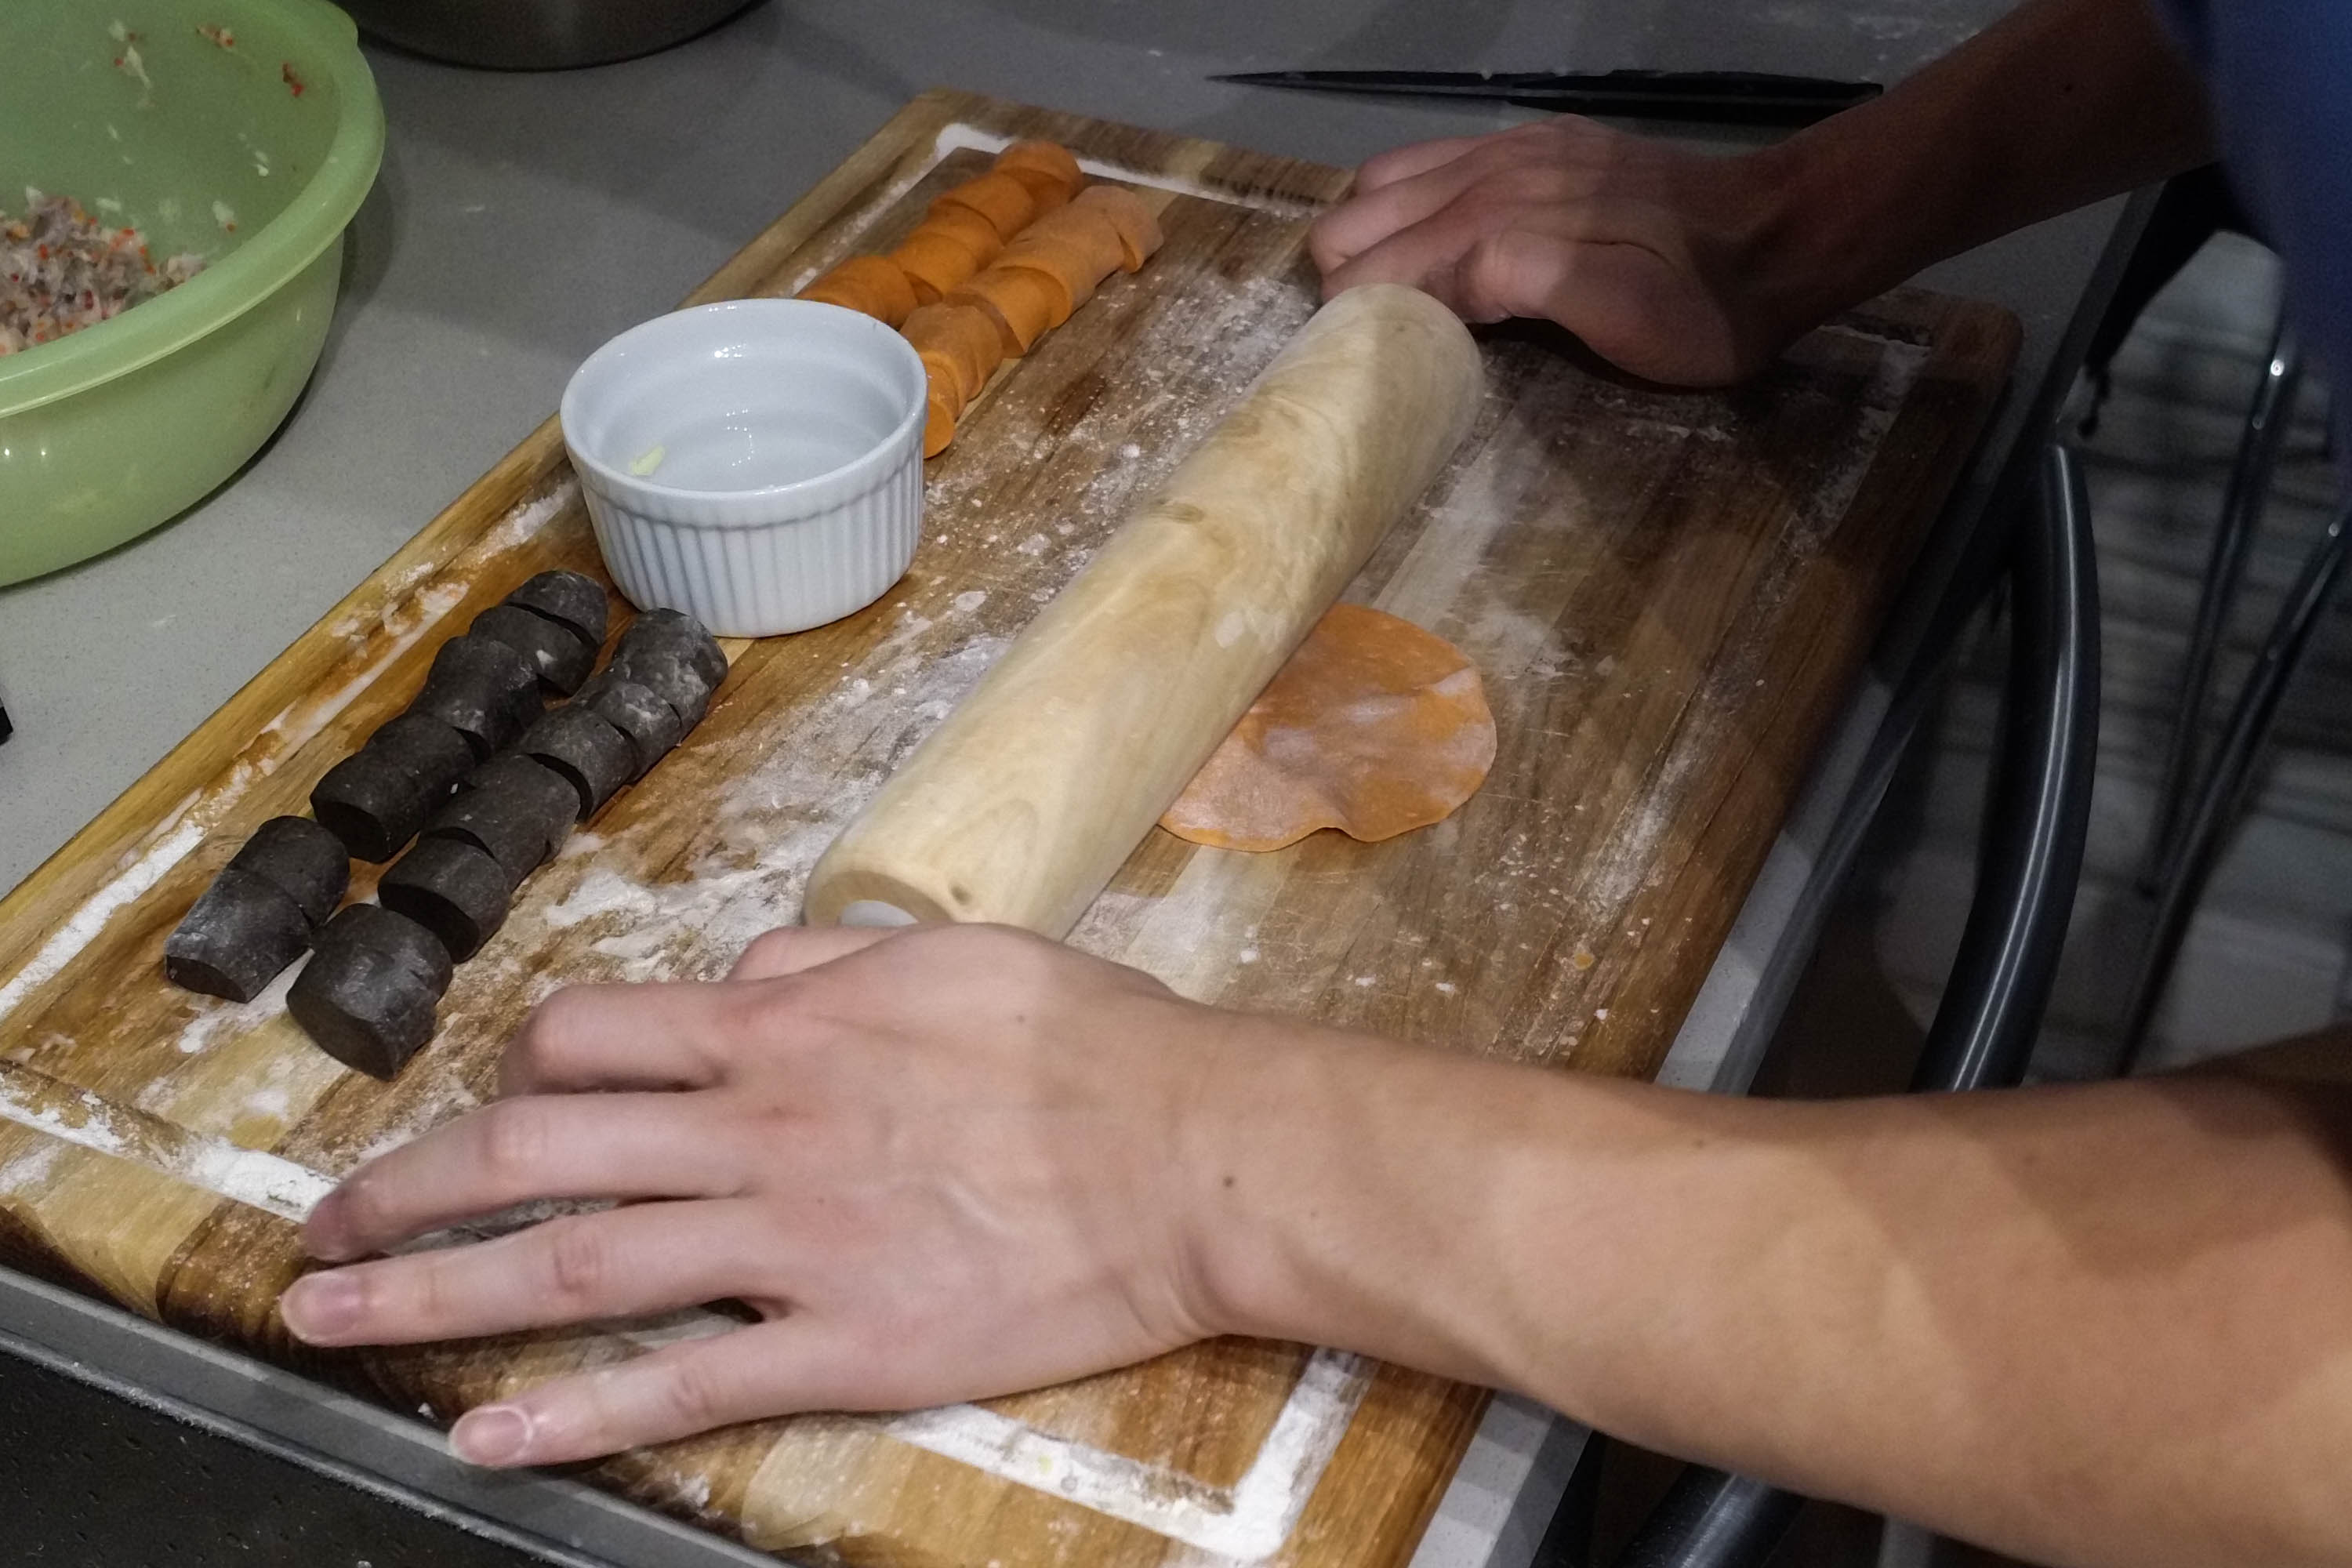
But wait Justin, why the fuck are the doughs weirdly colored? Good question carefully observant reader! I decided that I would try to impress you by coloring the dough with ground Annatto beans for orange-red, and another portion with cuttlefish ink for black. You’ll see why in a sec. Cuttlefish ink is surprisingly hard to procure btw - was legit considering buying a whole uncleaned maybe live squid and squeezing that shit out myself.
STEP 2: Make gelatinized broth
I’ve got some experience making broths for ramen so this was a bit easier for me, albeit very time-consuming. I decided to go for a seafood 小籠包 and a pork 小籠包, so I settled on two different broths, a seafood one and a meat one. This is also the reason why I went with the colored dough.
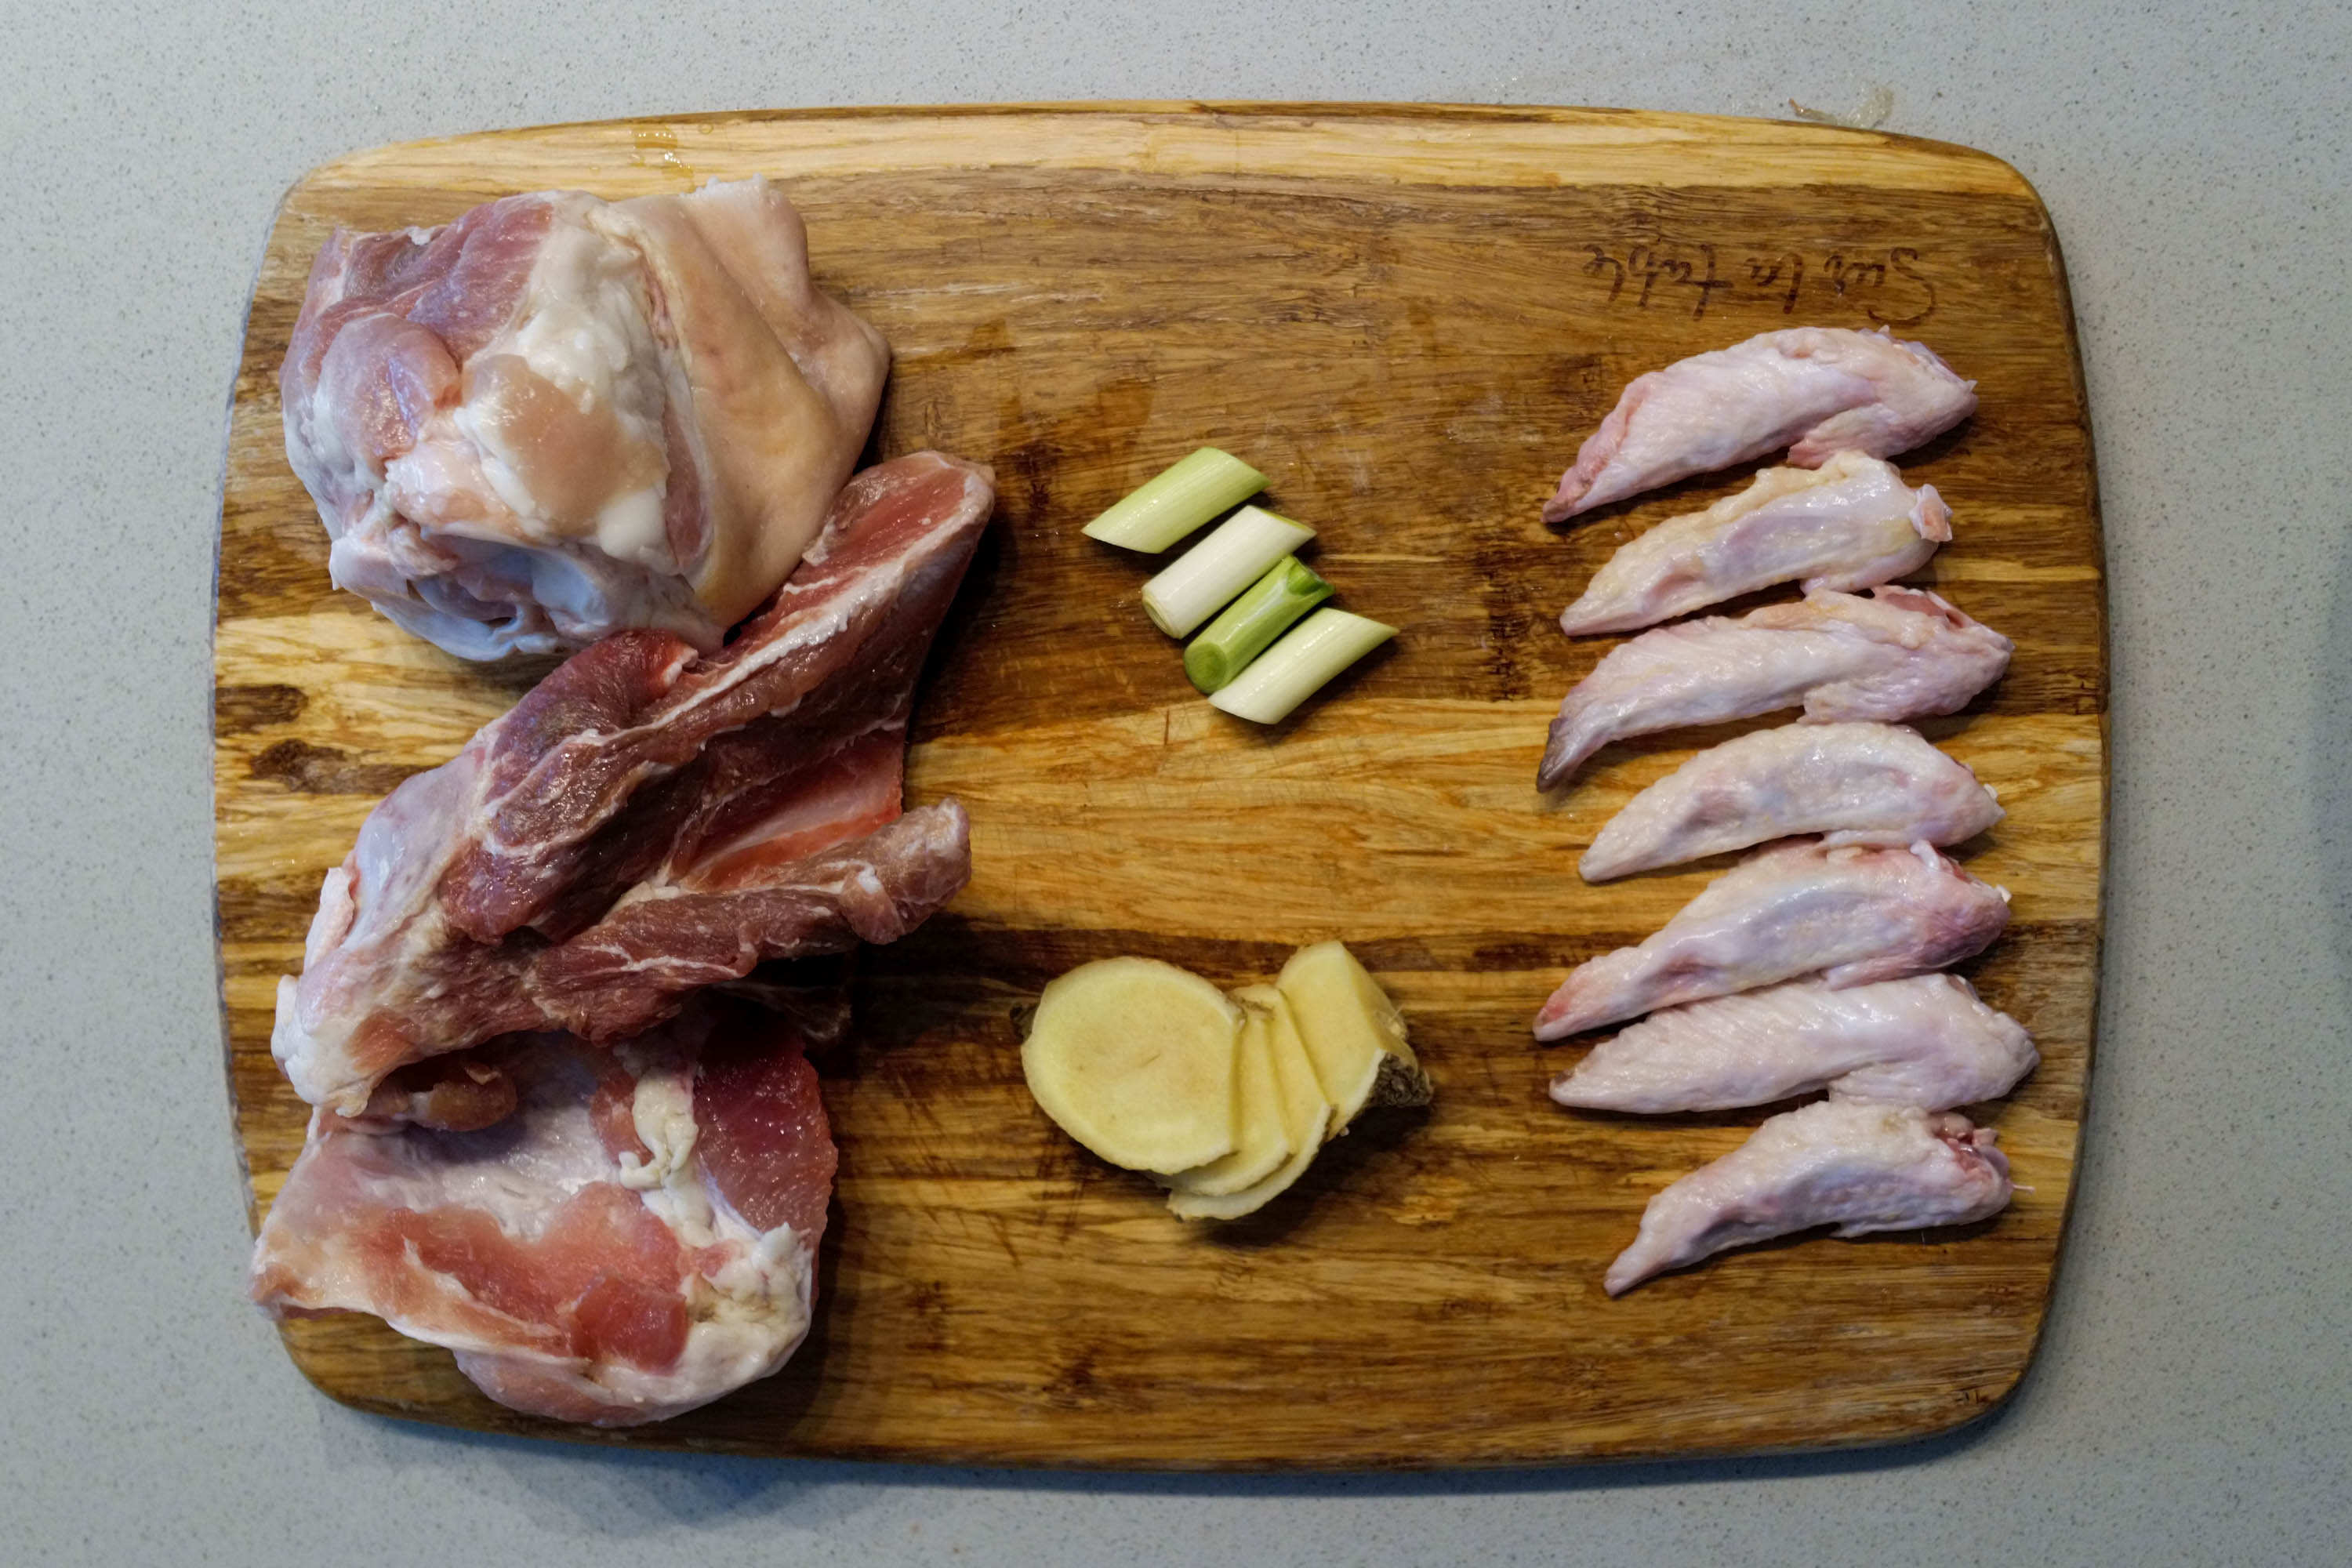
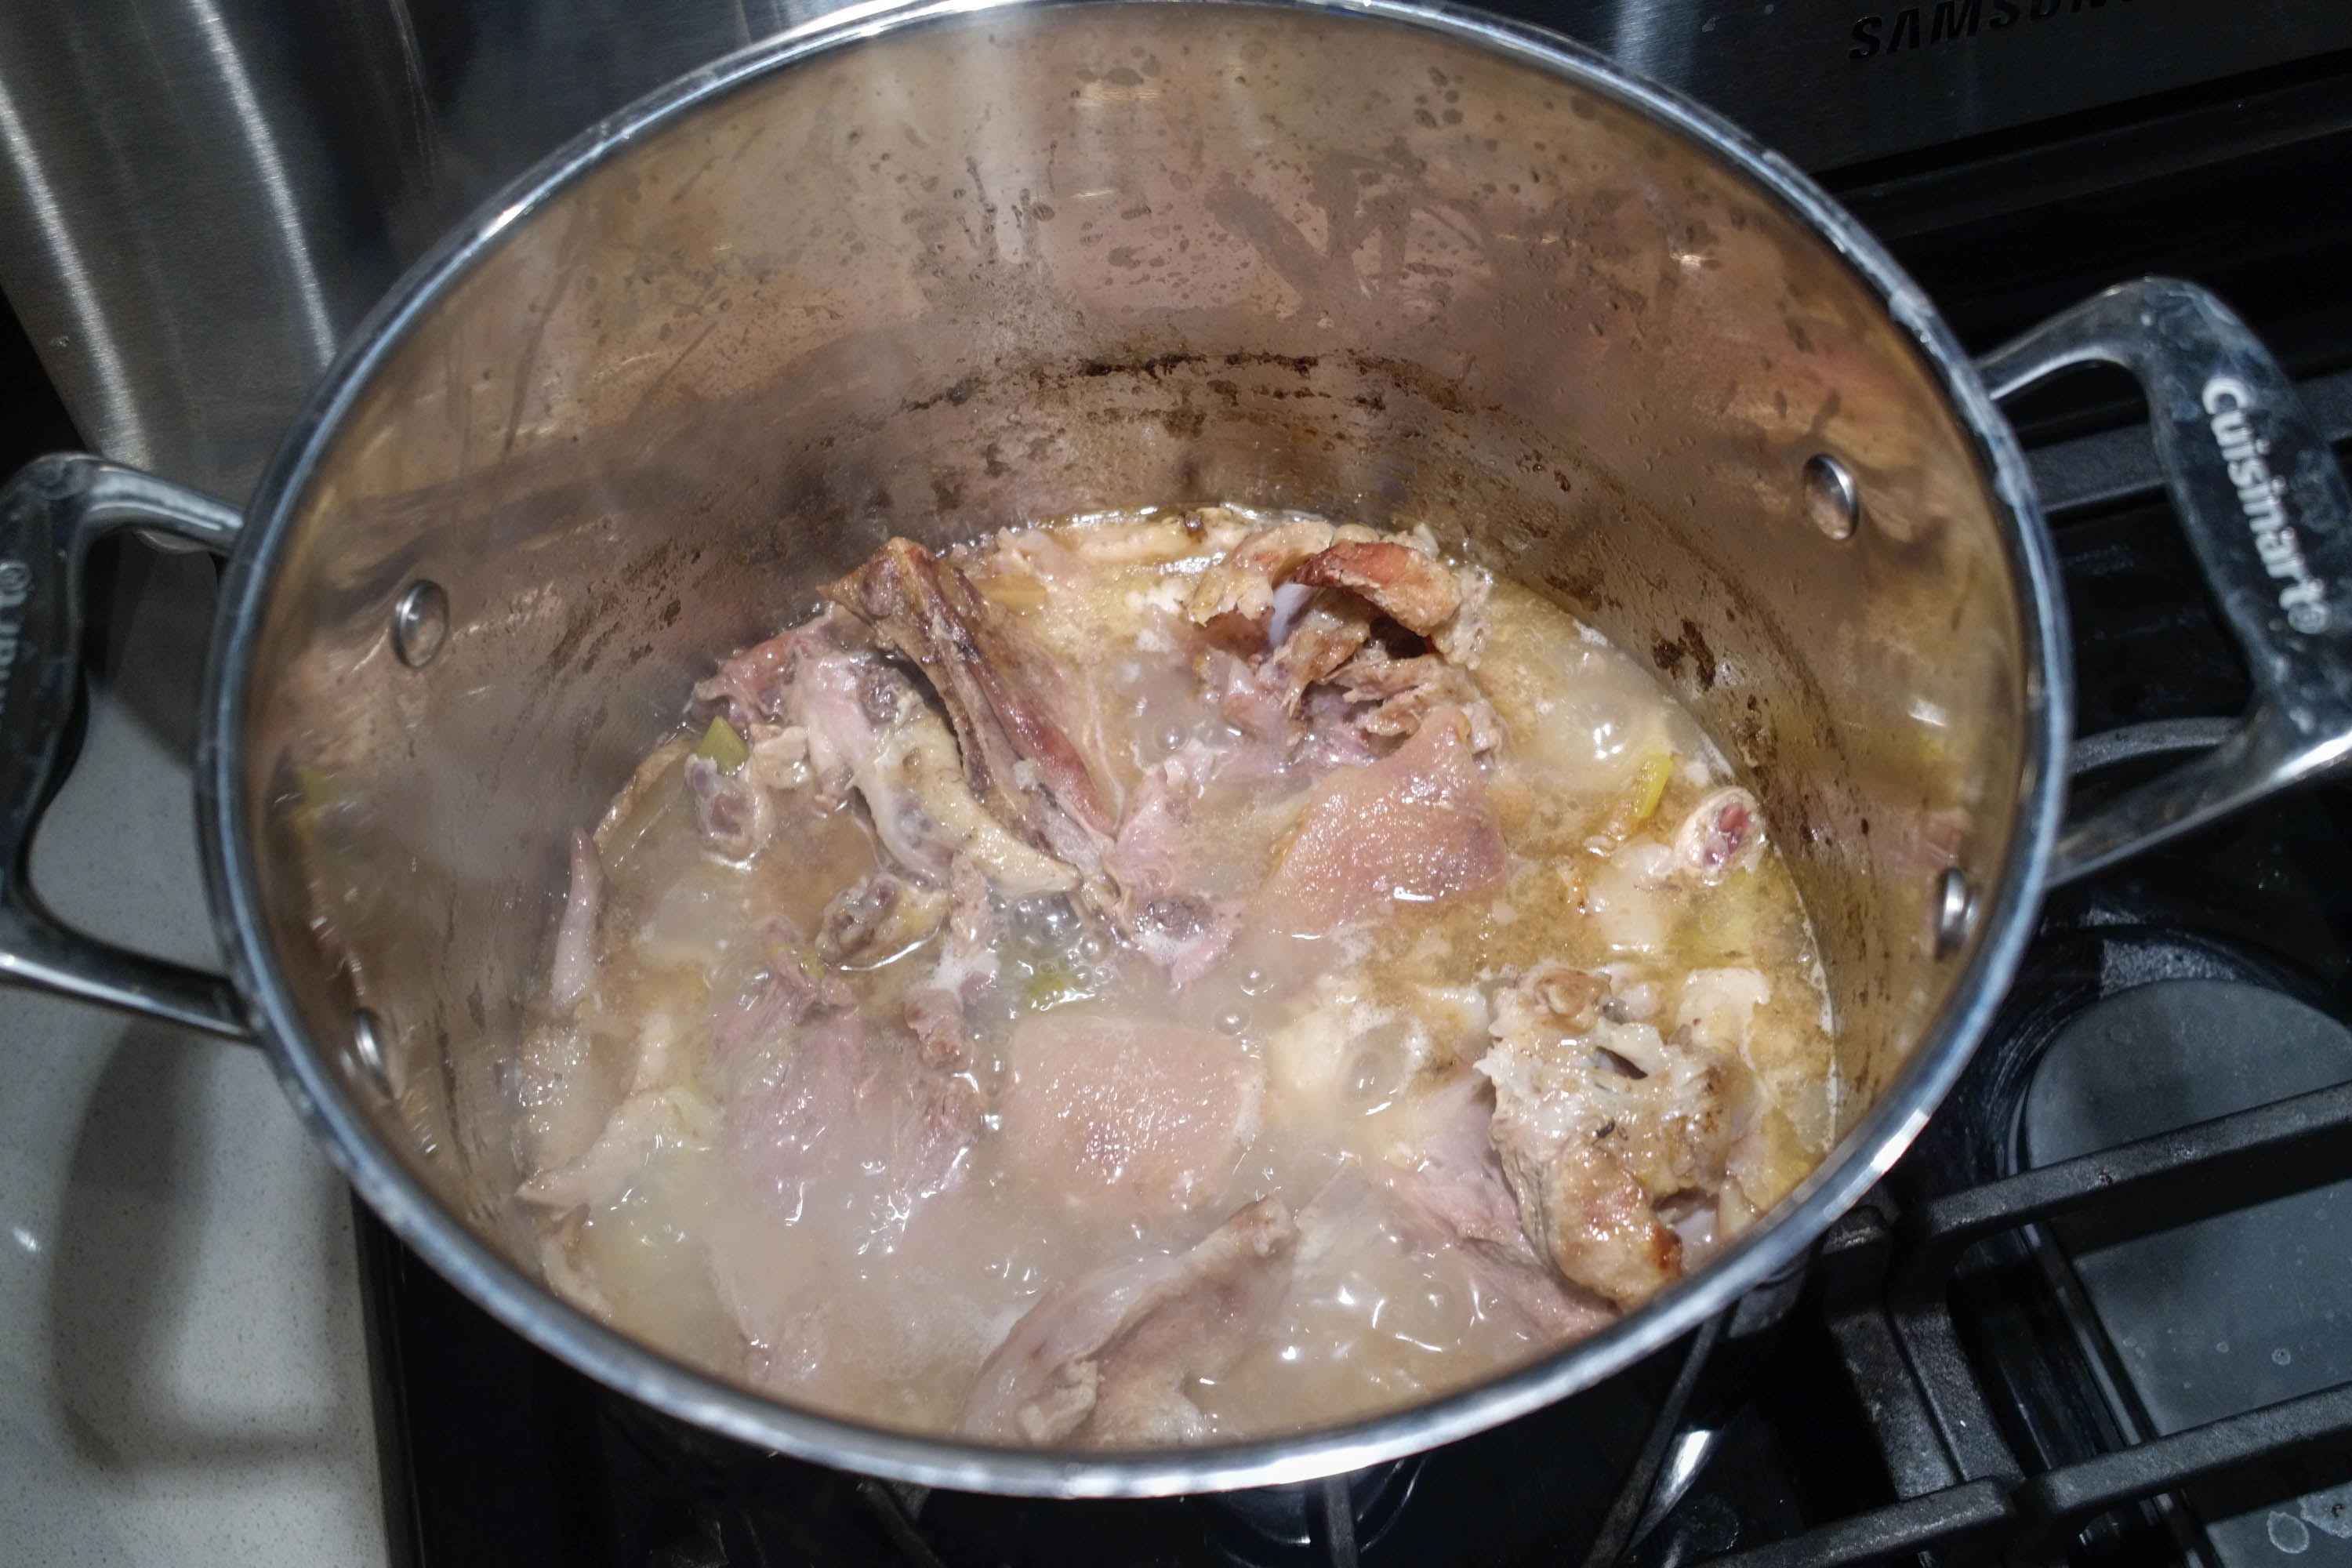
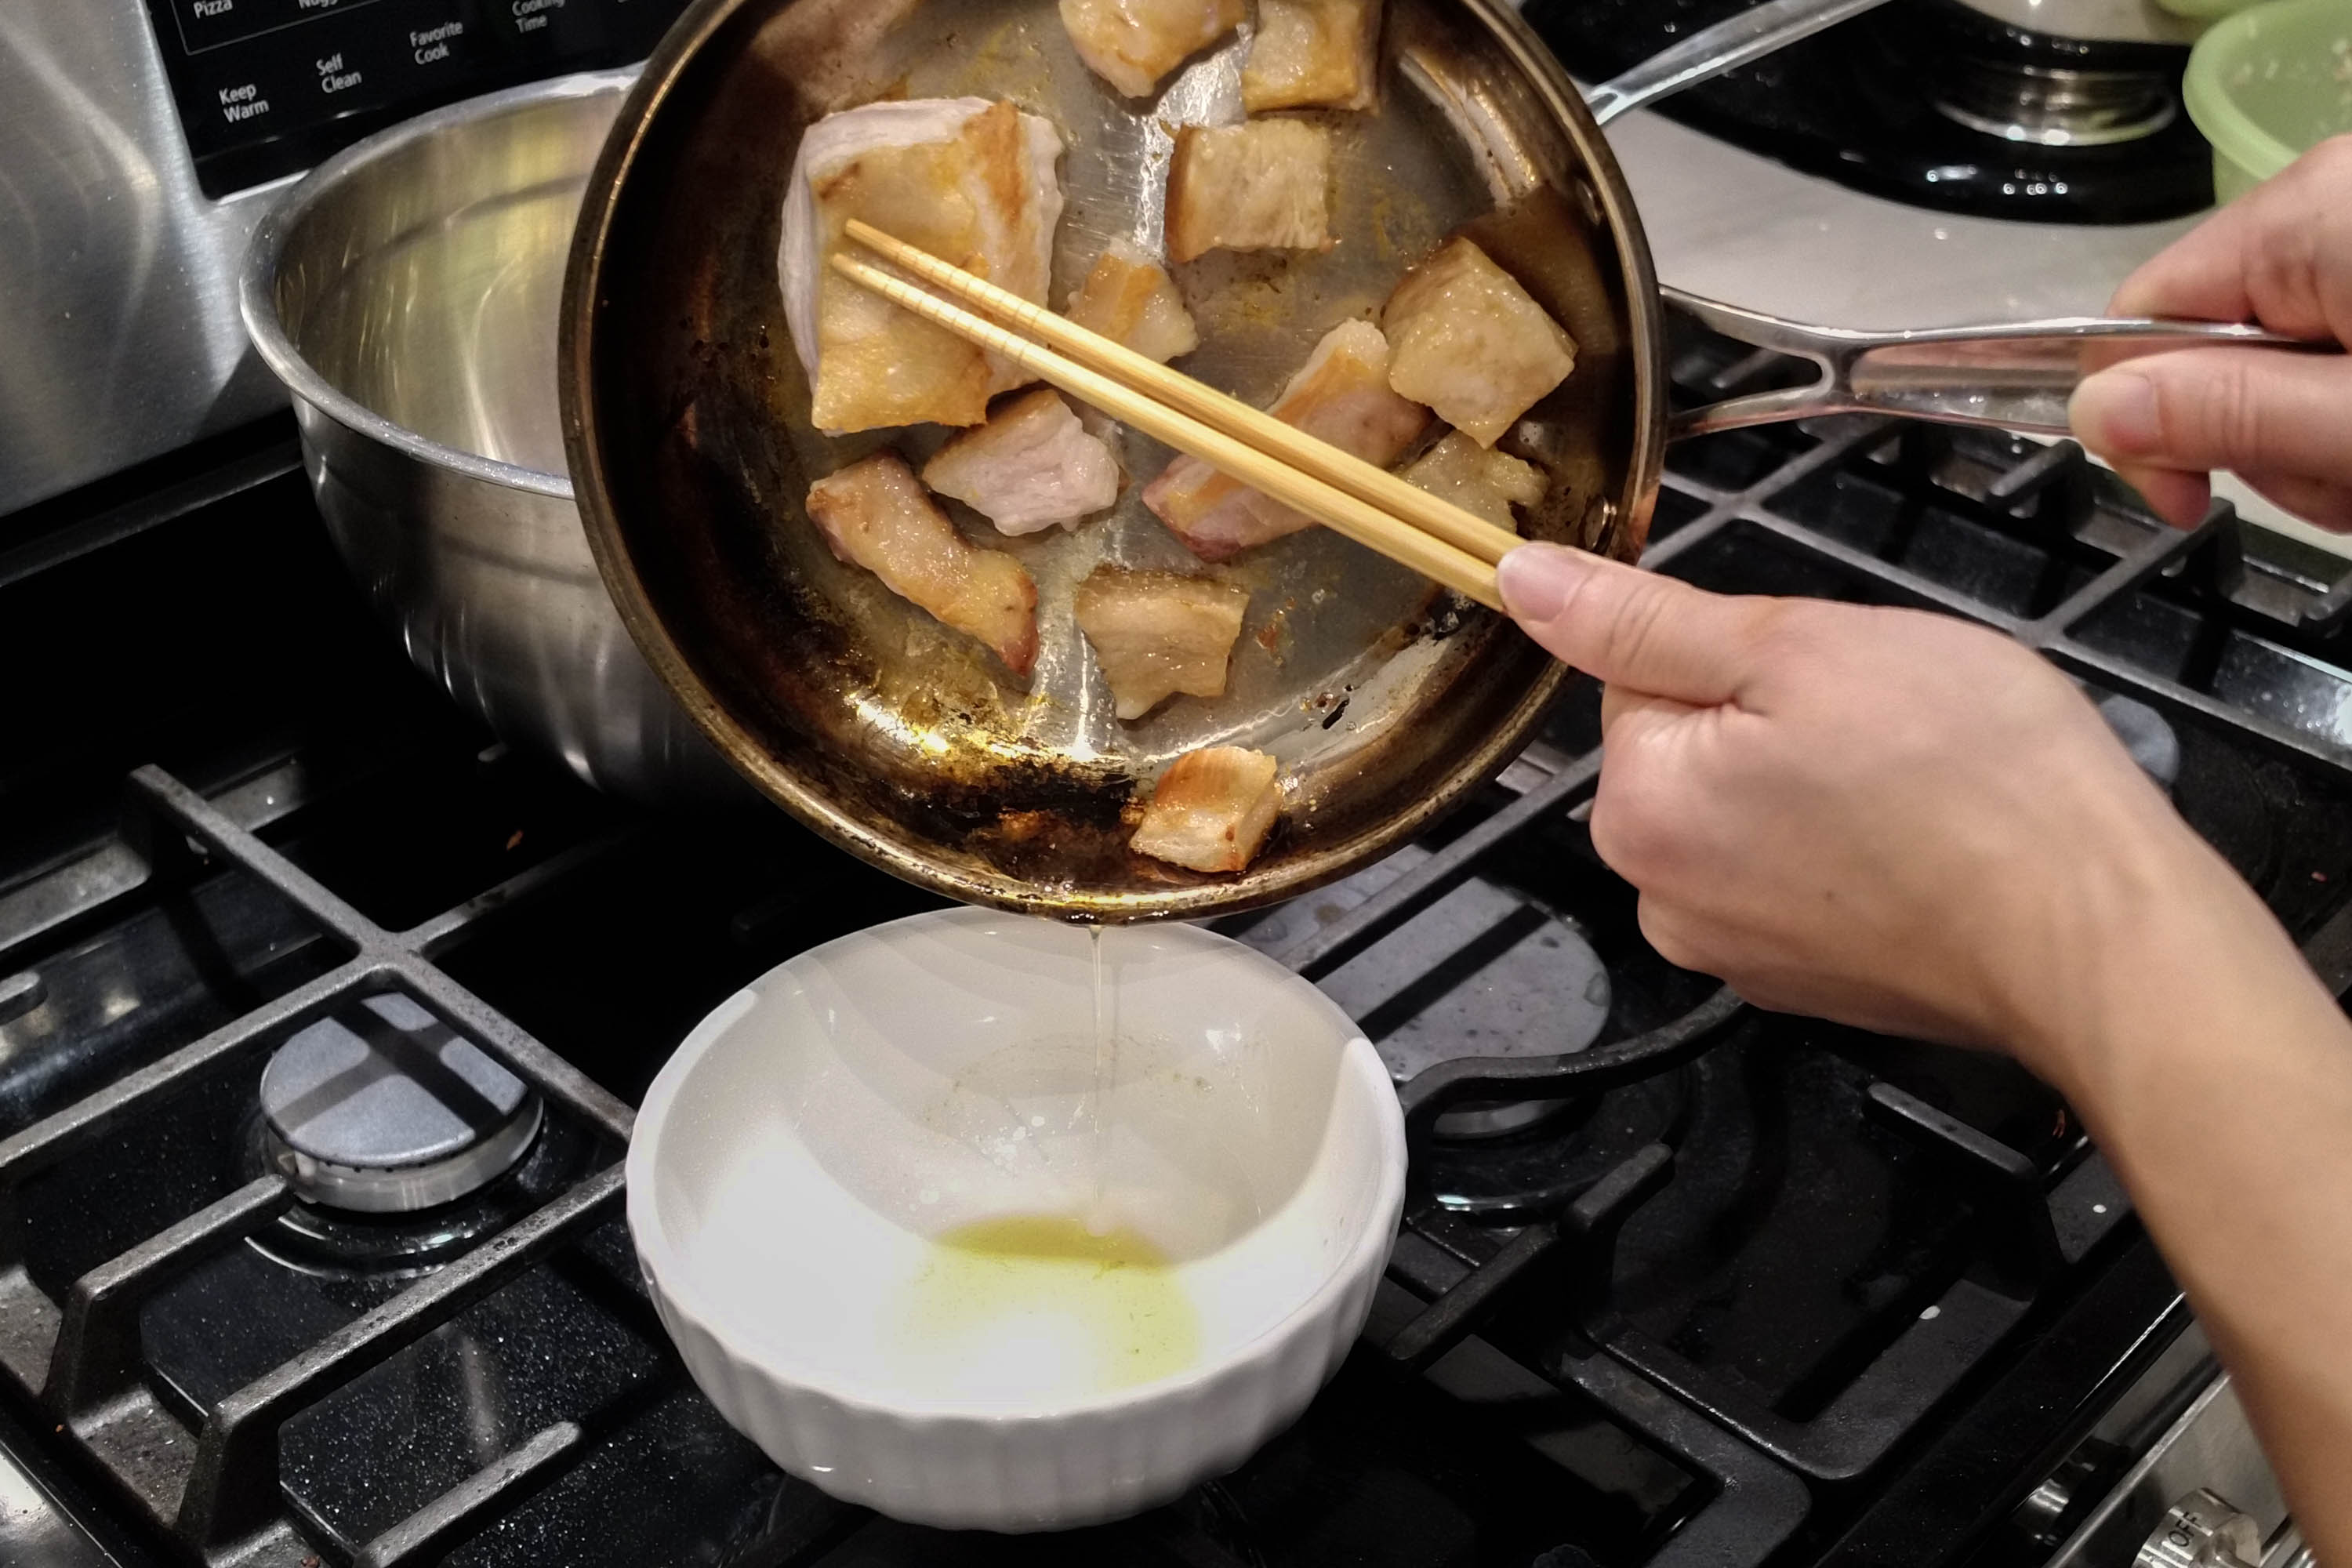
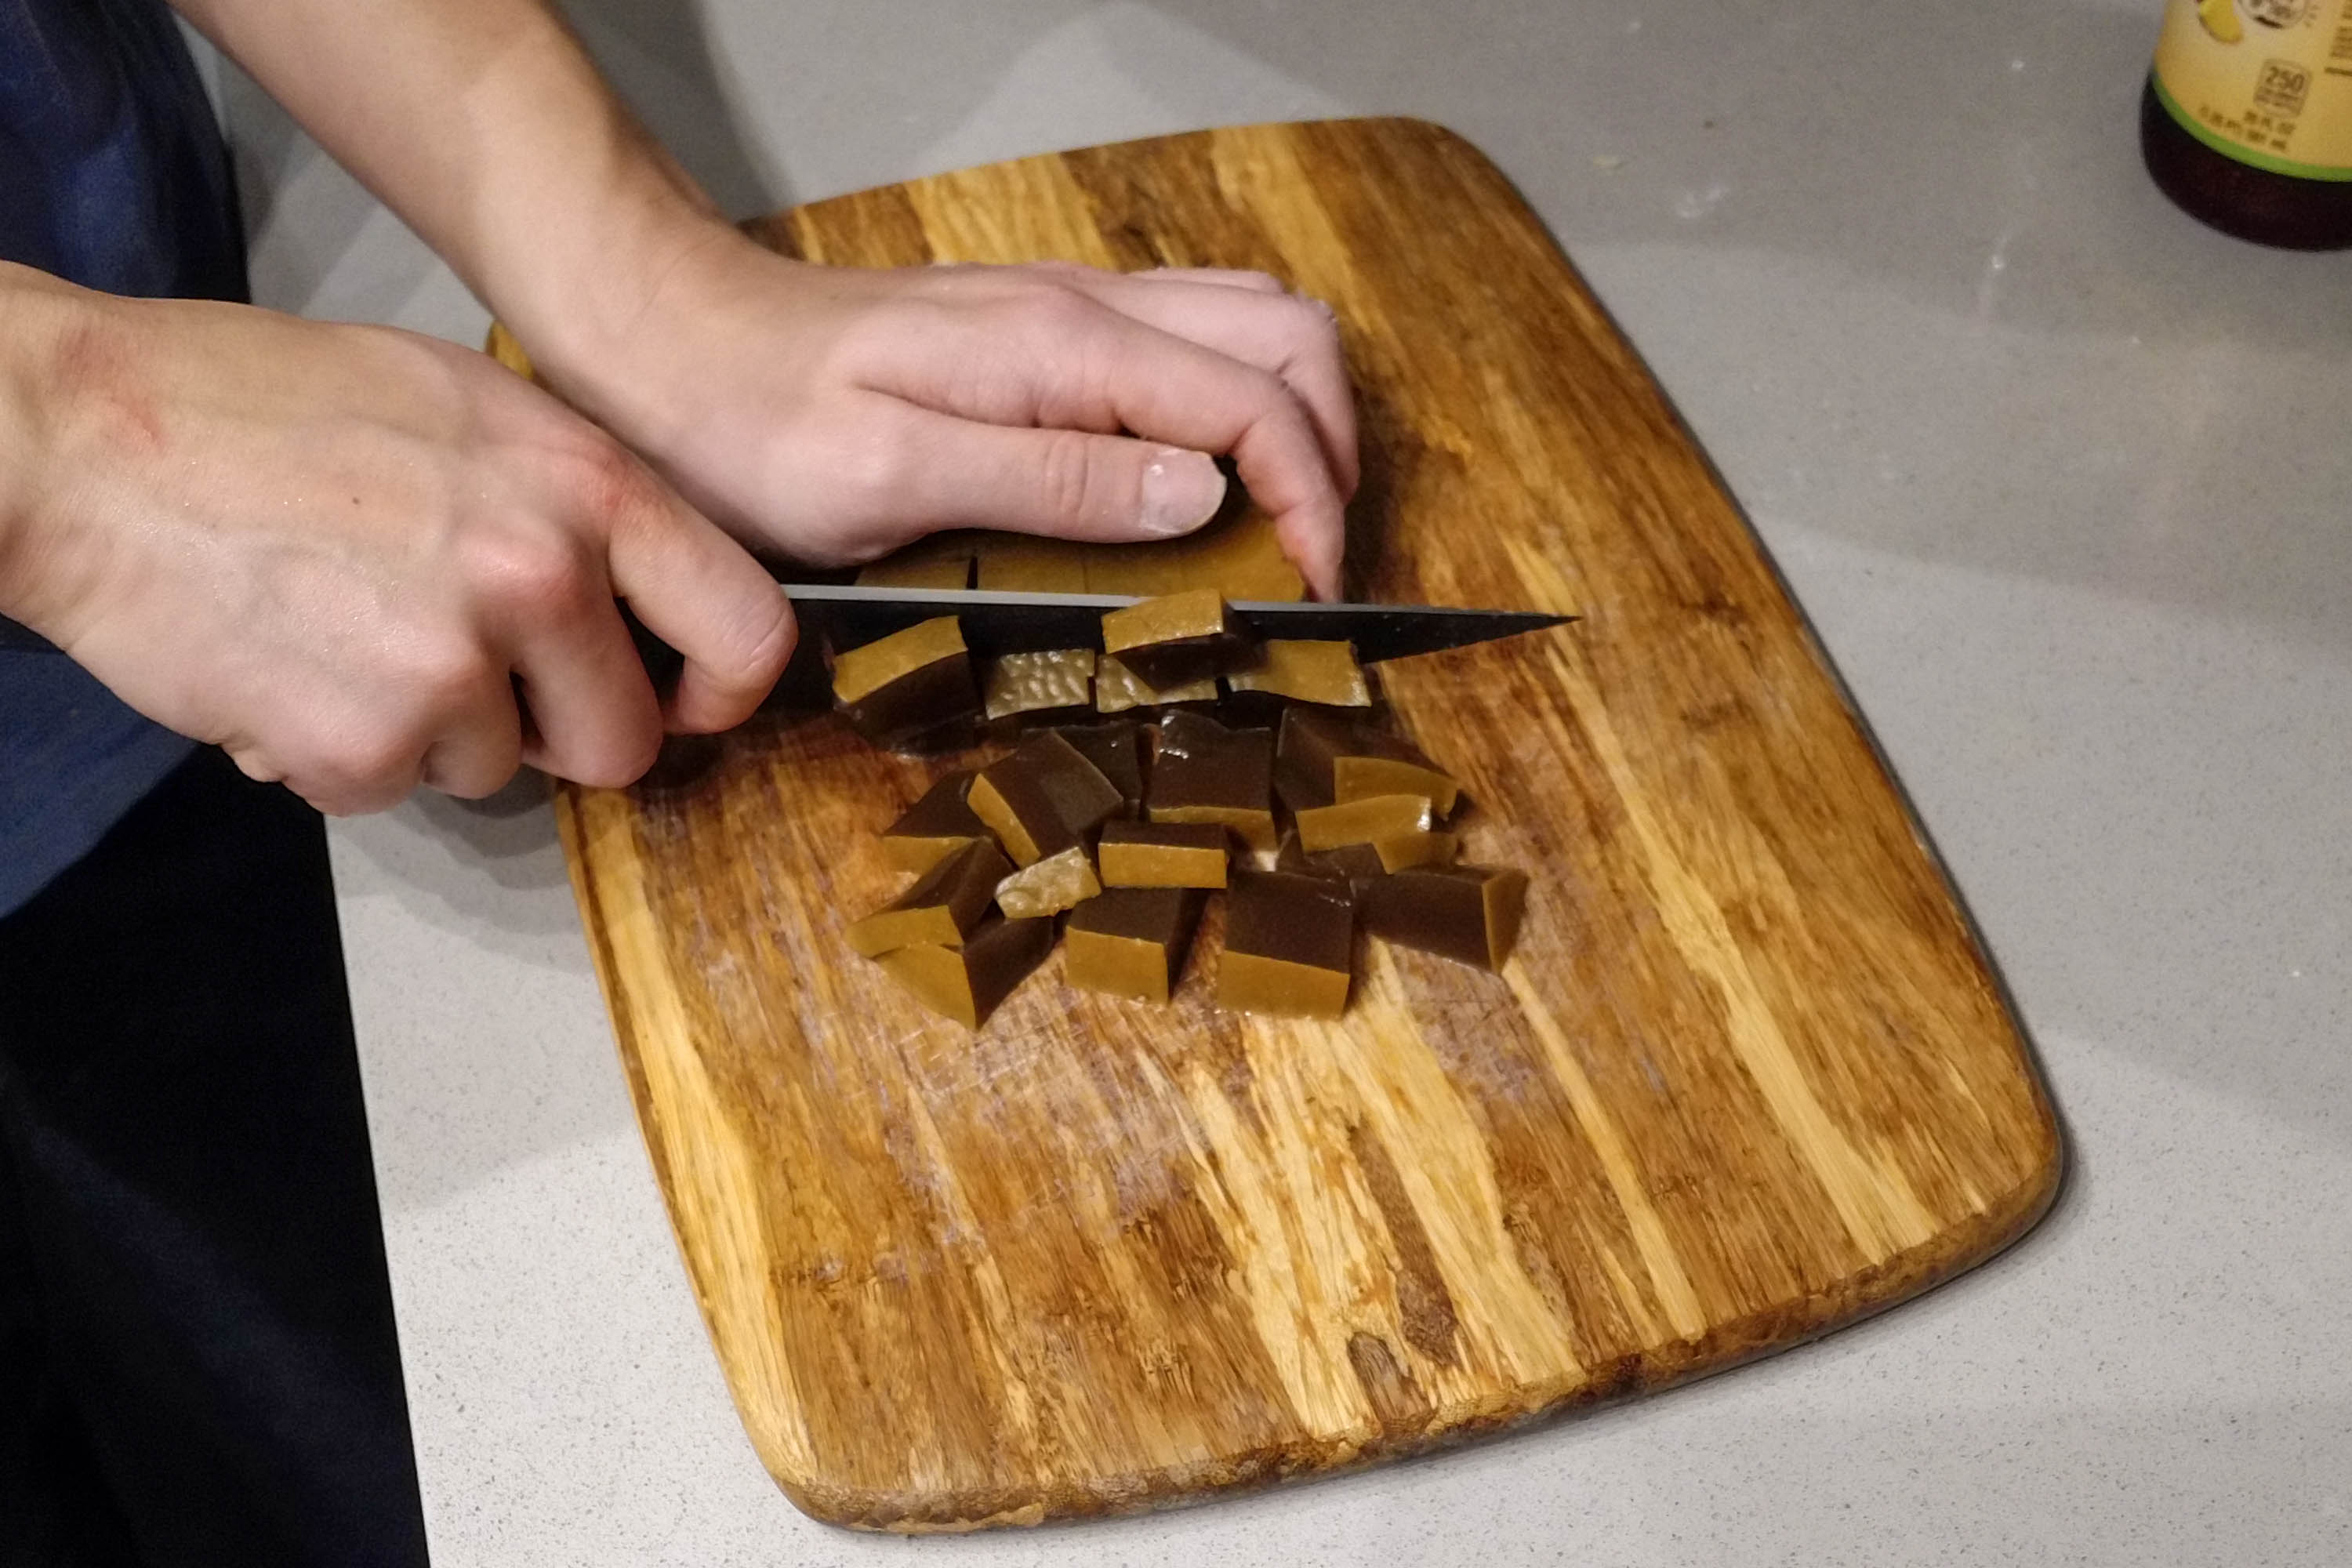
For the pork dumpling I went with a simple chicken and pork broth. I took chicken wing ends that I saved from making chicken wings, pork bones, and pork belly and reduced it into a beautiful broth. Usually broth recipes will tell you to parboil the bones or to skim the broth, but that’s just for aesthetic purposes if you want to present a beautifully clear broth. We only care about the taste so ignore those steps and leave all the delicious impurities in. All of the collagen in the jointy bone parts will boil down into gelatin and when cooled, turn the broth into a gel.
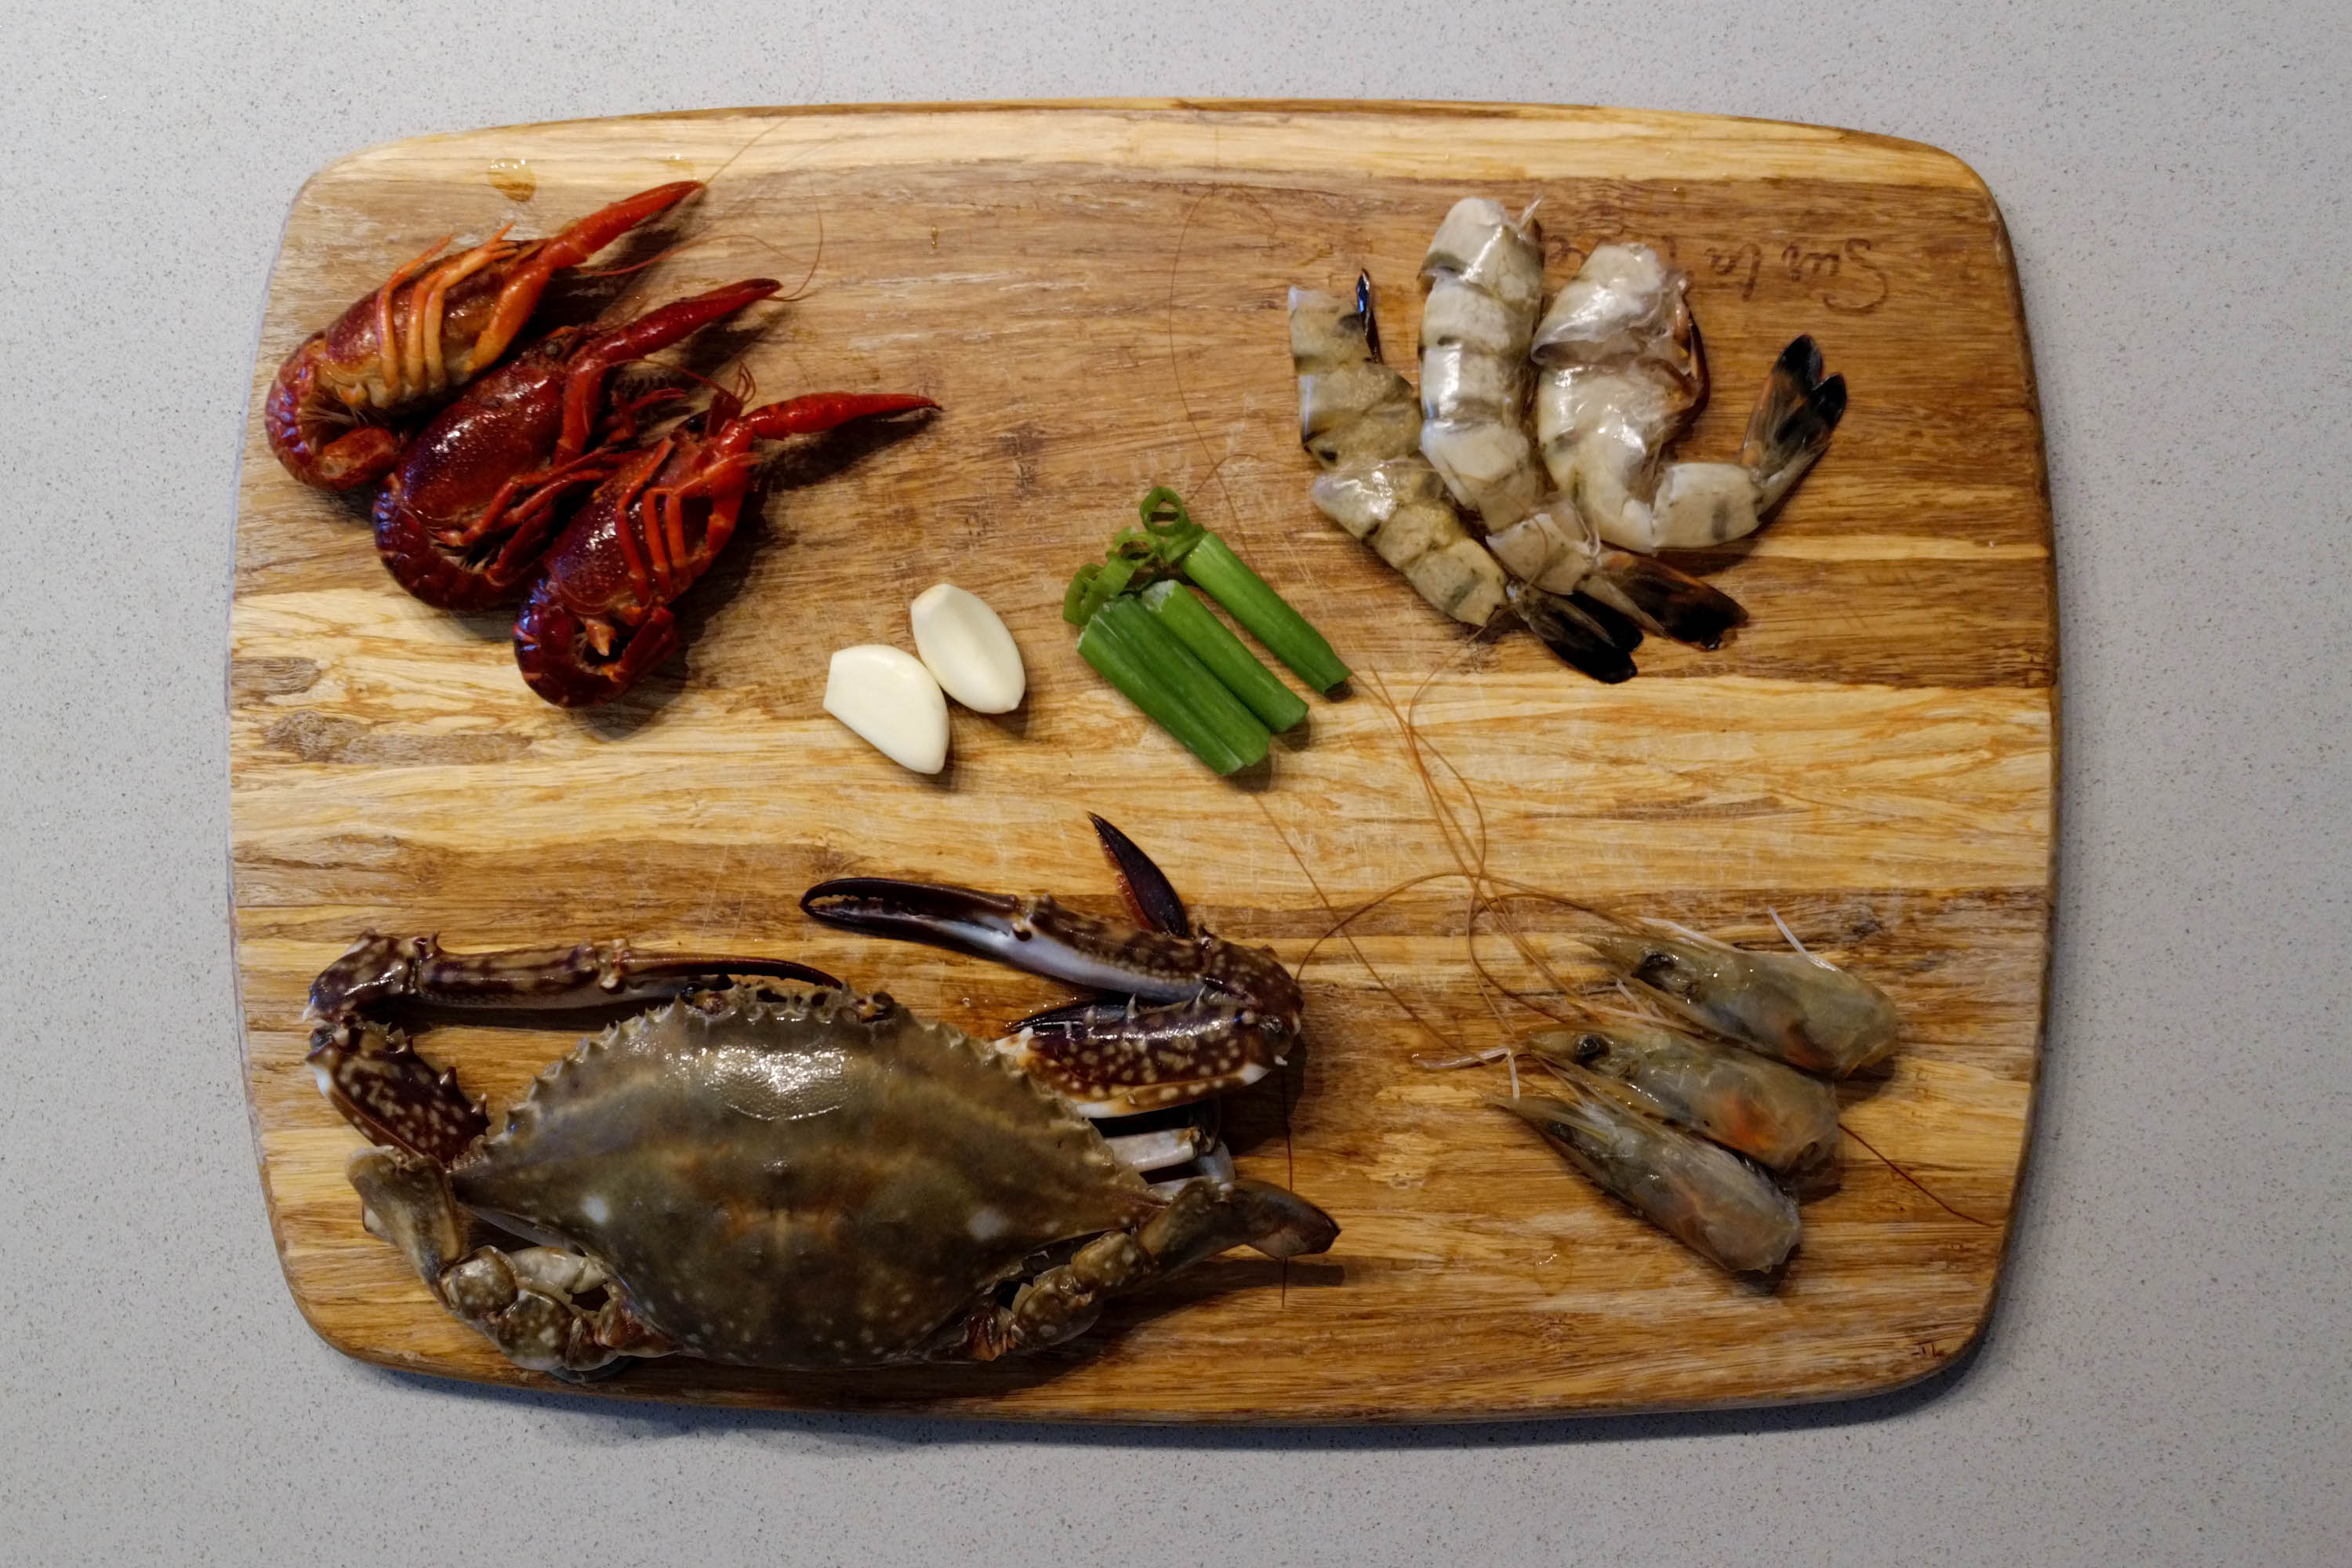
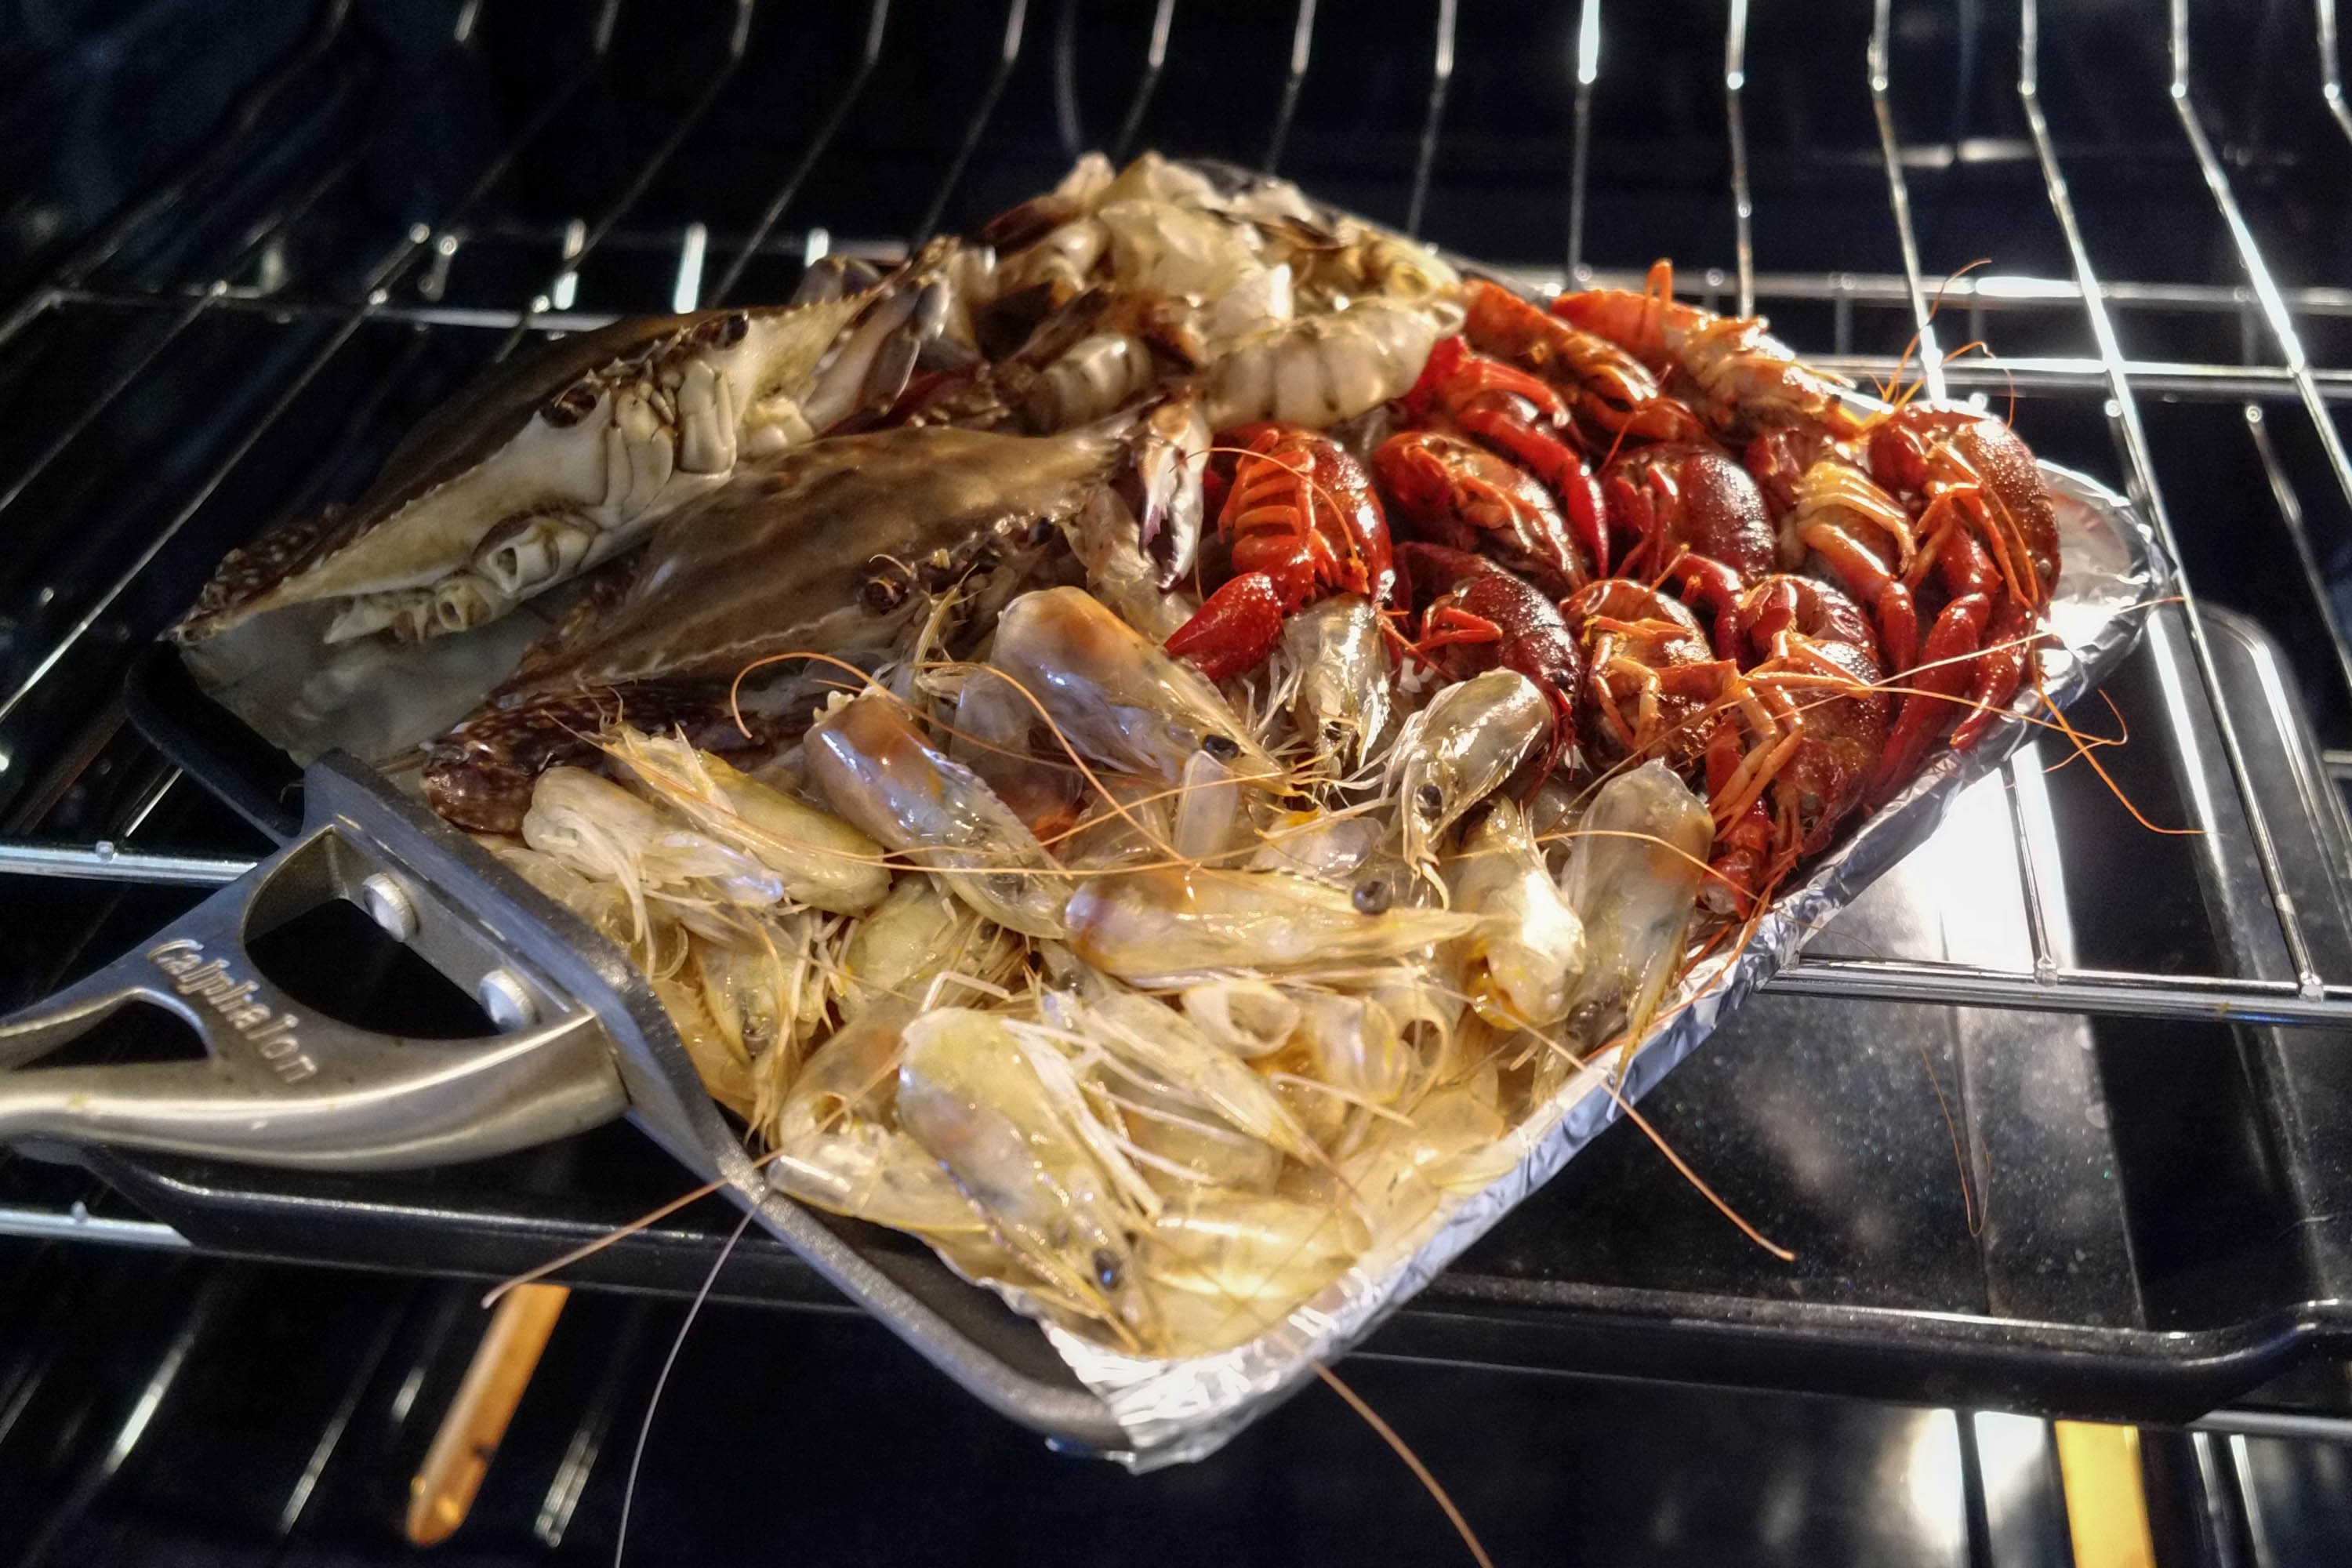
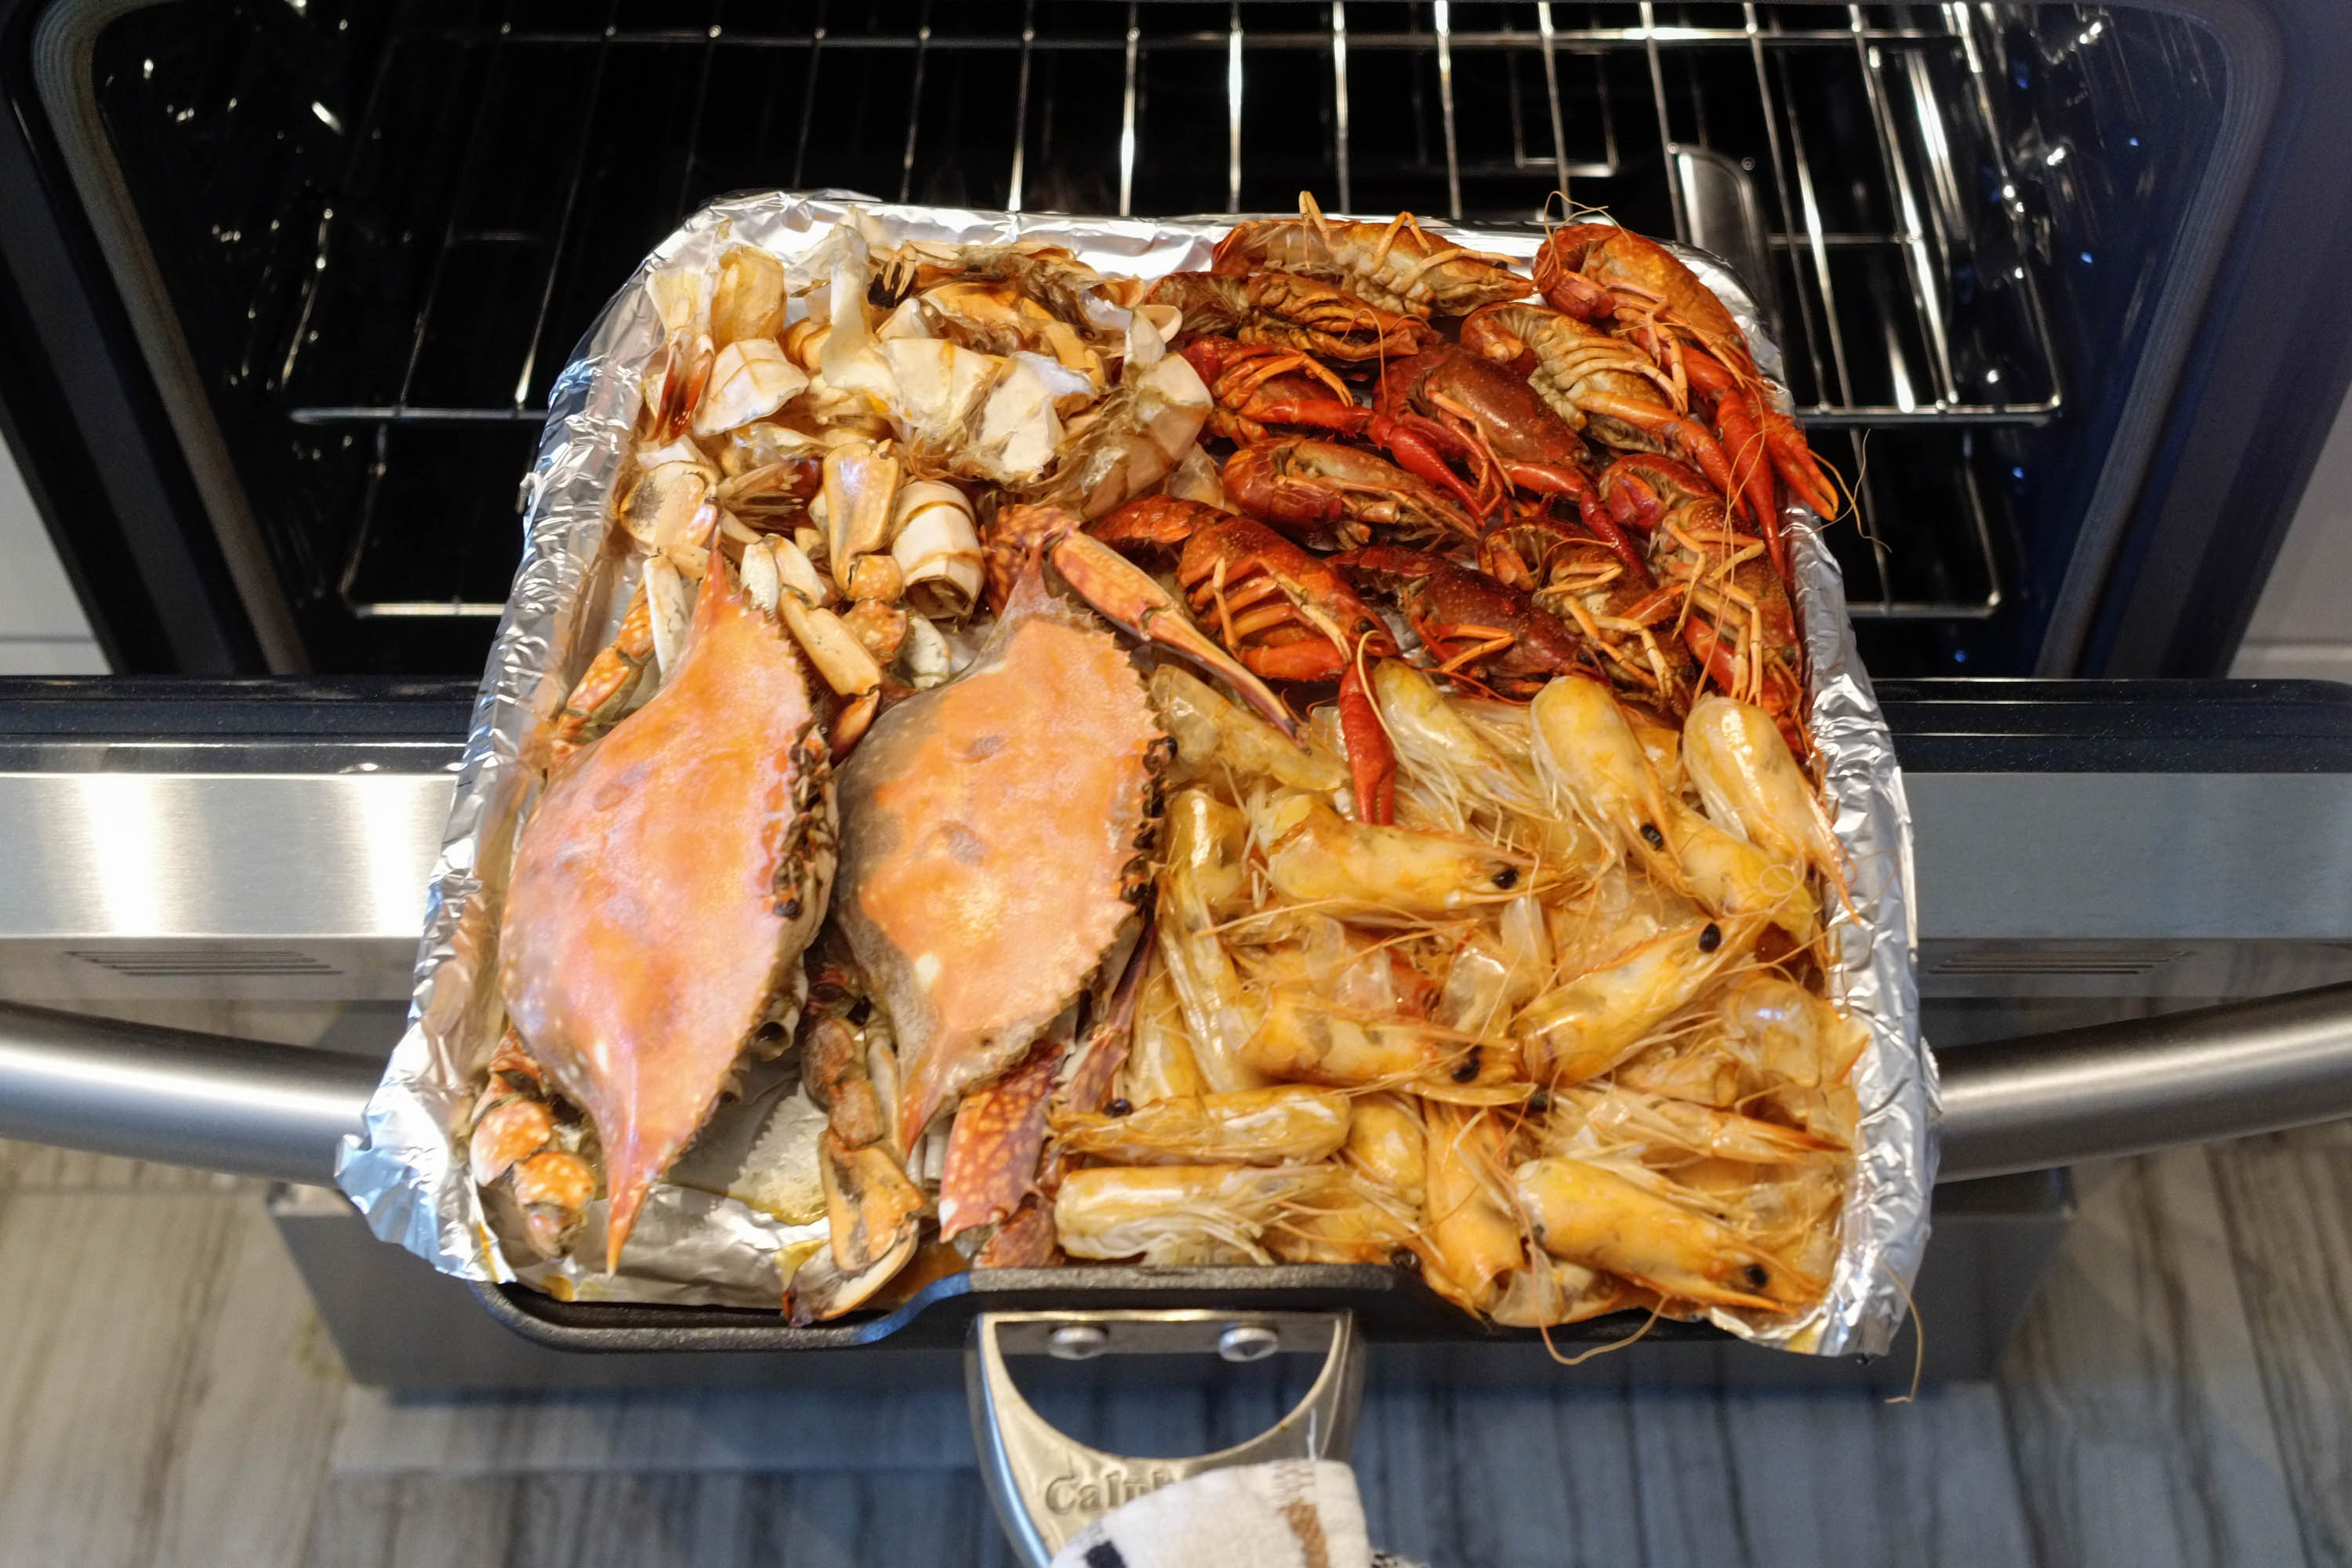
The seafood broth was a simple seafood stock. I took tiger shrimp shells I froze from last week’s shrimp dumplings, shrimp heads, blue crabs, and crawfish, and made a savory broth. The first step though was to take all of this and roast at 400F, it brings flavor out, trust me. Added other ingredients but you basically just boil for a couple hours.
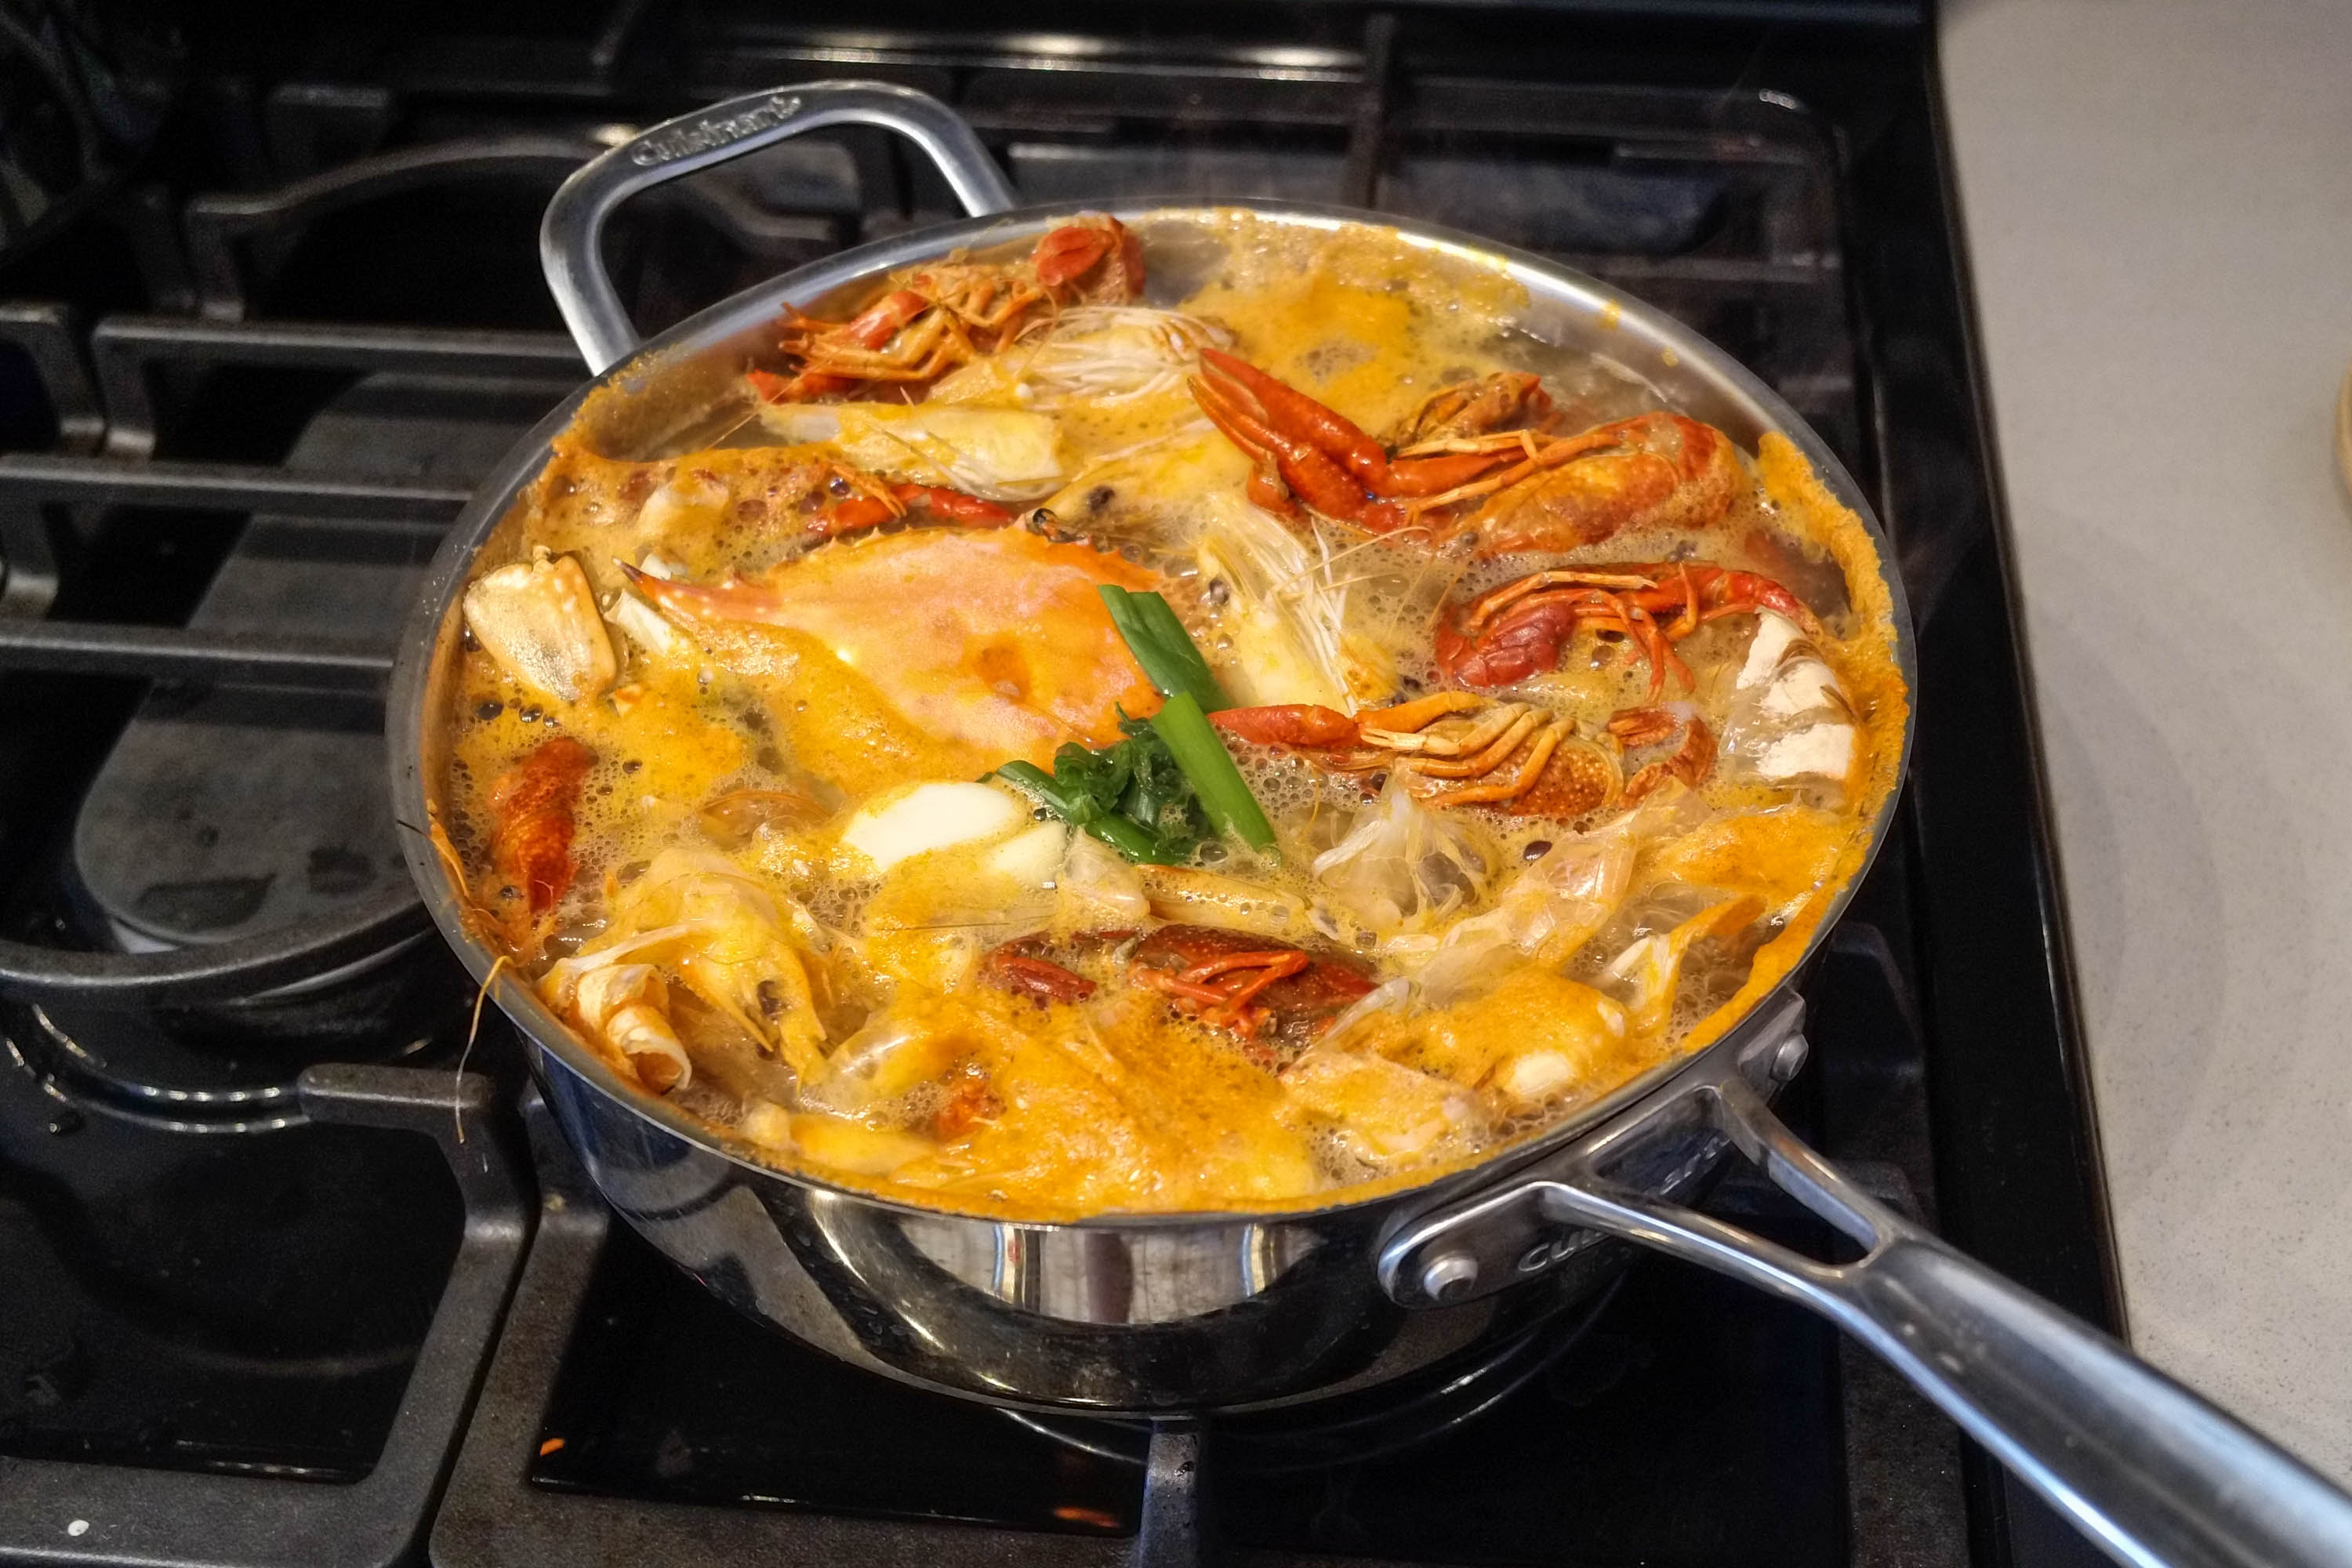
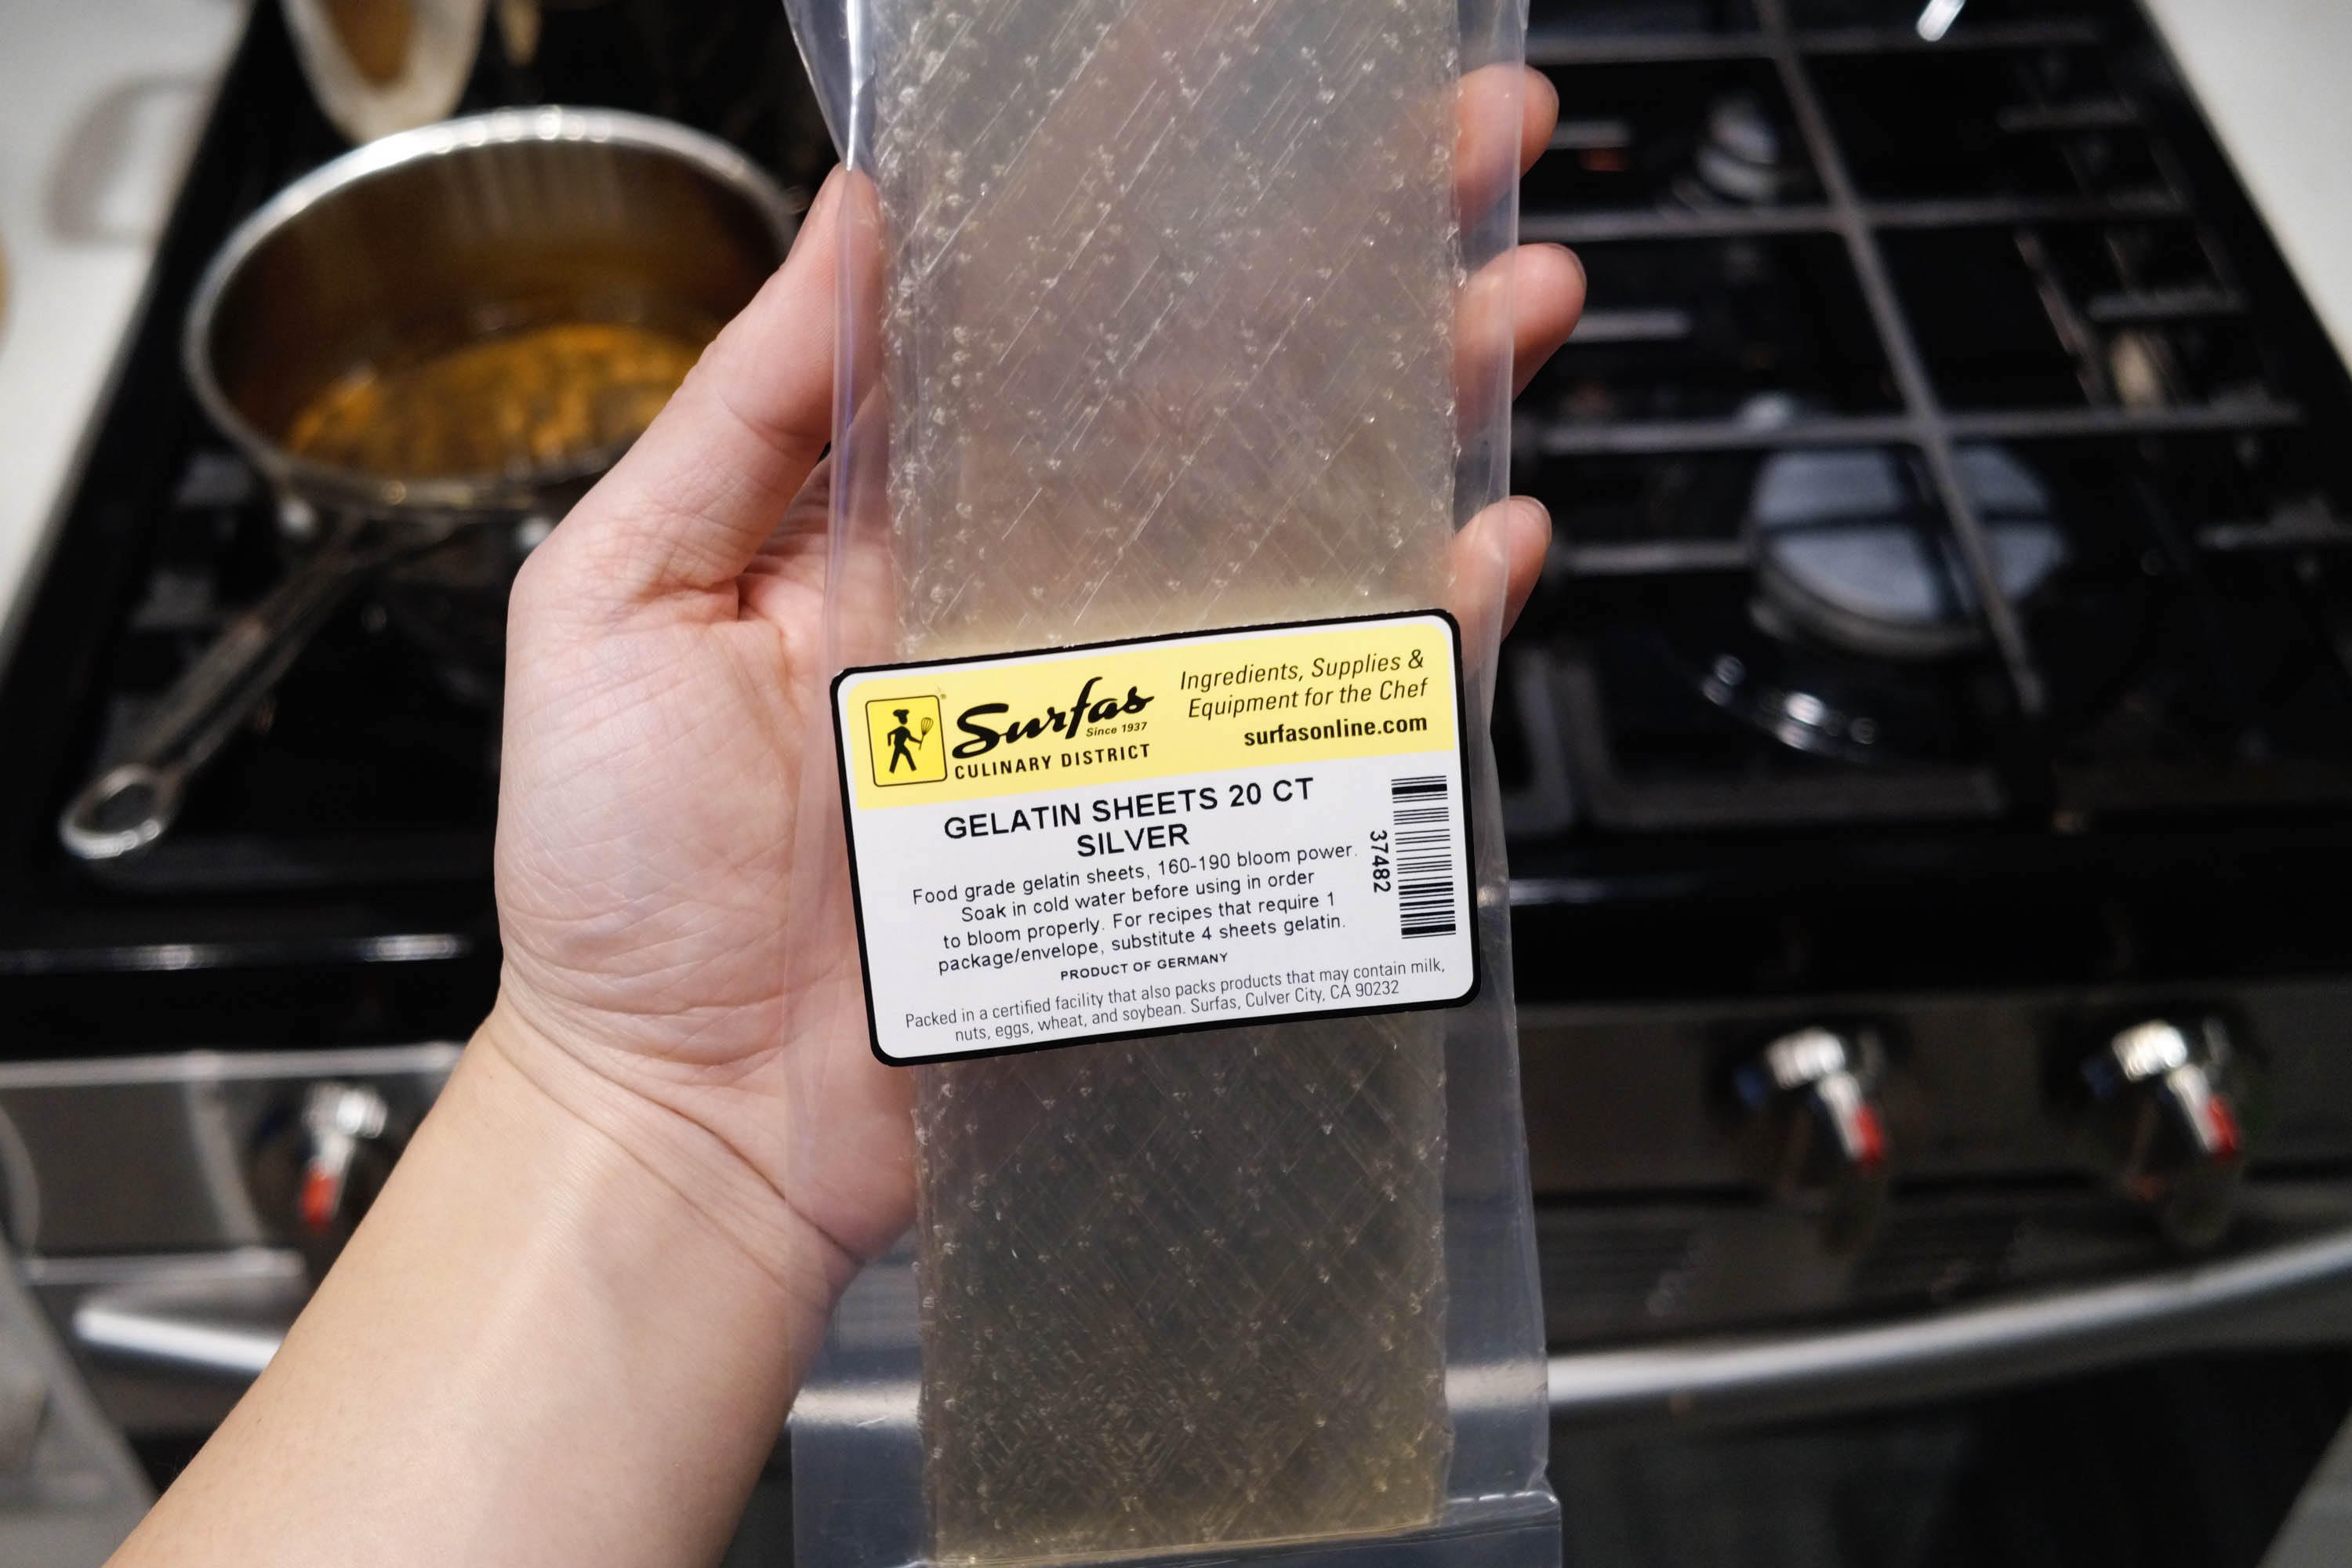
The hard part is that a seafood broth has no collagen to gelatinize the broth. To solve this issue, I had to buy gelatin sheets and add them in to turn this liquid into something I could work with. If you ever buy gelatin sheets, the bloom strength is just how thick you want the gel to be. Lower bloom, less gel rigidity. I went with a “silver” (~160 bloom) grade gelatin but it really doesn’t matter, I just couldn’t bring myself to “bronze” peasantry, and “gold” was too expensive.

After you’re done with the broths, reduce, let cool, then fridge for a few hours for them to set.
STEP 3: Make meat filling
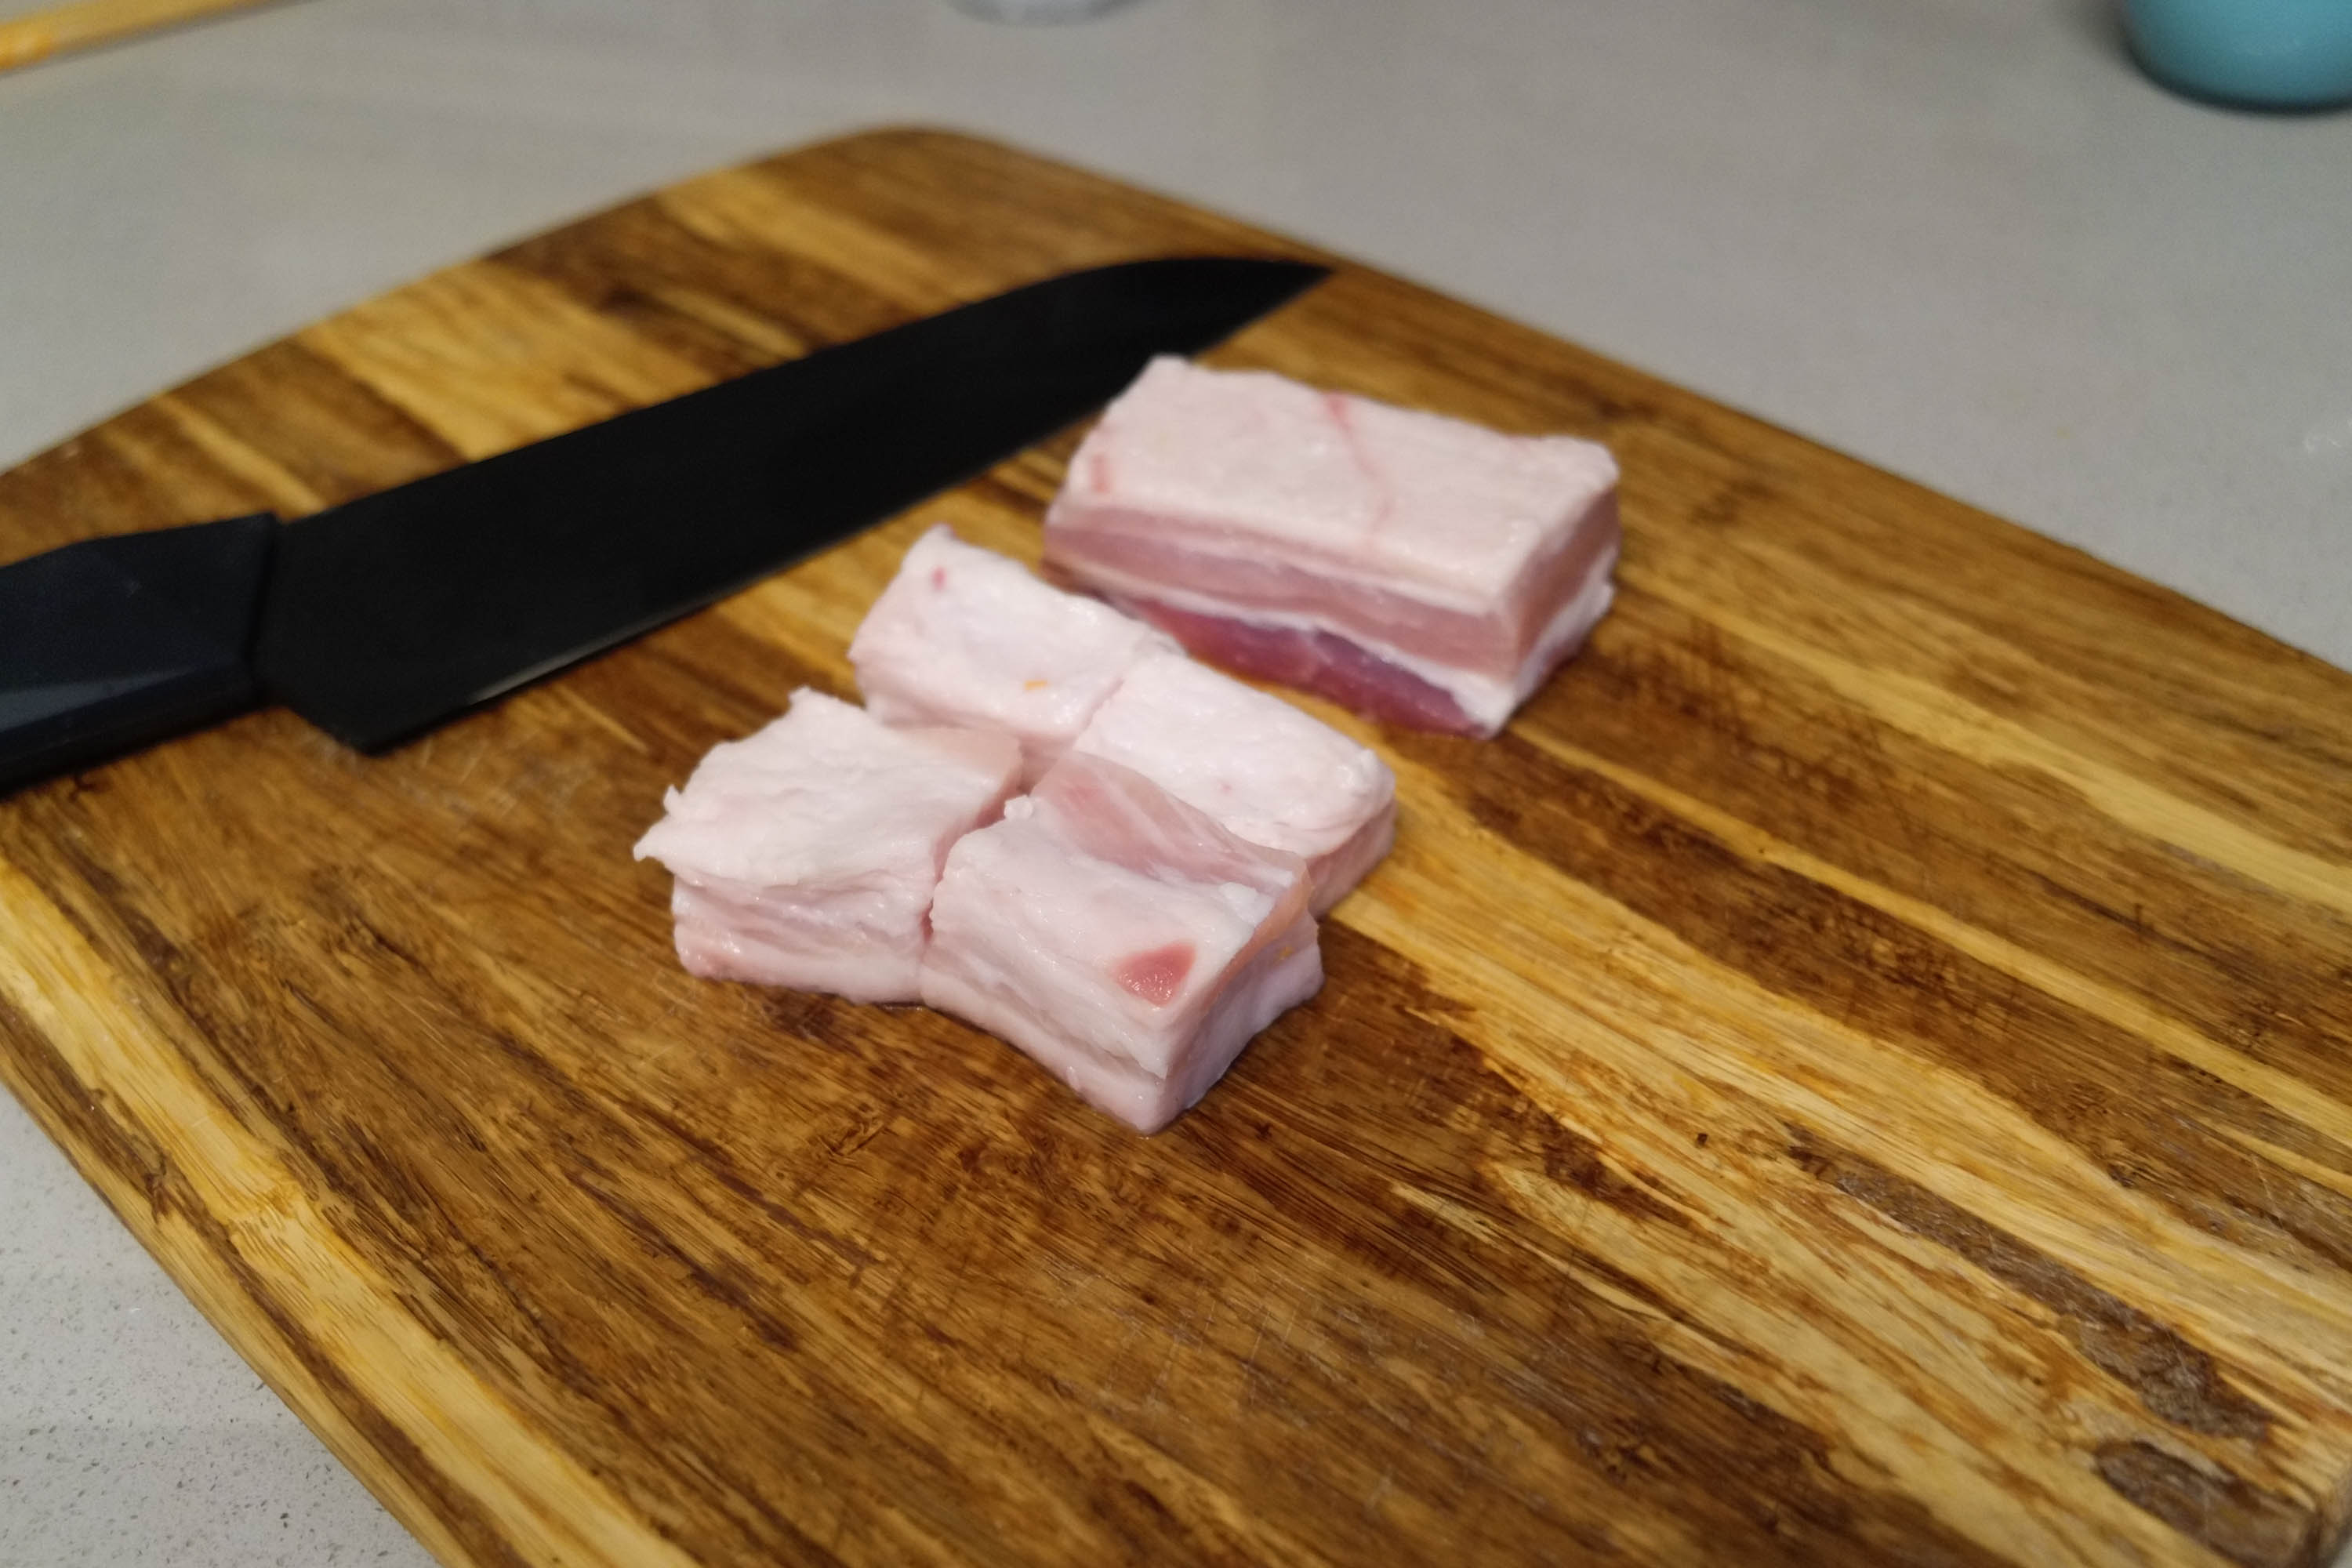
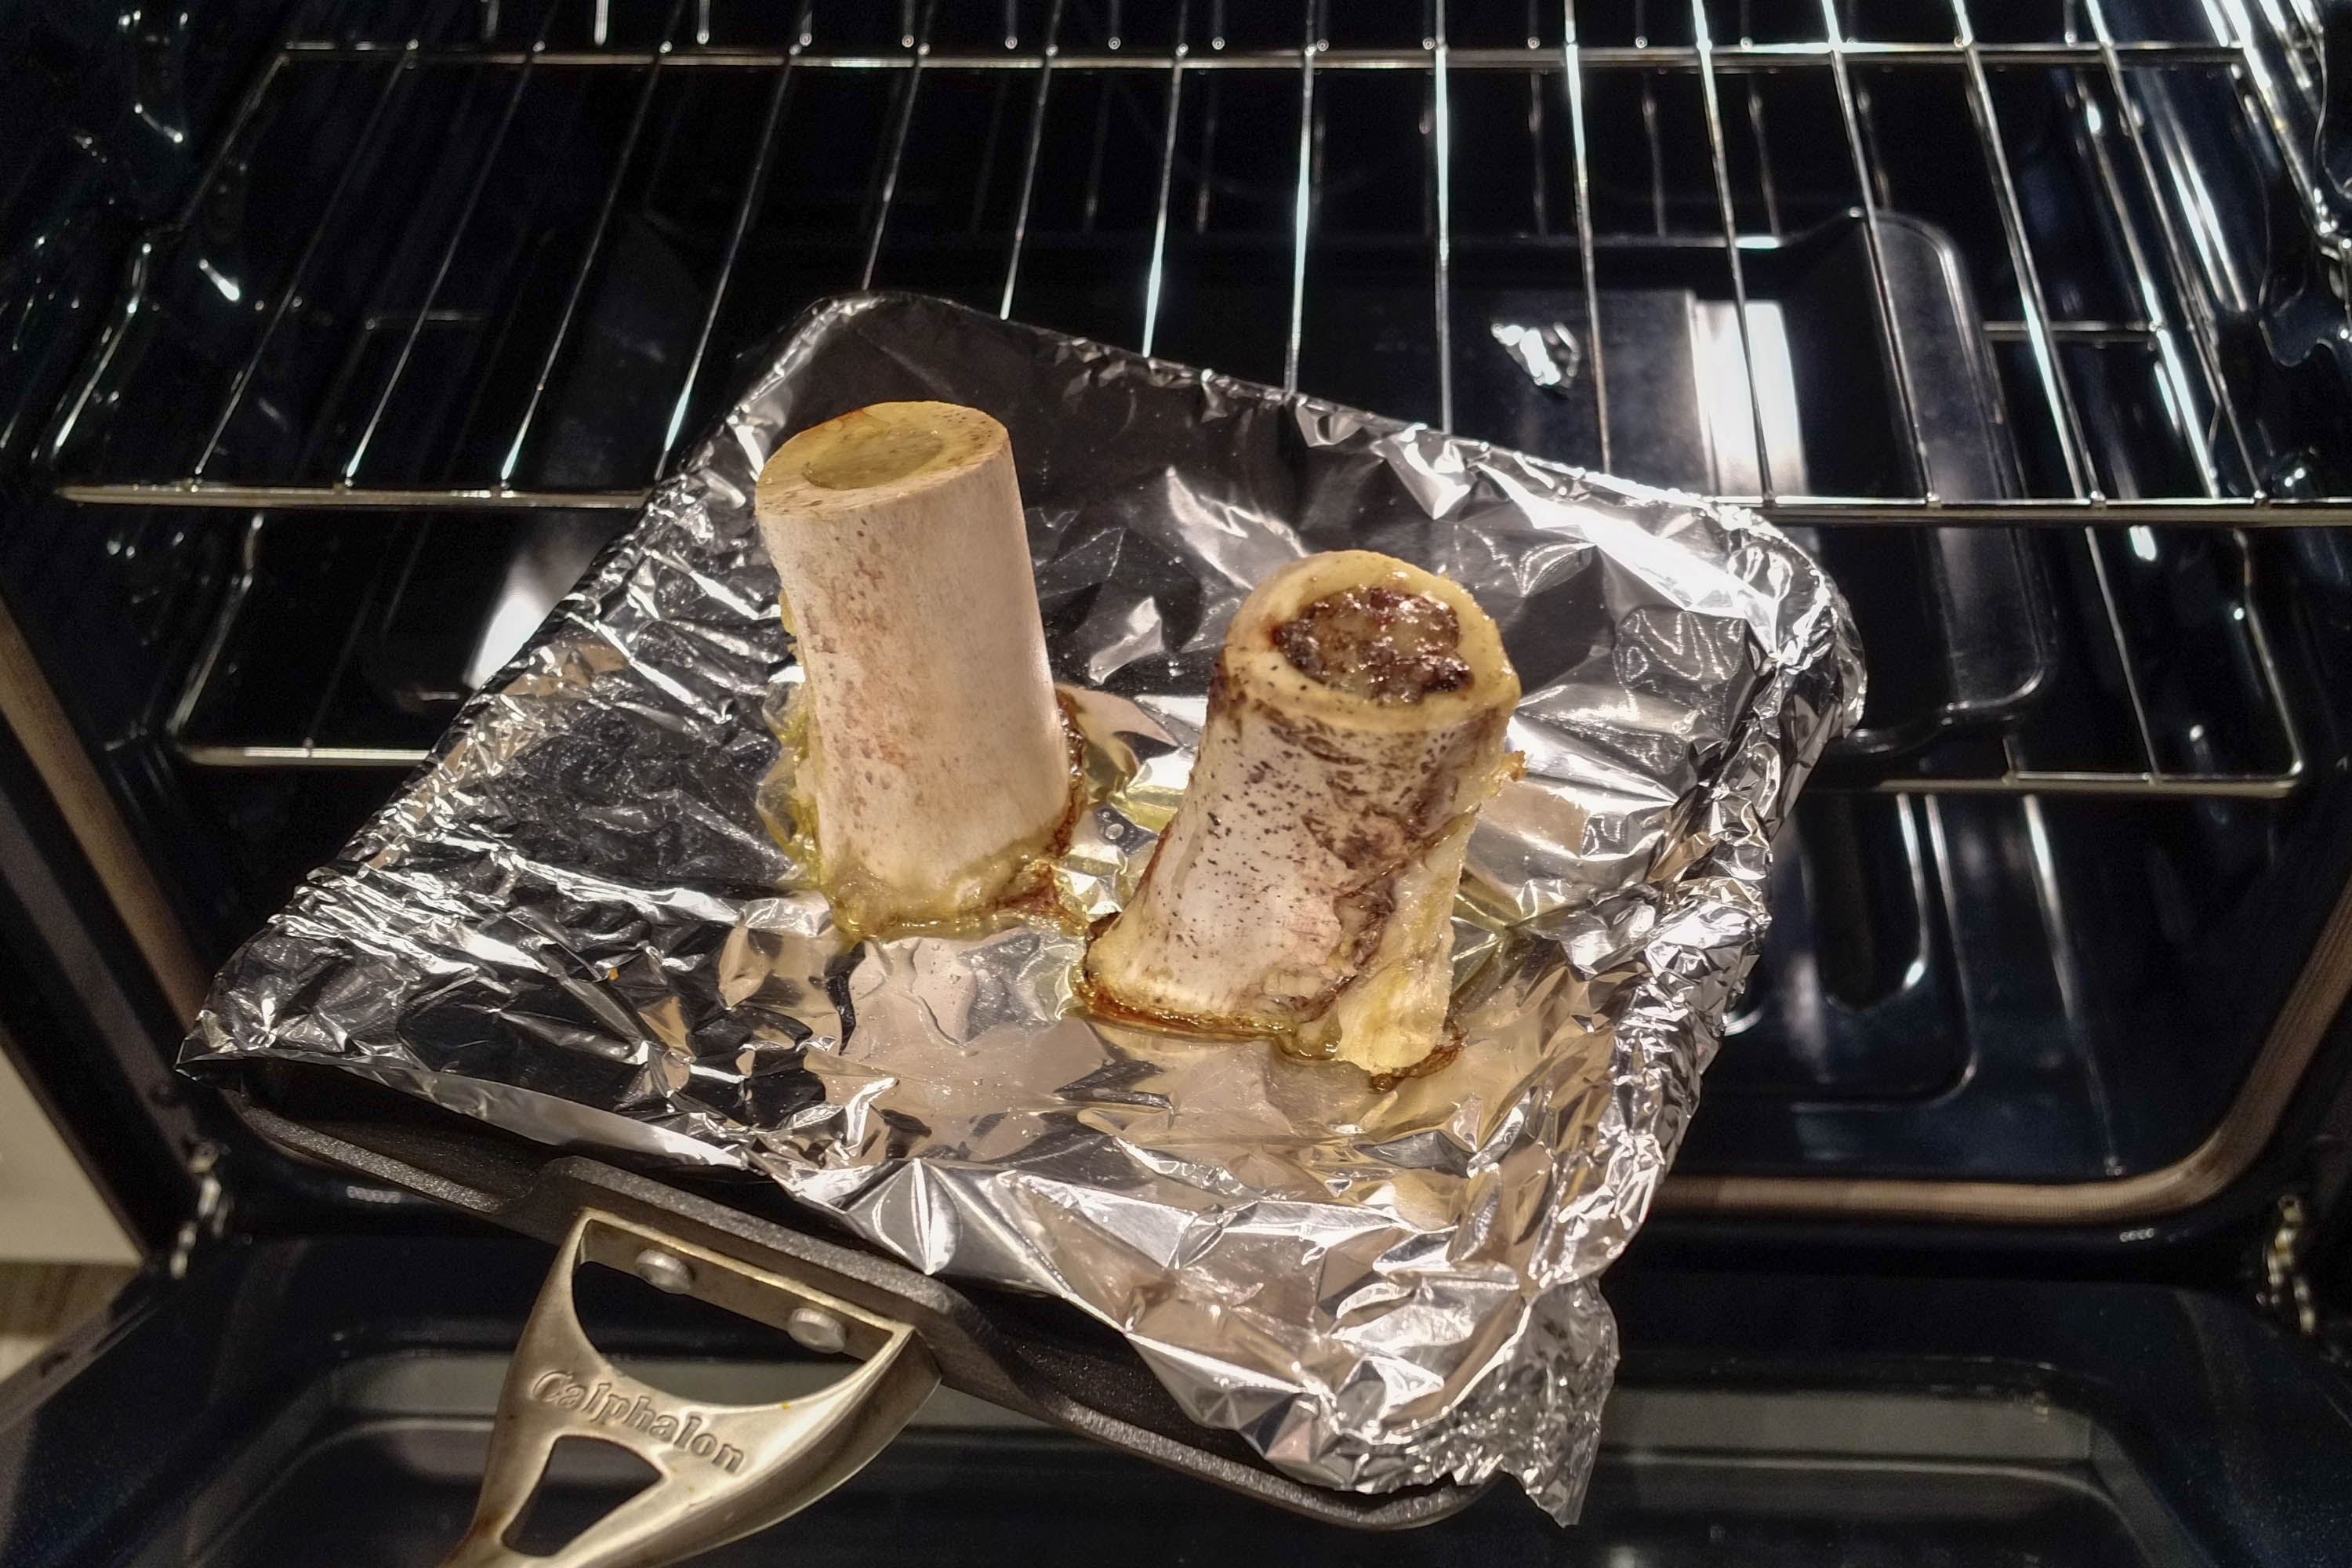
Pork is too boring of an ingredient, so I decided to up the flavor by adding some rendered pork belly fat and a healthy amount of bone marrow - which is also why I decided on black 小籠包s. Mix in the ground pork with all of these other ingredient and you have a filling.
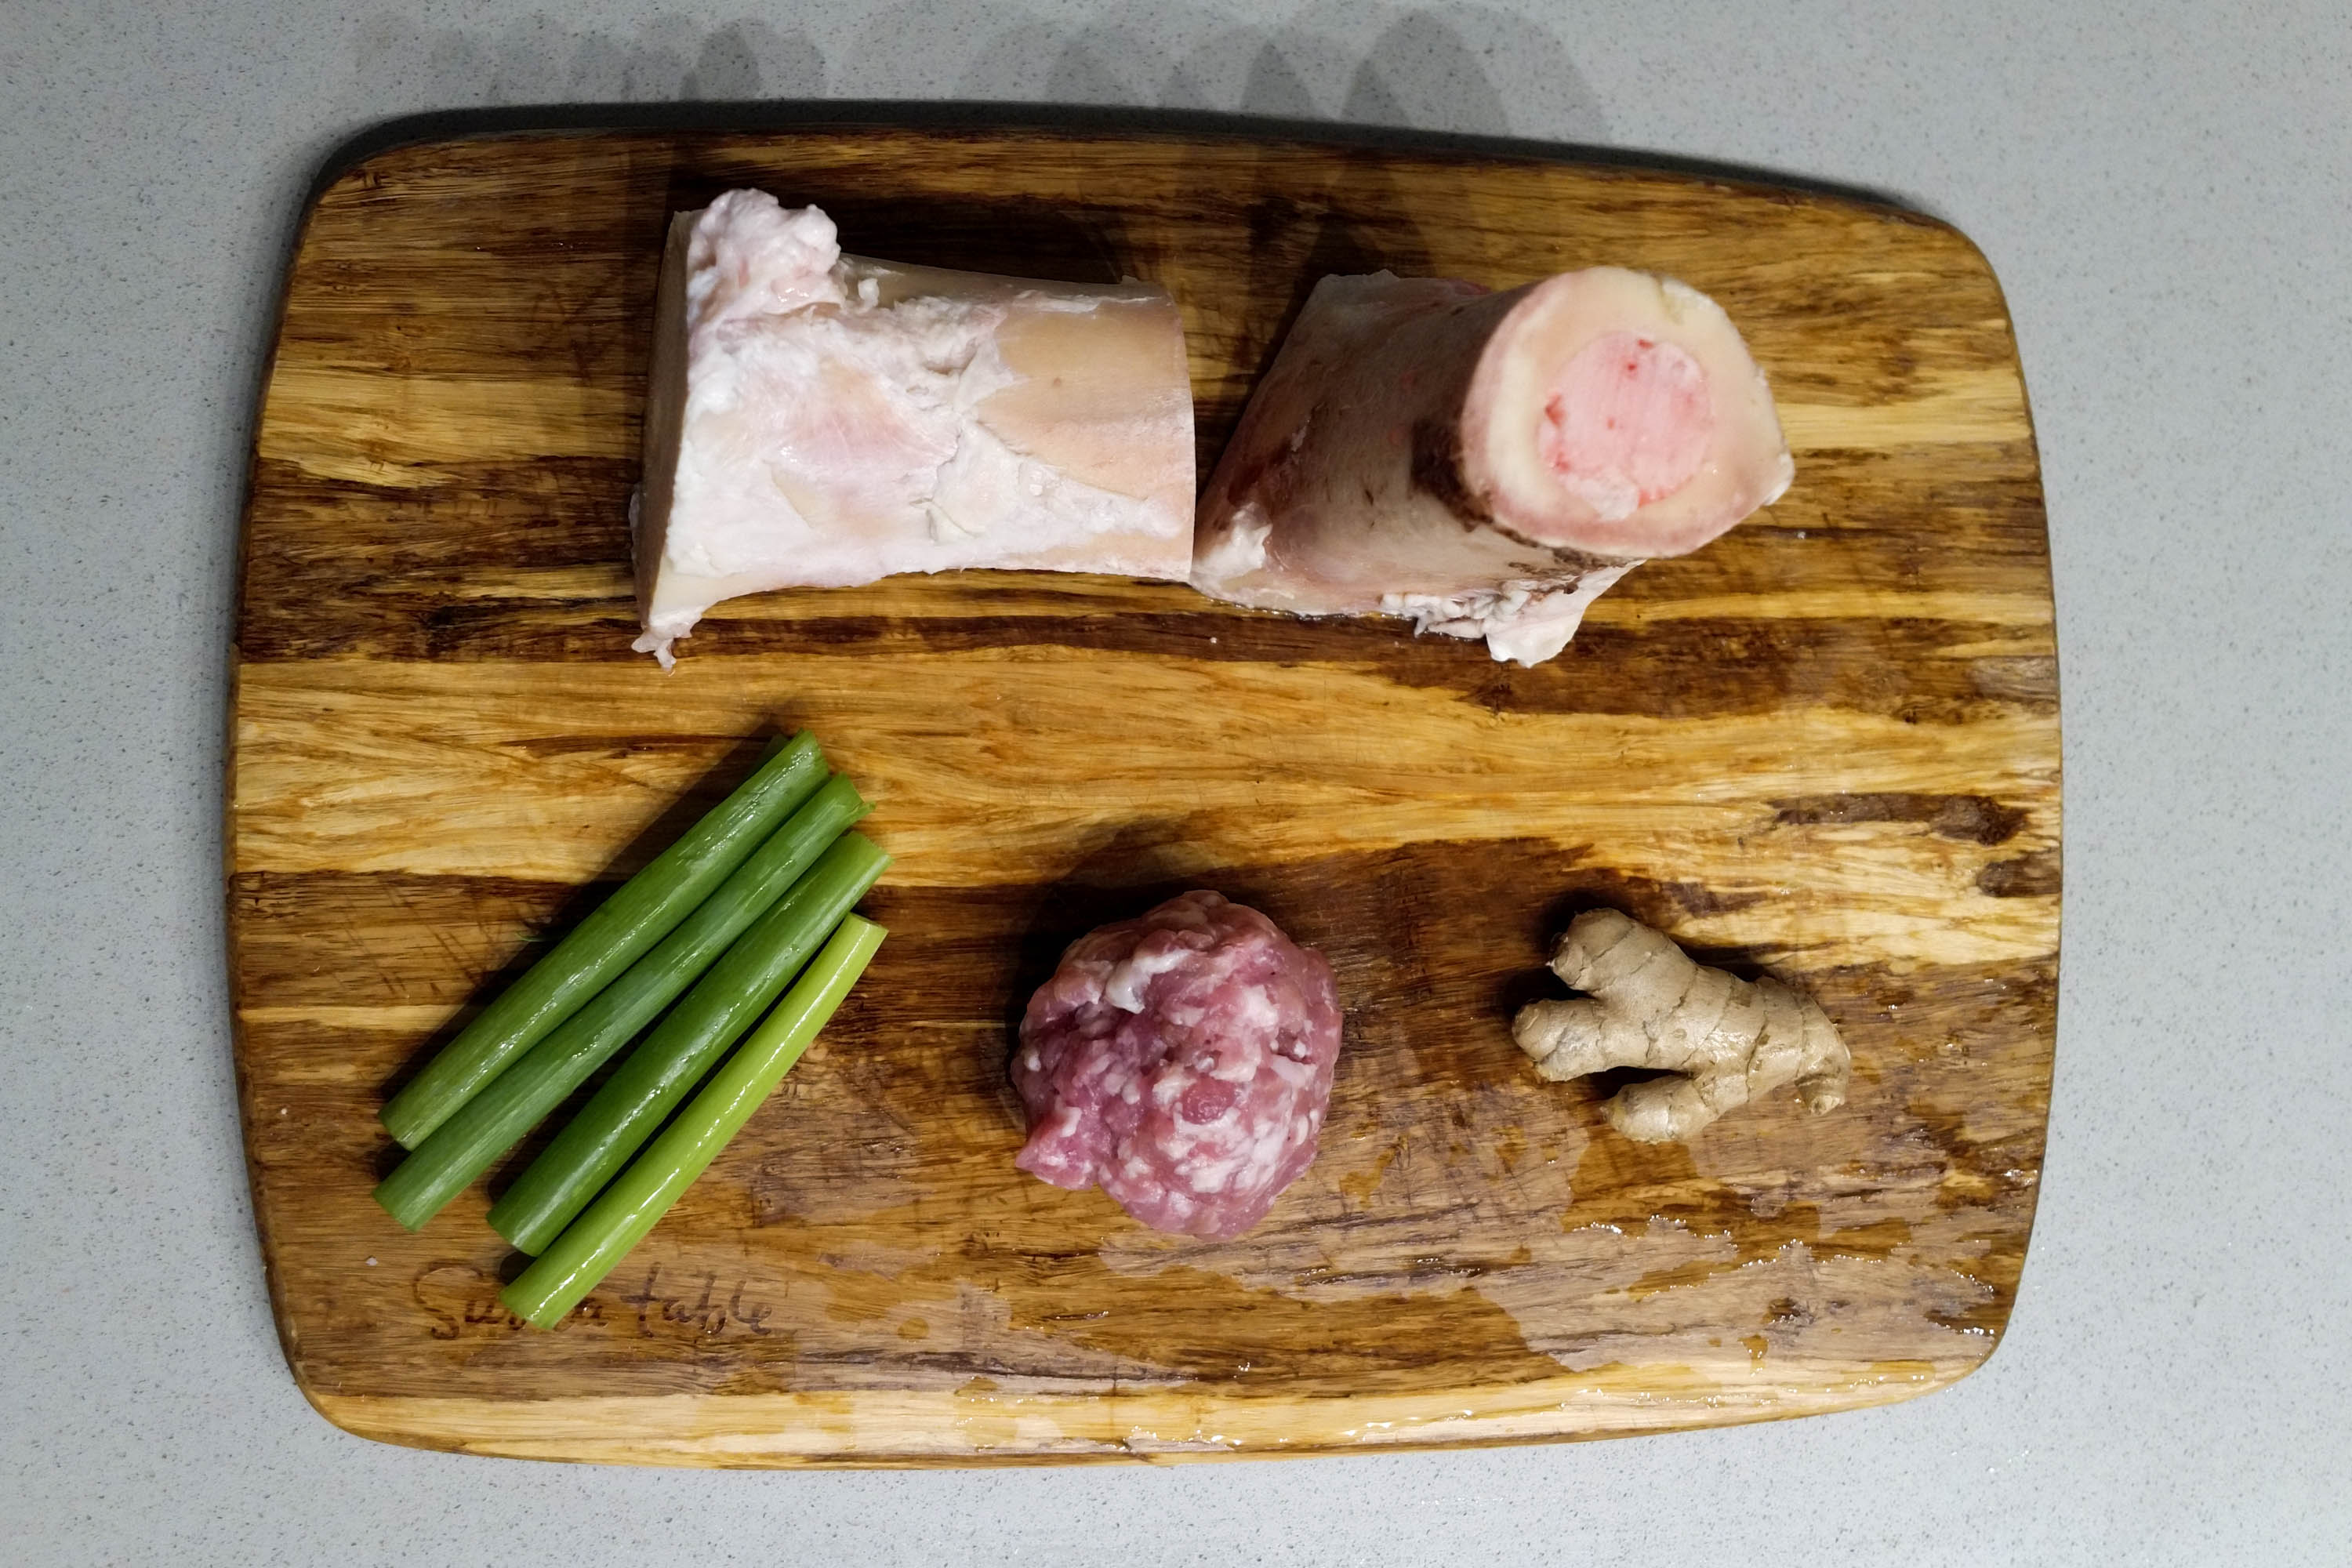
I also roasted the bone marrow first before mixing it in.
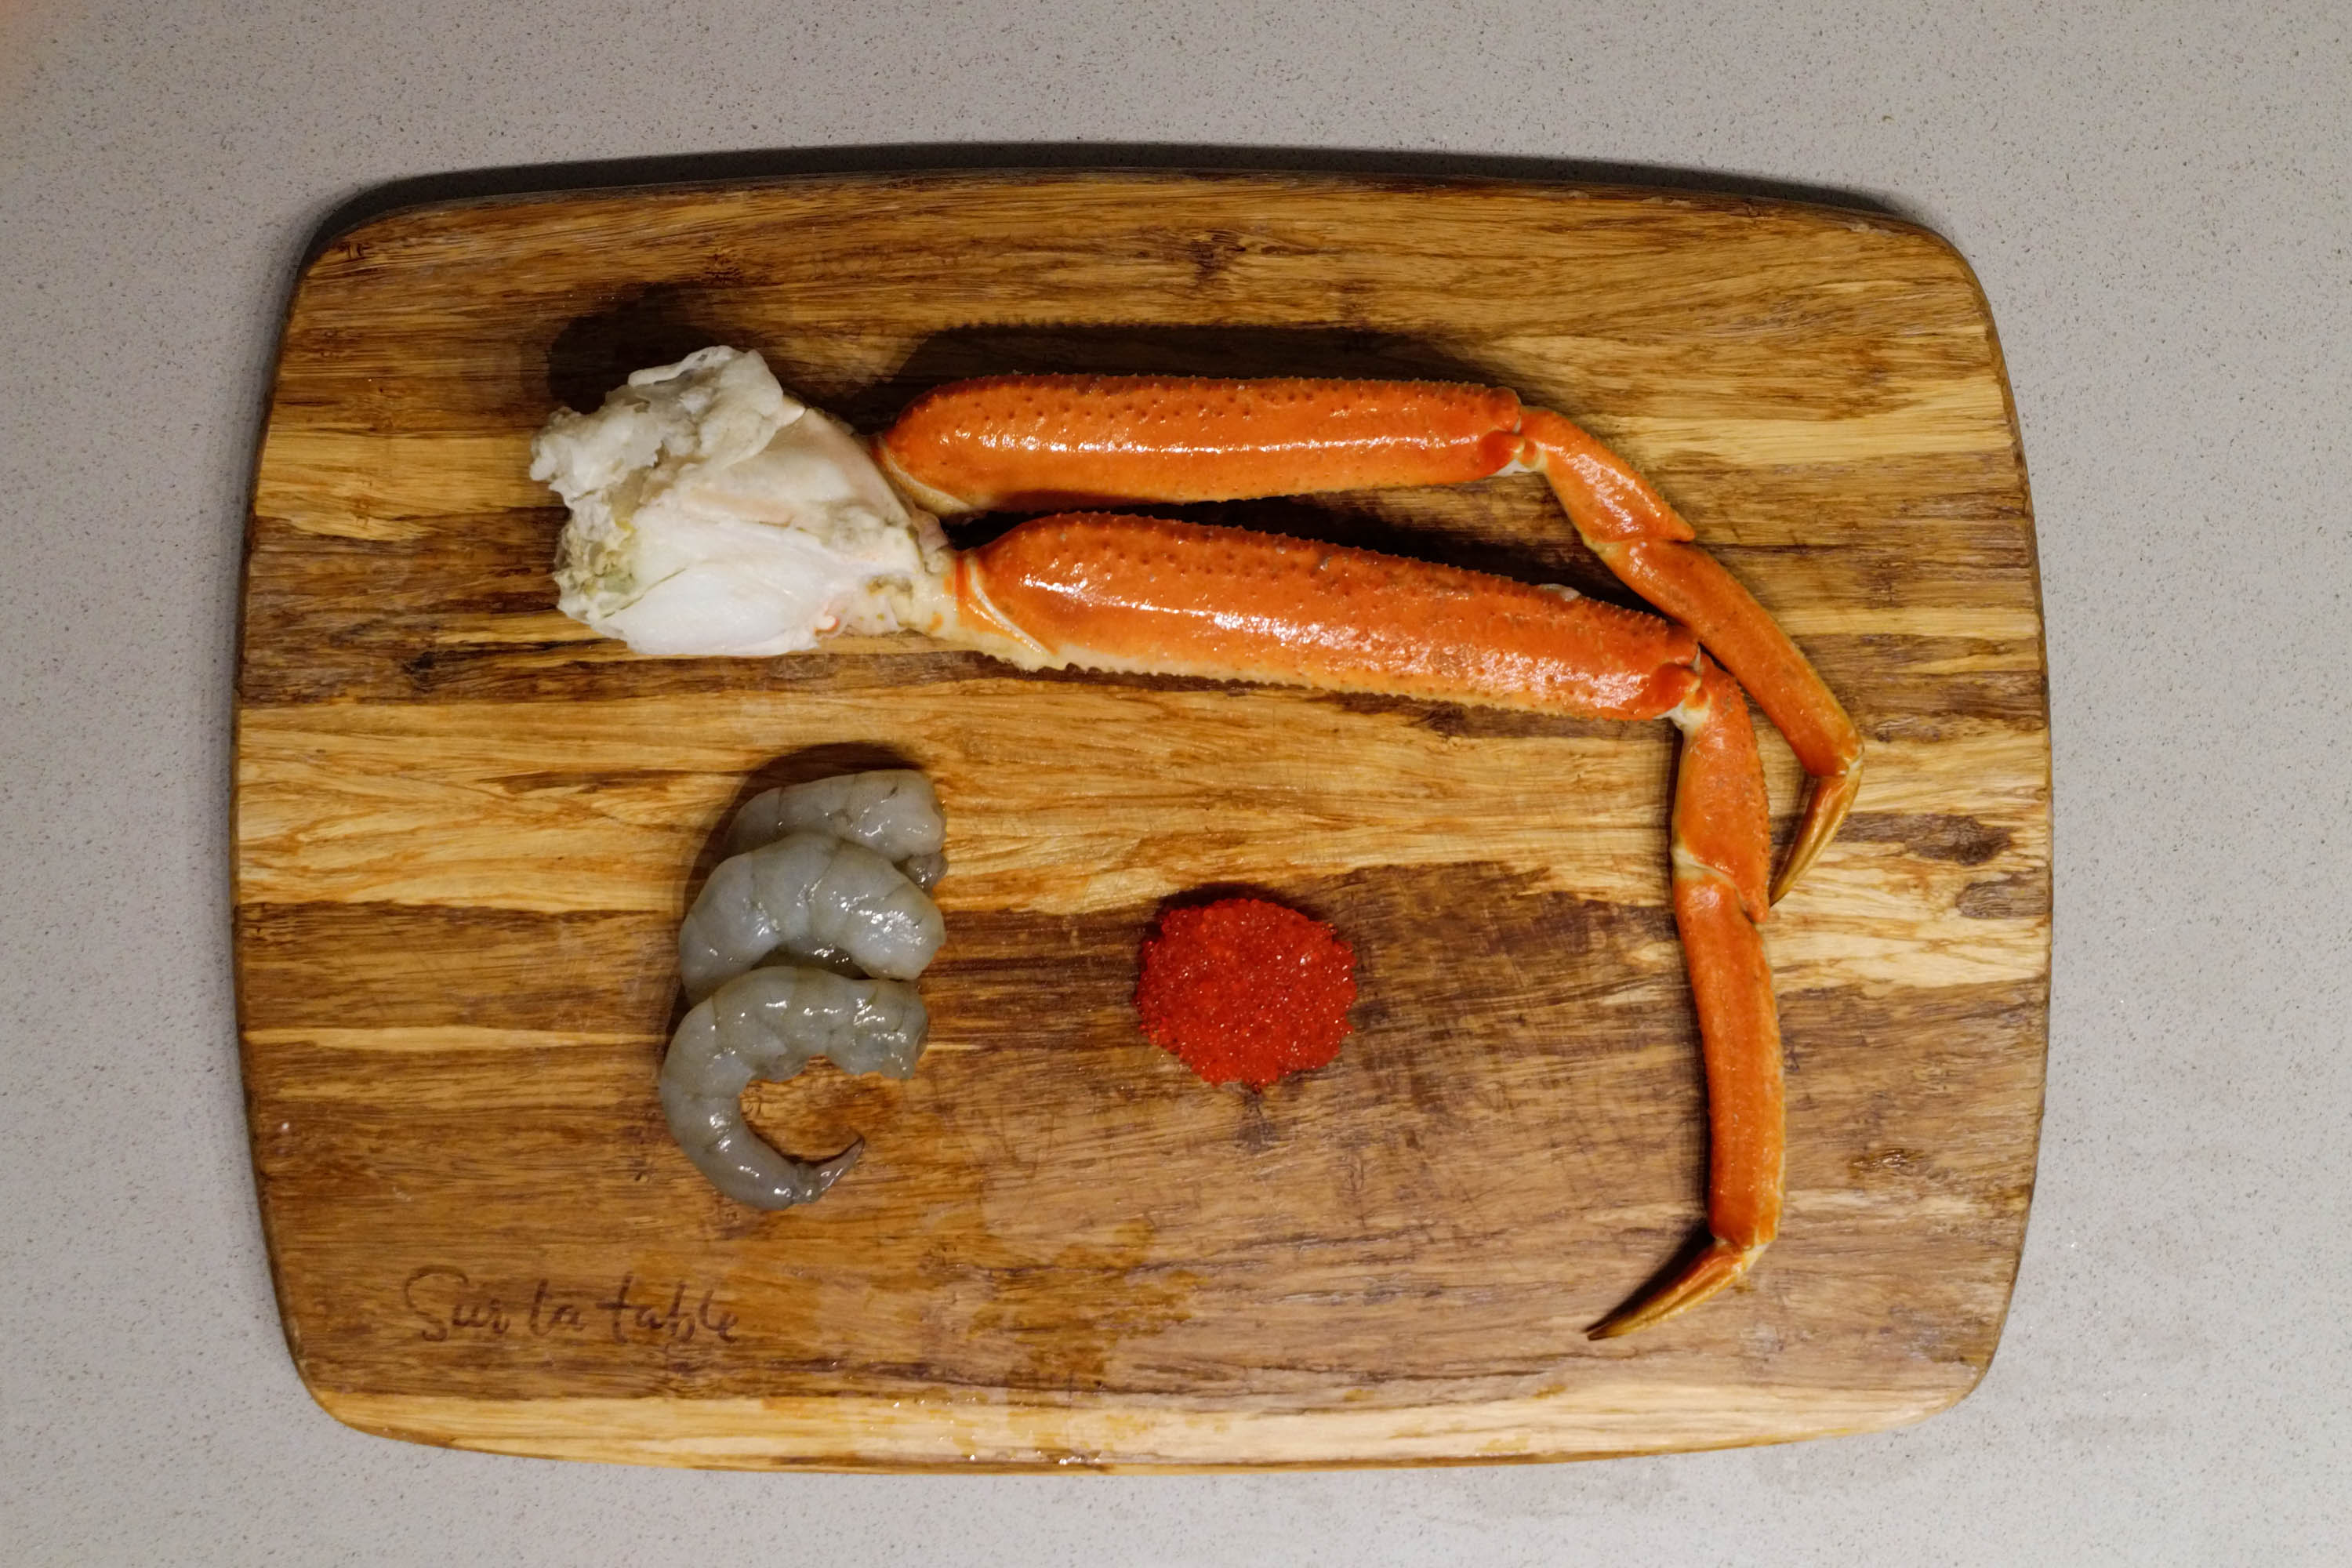
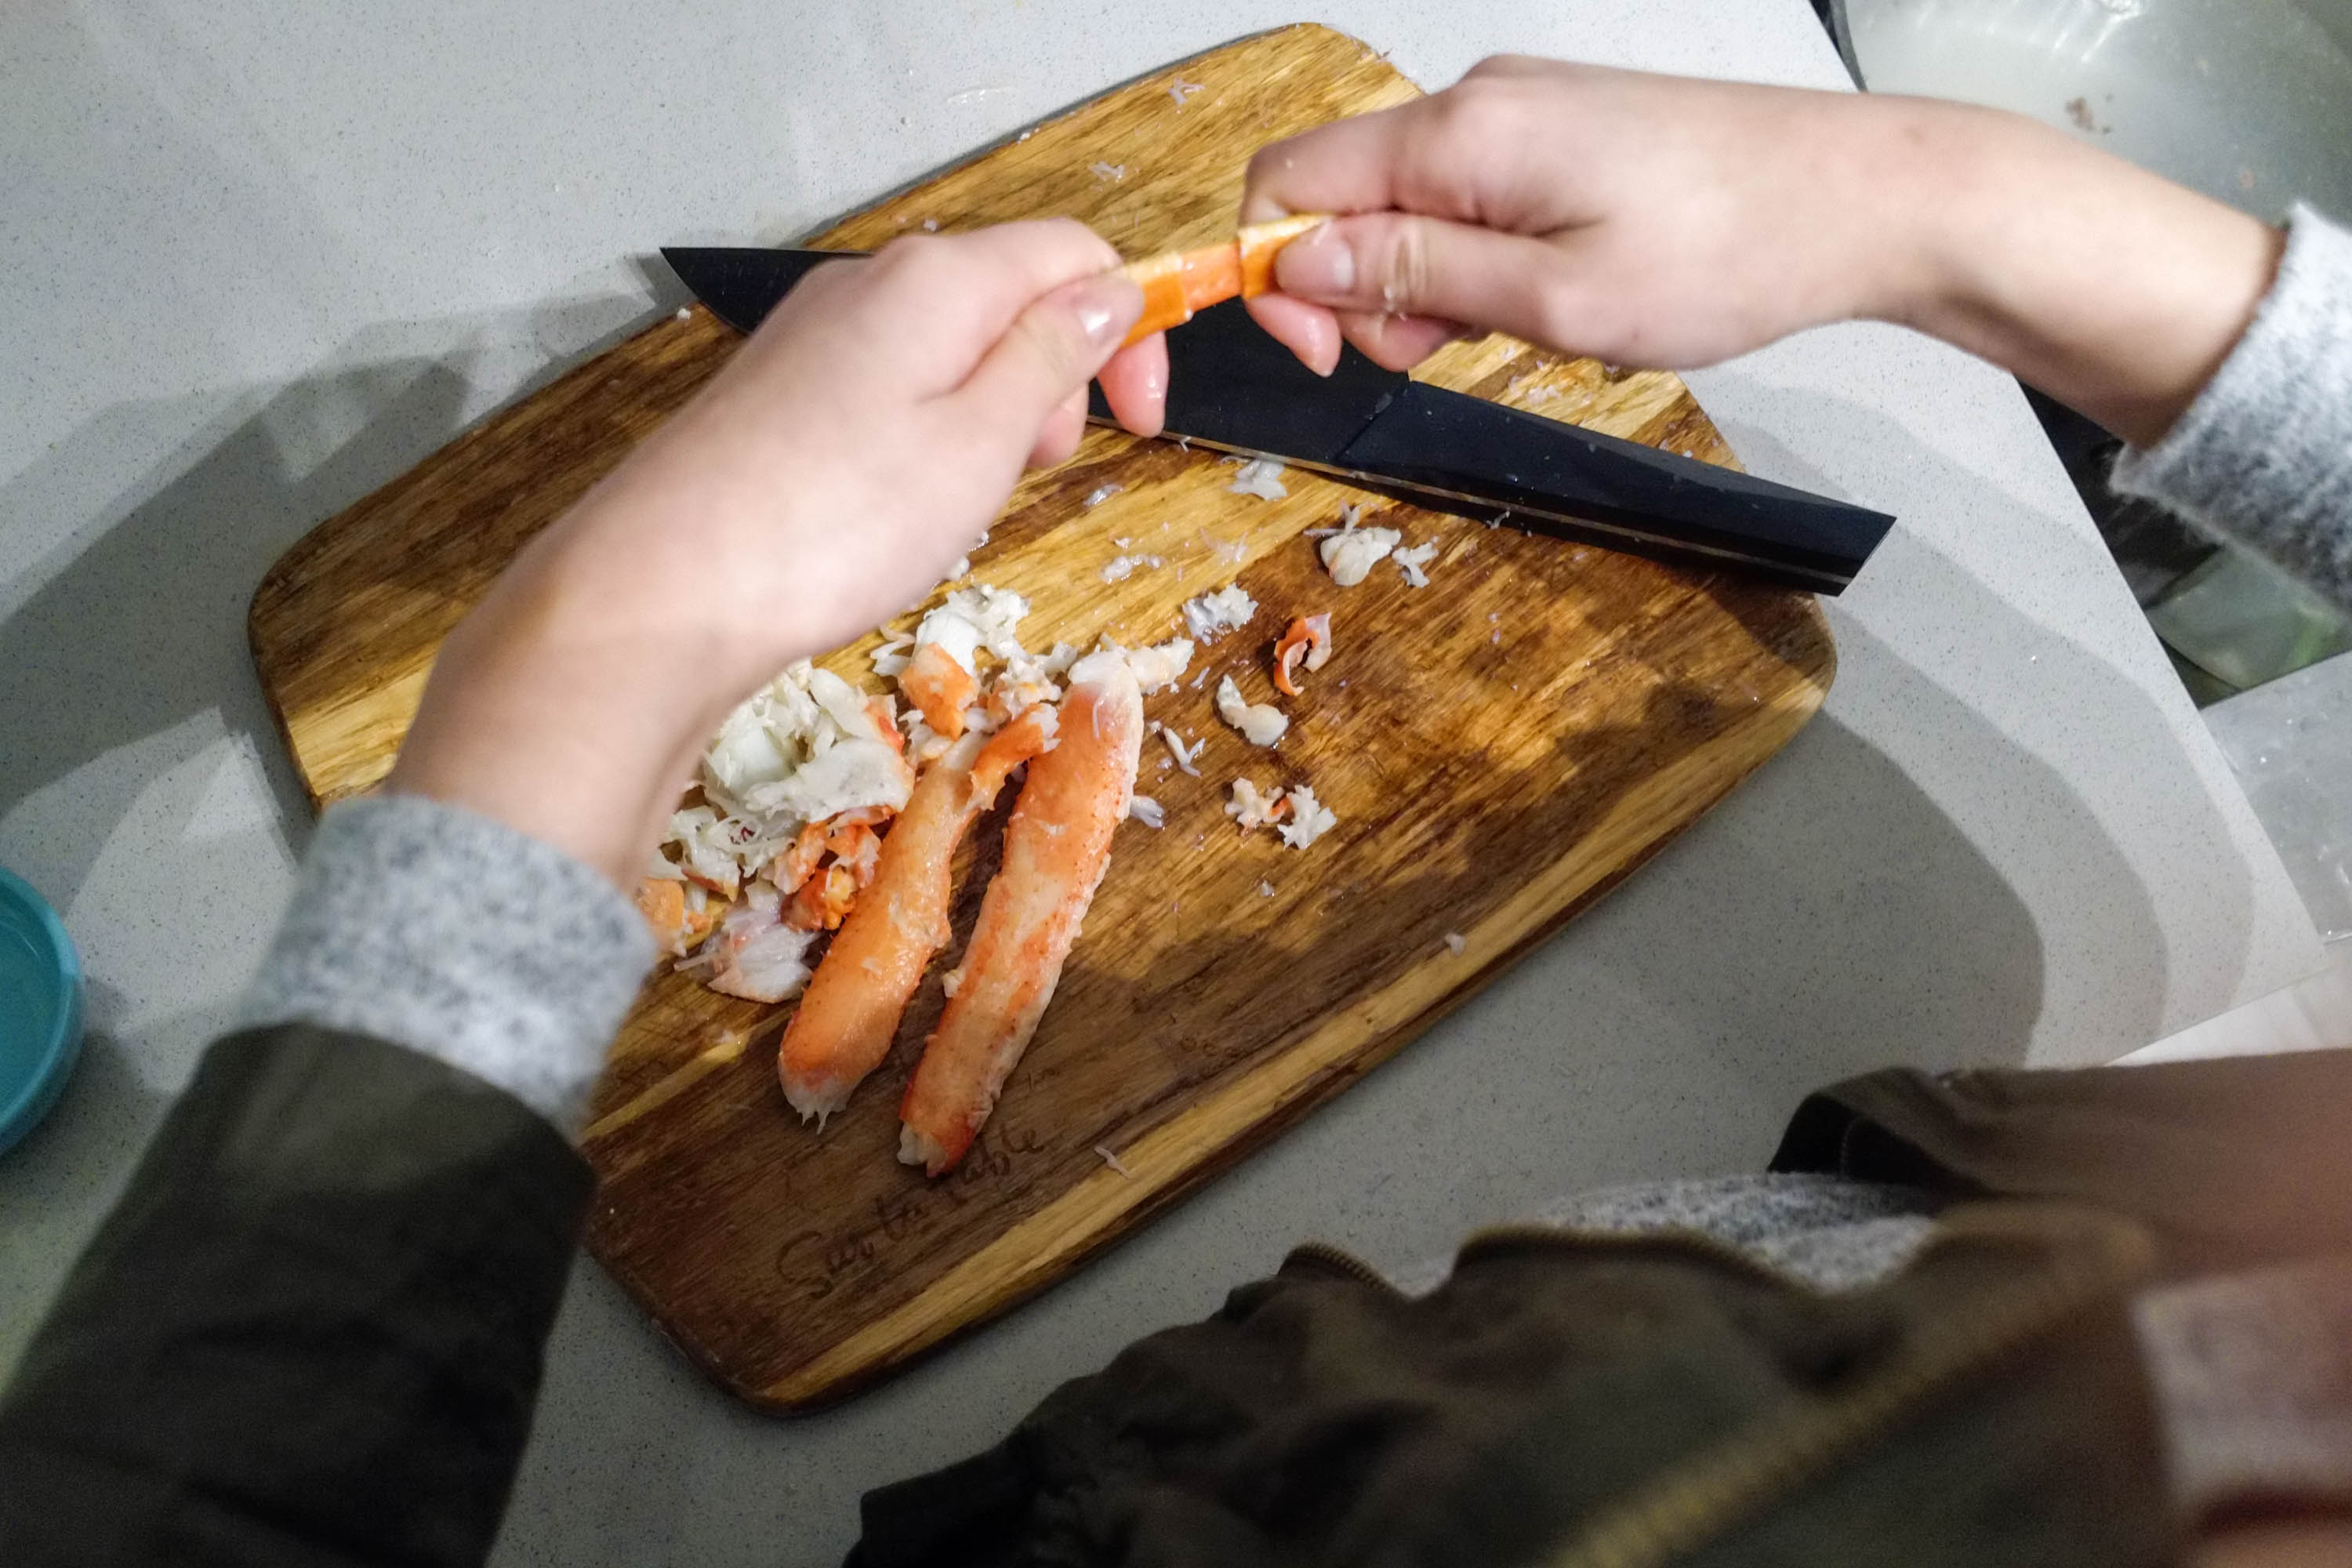
For the seafood 小籠包, I used fresh crab meat and shrimp in equal portions, along with some Tobiko just because I had some. Don’t use that lump crab meat junk, that’s lazy cooking. I wanted to use Salmon roe instead since I figured you would end up with multiple layers of liquid explosions in your mouth if that’s your thing, but unfortunately that shit is expensive (just to be clear, I’m referring to the salmon roe).
STEP 4: Wrap gelatinized broth and filling
I thought wrapping normal dumplings were hard but wrapping these made me legitimately consider putting all my ingredients back into the fridge and ordering take-out. Thankfully I’m not a little bitch and you guys now have this article to steer you away from making stupid culinary decisions like hand-making 小籠包.
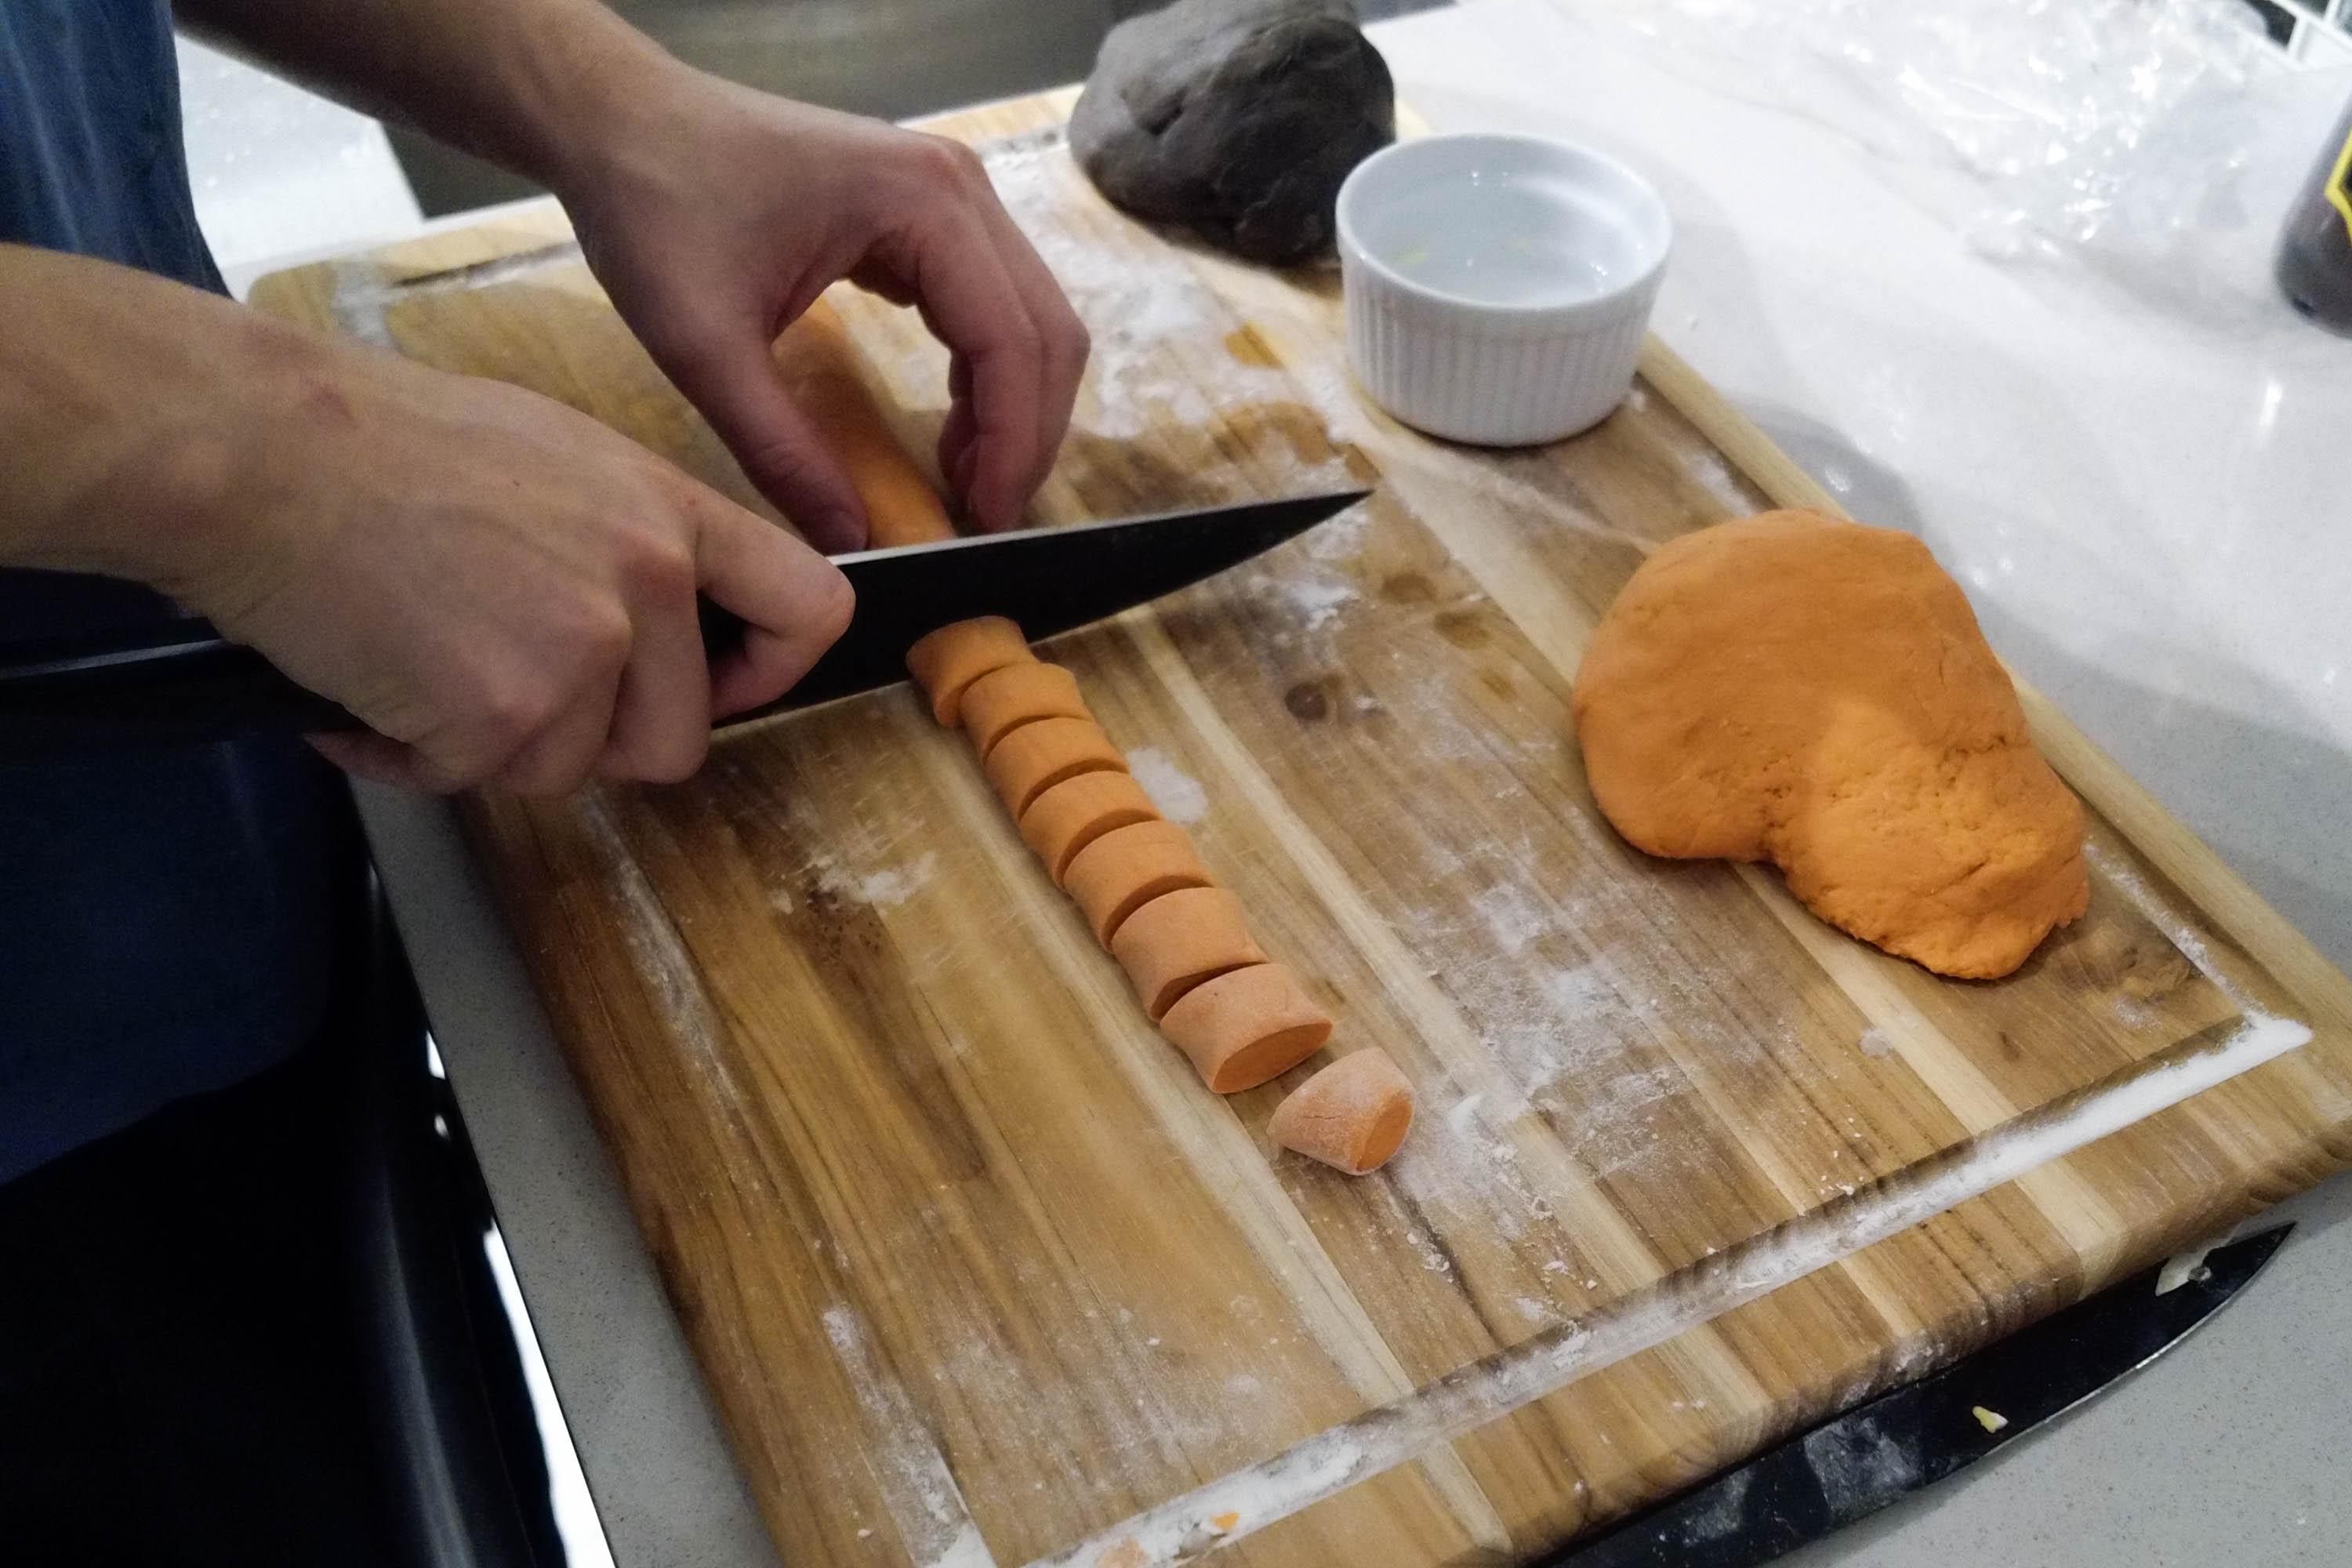
First, you need to roll out a perfectly thin piece of a dough with the center slightly thicker than the edges so that it can carry the broth. Trust me, you need the outside to be as thin as possible otherwise you end up eating something more like cooked dough with a hint of meat.
Make sure you flour-dust all surfaces otherwise your dough is going to get stuck on something. Because if you don’t, when you try to lift your paper thin dough that you’ve been rolling for forever, it’ll rip and at that moment you wonder why you didn’t just go buy 小籠包 wrapping skin at 99 Ranch, but now 99 Ranch is closed so unless you want to make pork meatballs and bake your dough into shitty bread for dinner you better get your dumpling wrap game up to par before your girlfriend gets hangry and contemplates why she’s still with you after steps 1-3.
Second, cut out a piece of the gelatinized broth and put it at the base of your dumpling, then cover with filling. Make sure there’s enough filling so the dumpling is mostly meat not dough.
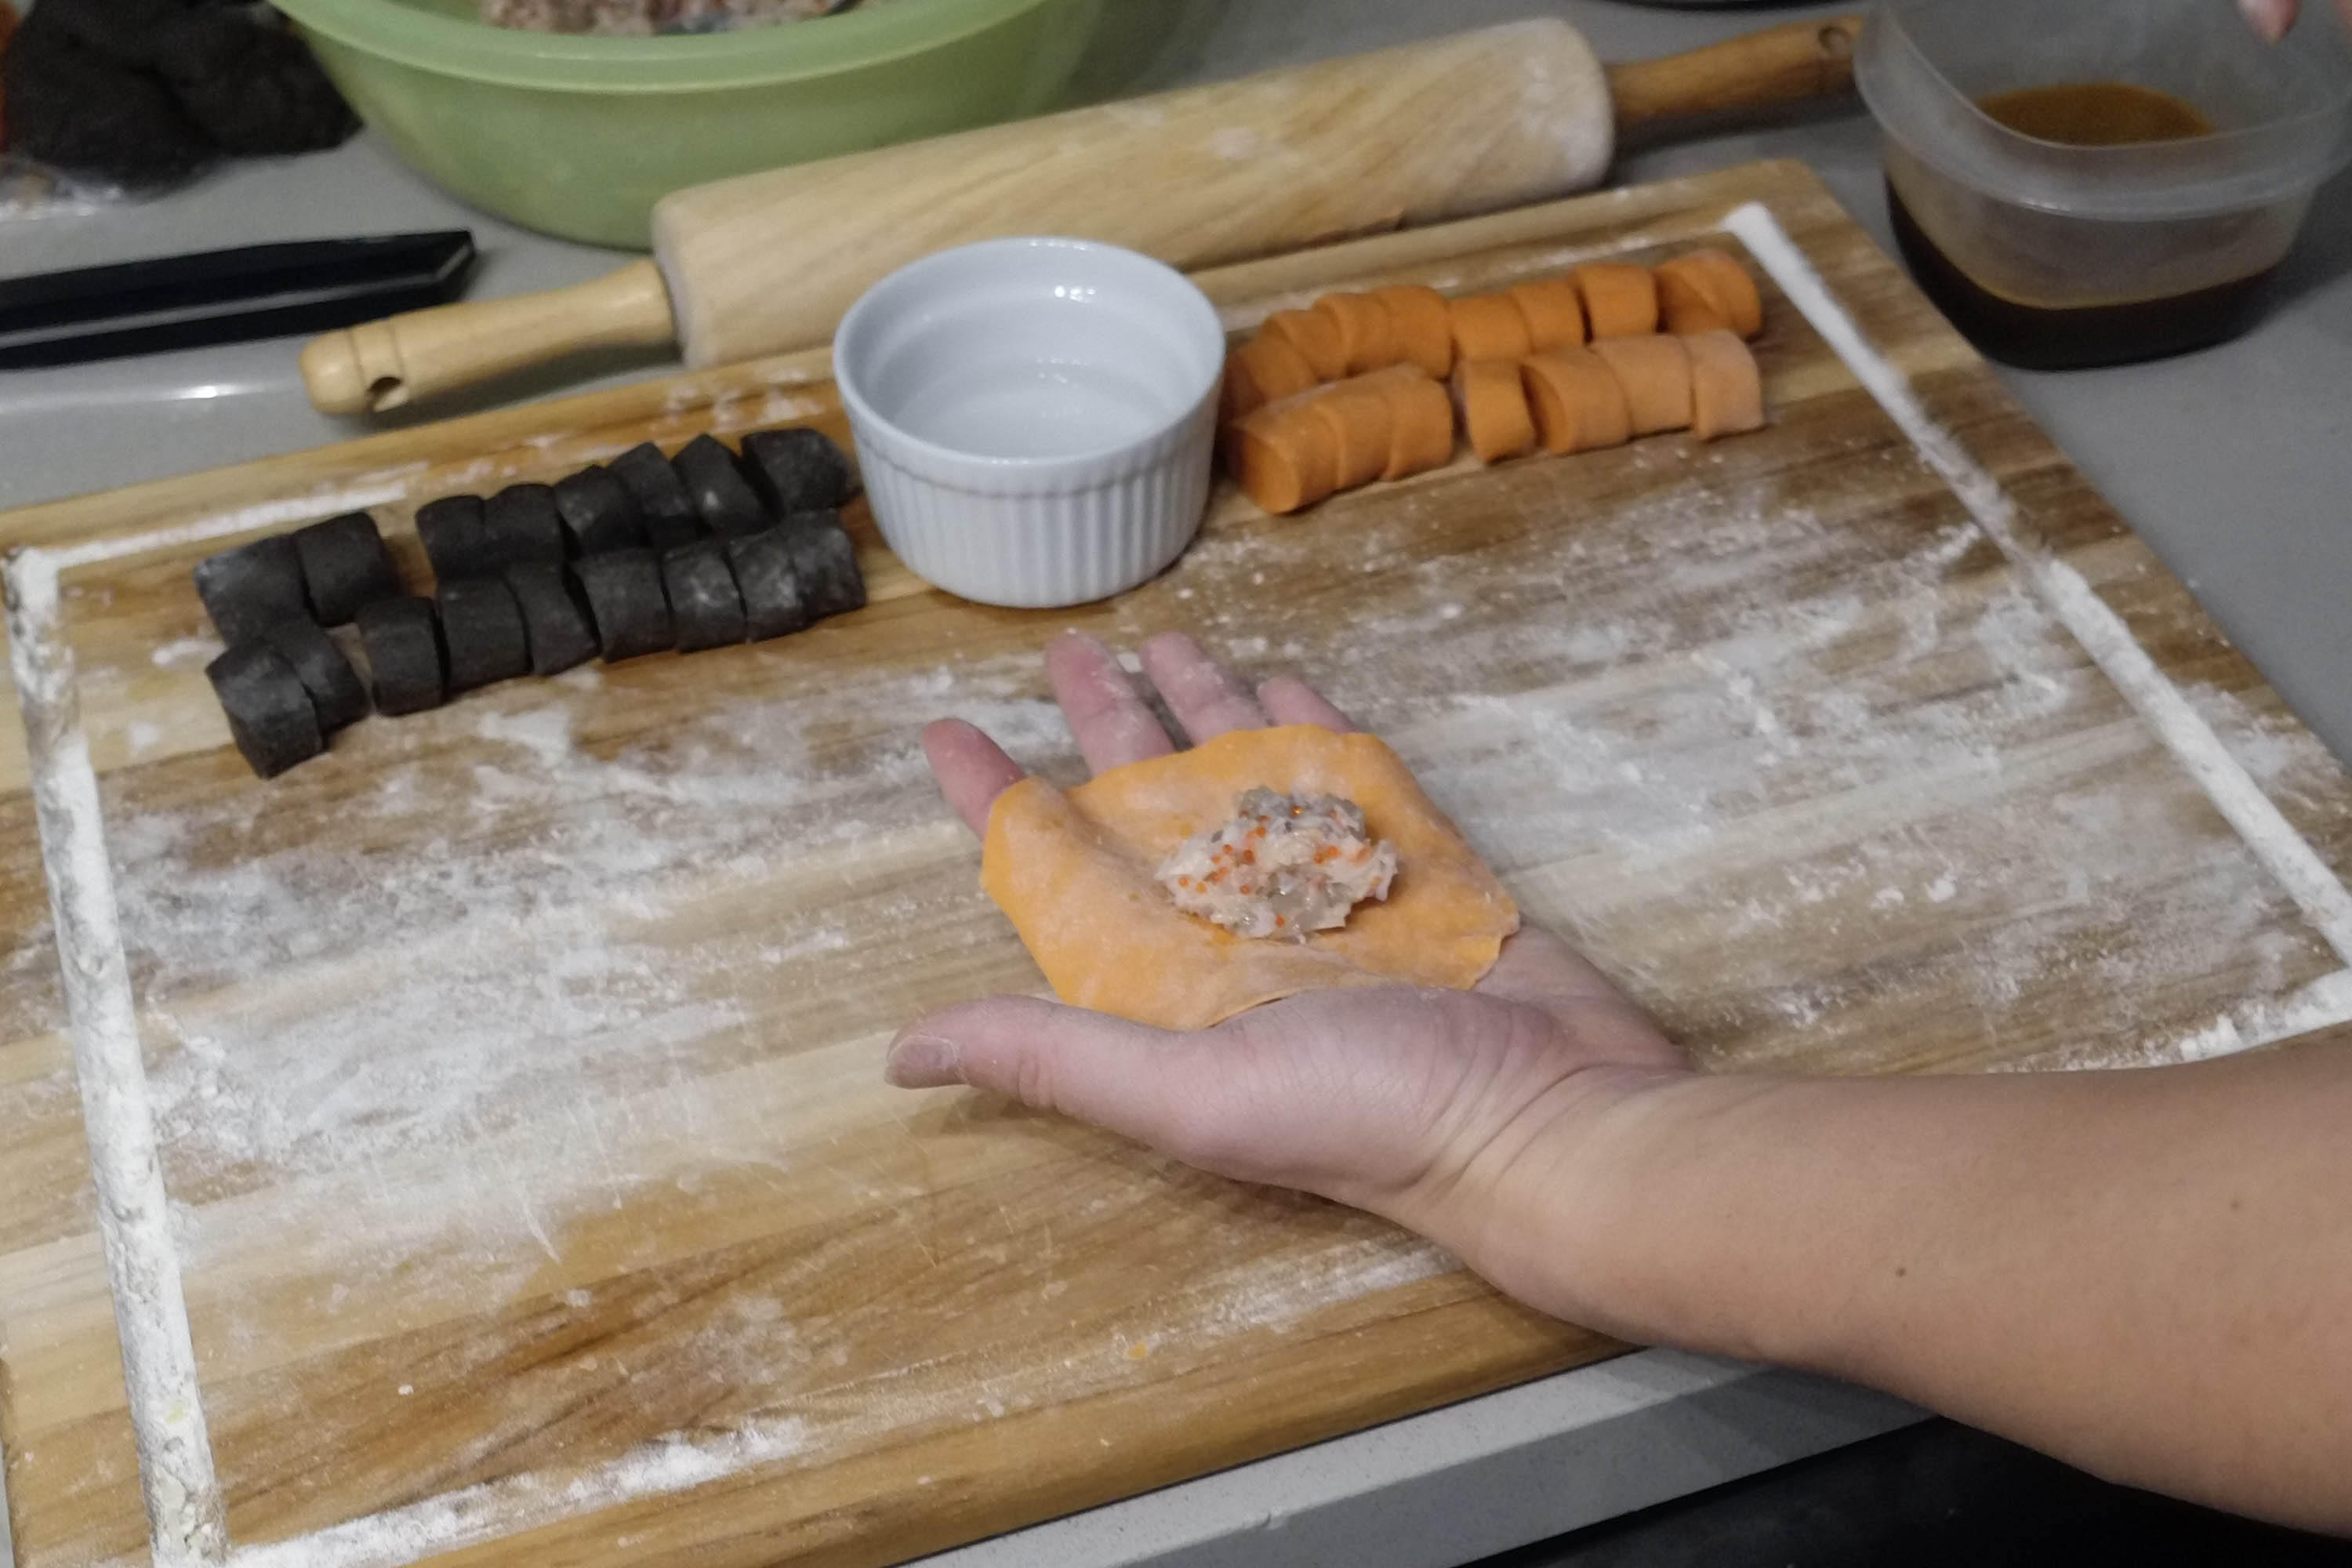
Lastly, just wrap it with this fancy folding pattern.
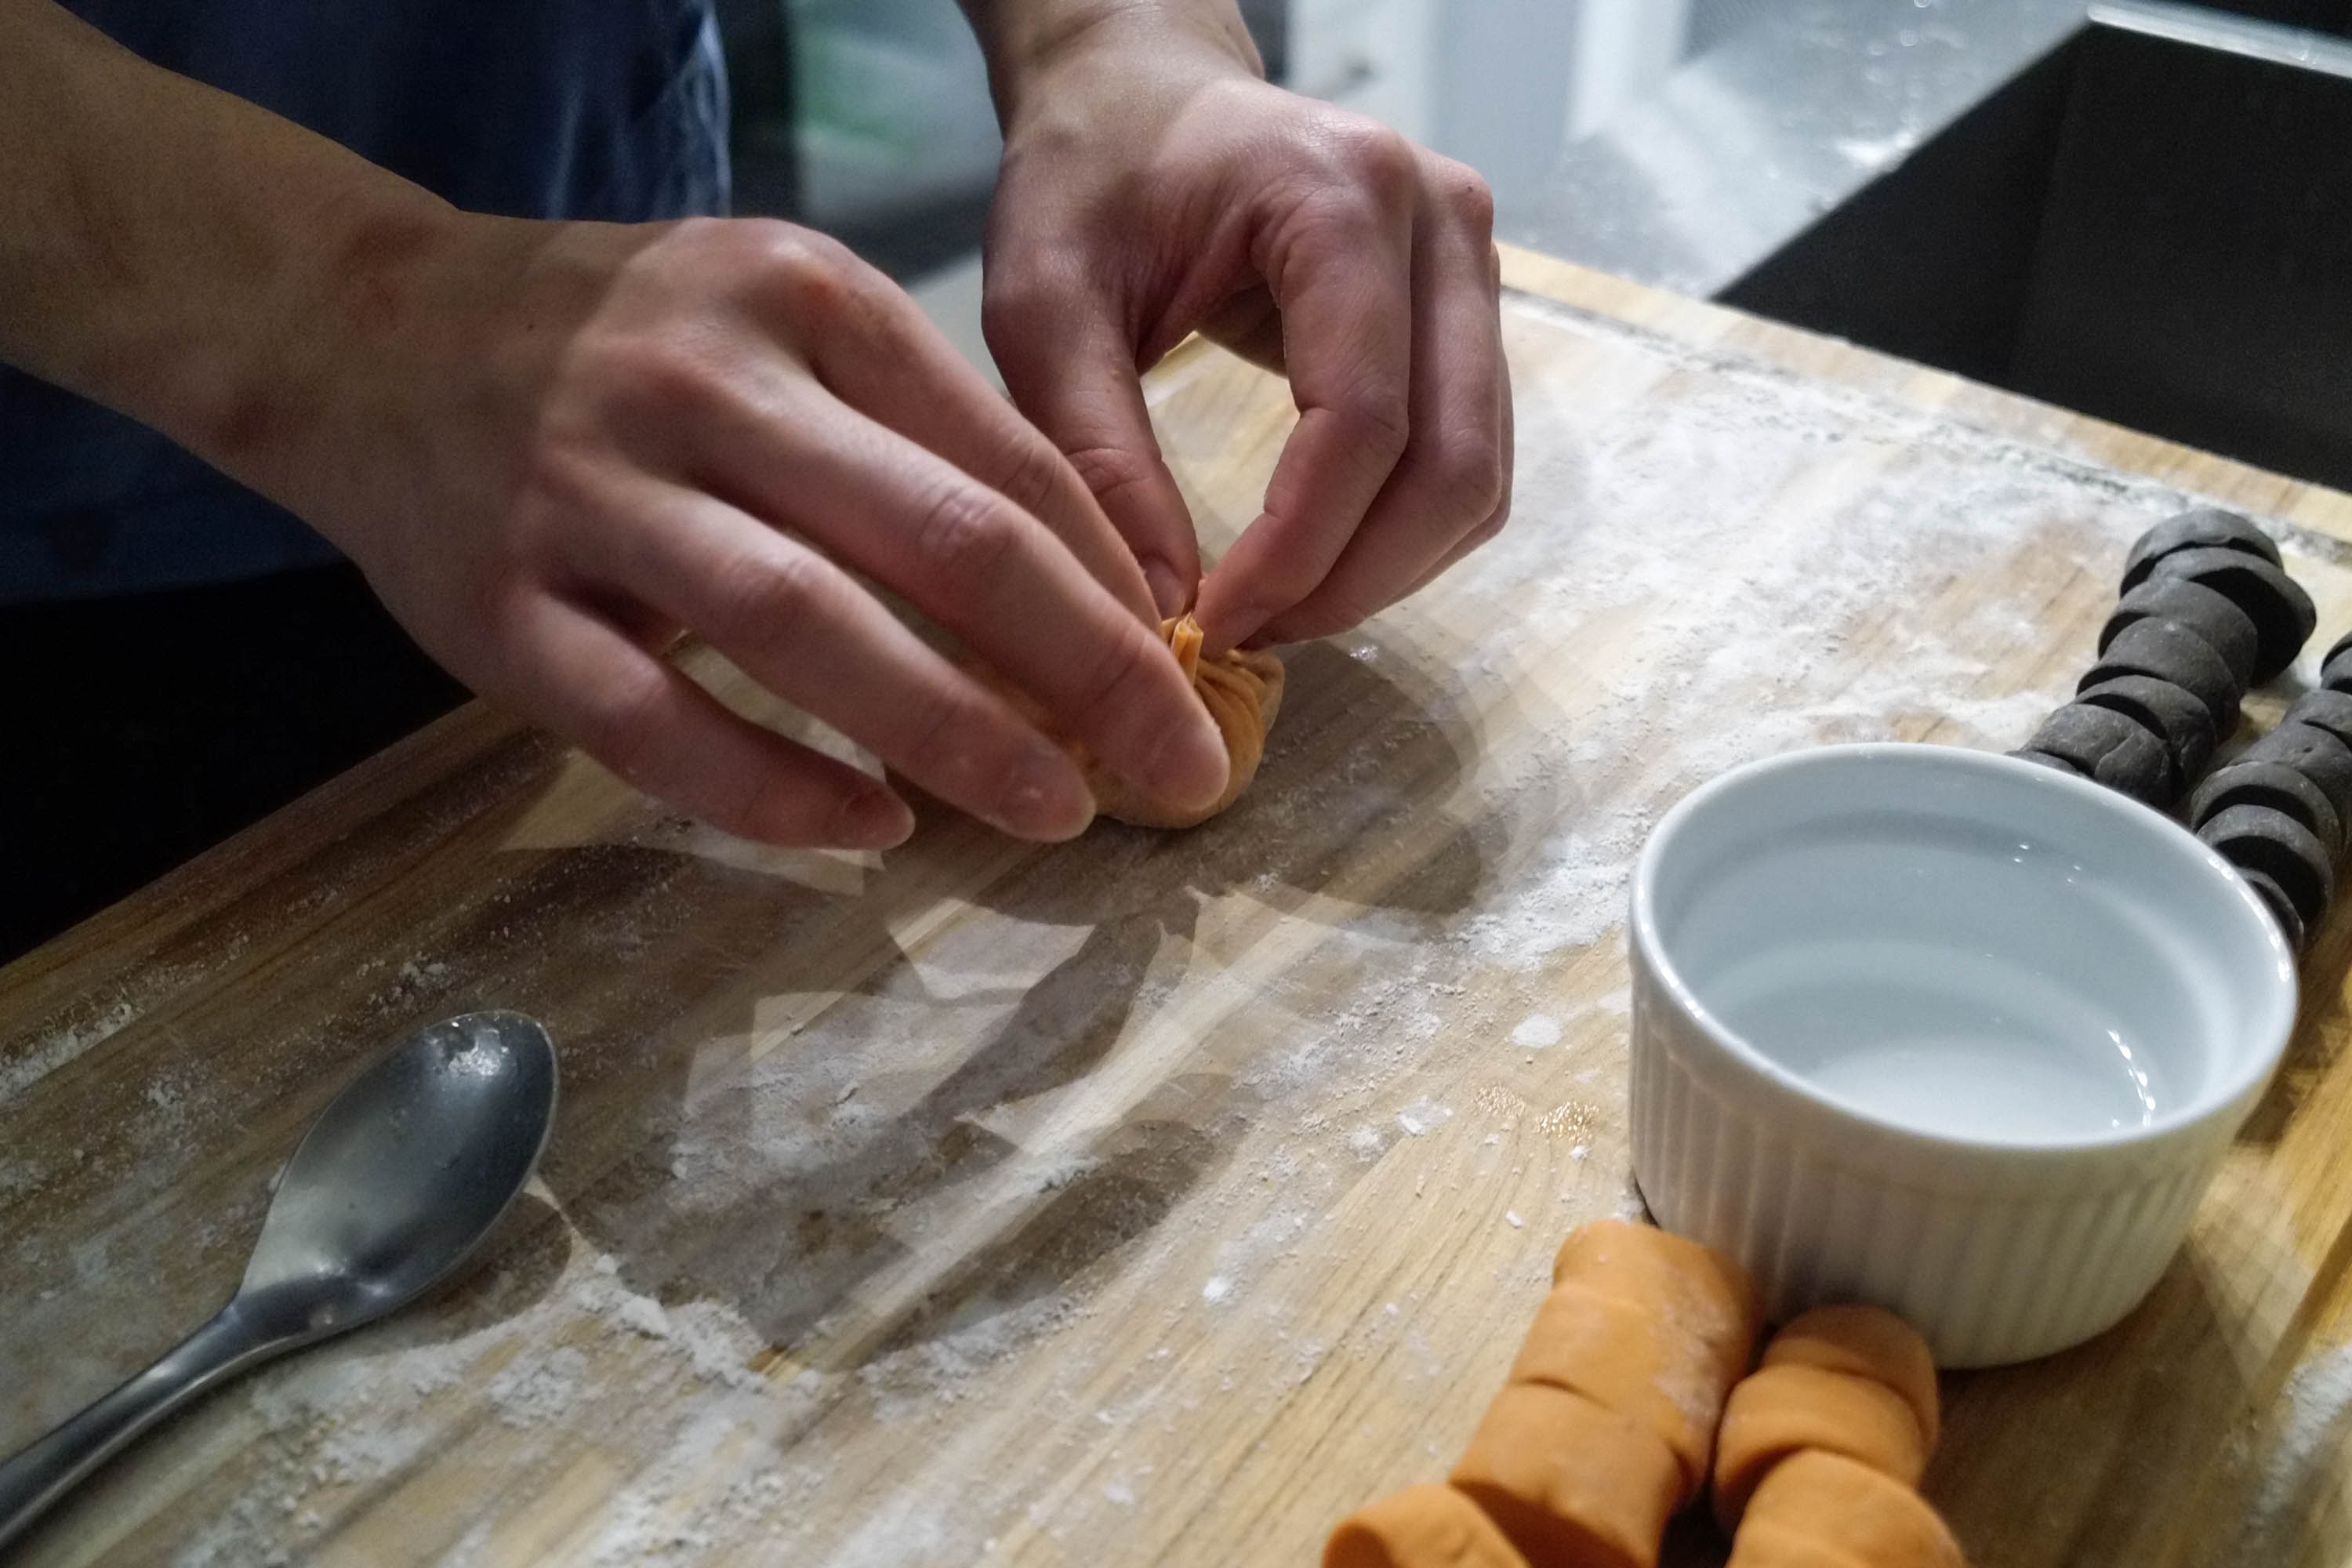
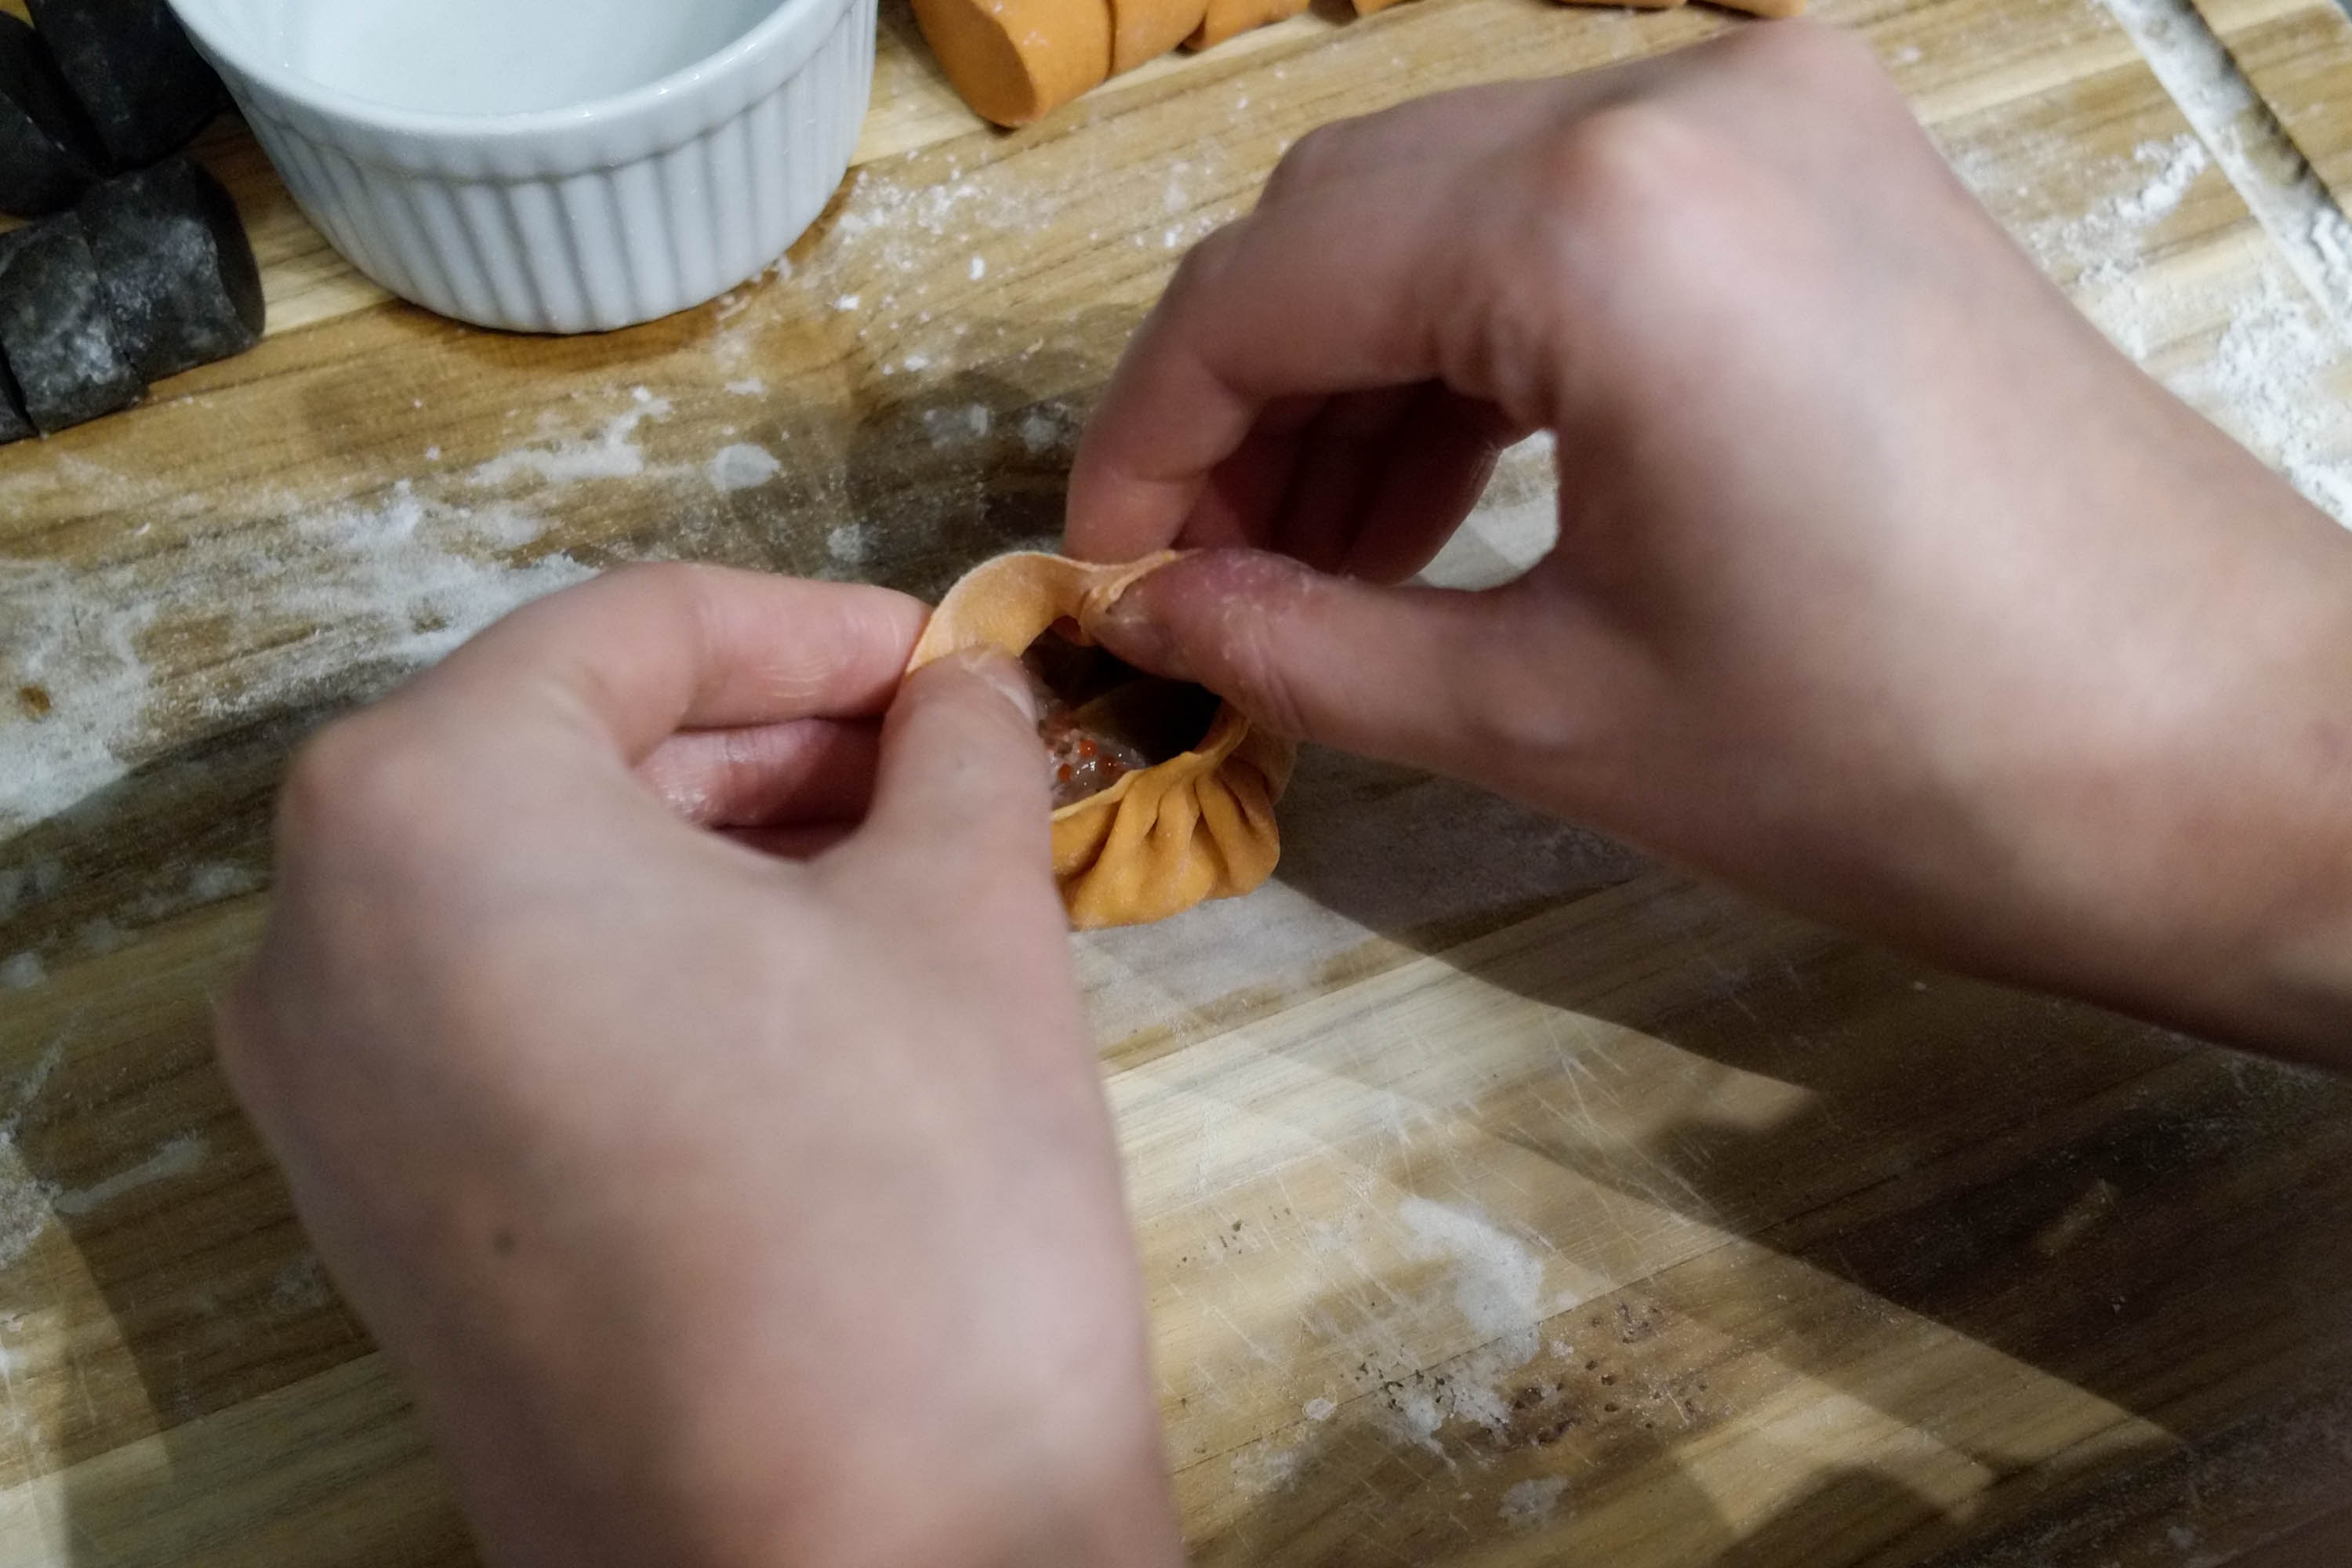
Youtube videos would explain it much better than I can so just Google for instructions there. This part was near impossible for me. It took several attempts until I had a dumpling that would stick together properly. After that I had to figure out how to make it so that it wasn’t ugly. And then I had to figure out how to wrap it so that soup wouldn’t leak out every time. To be honest they all ended up being still ugly - never figured that one out.
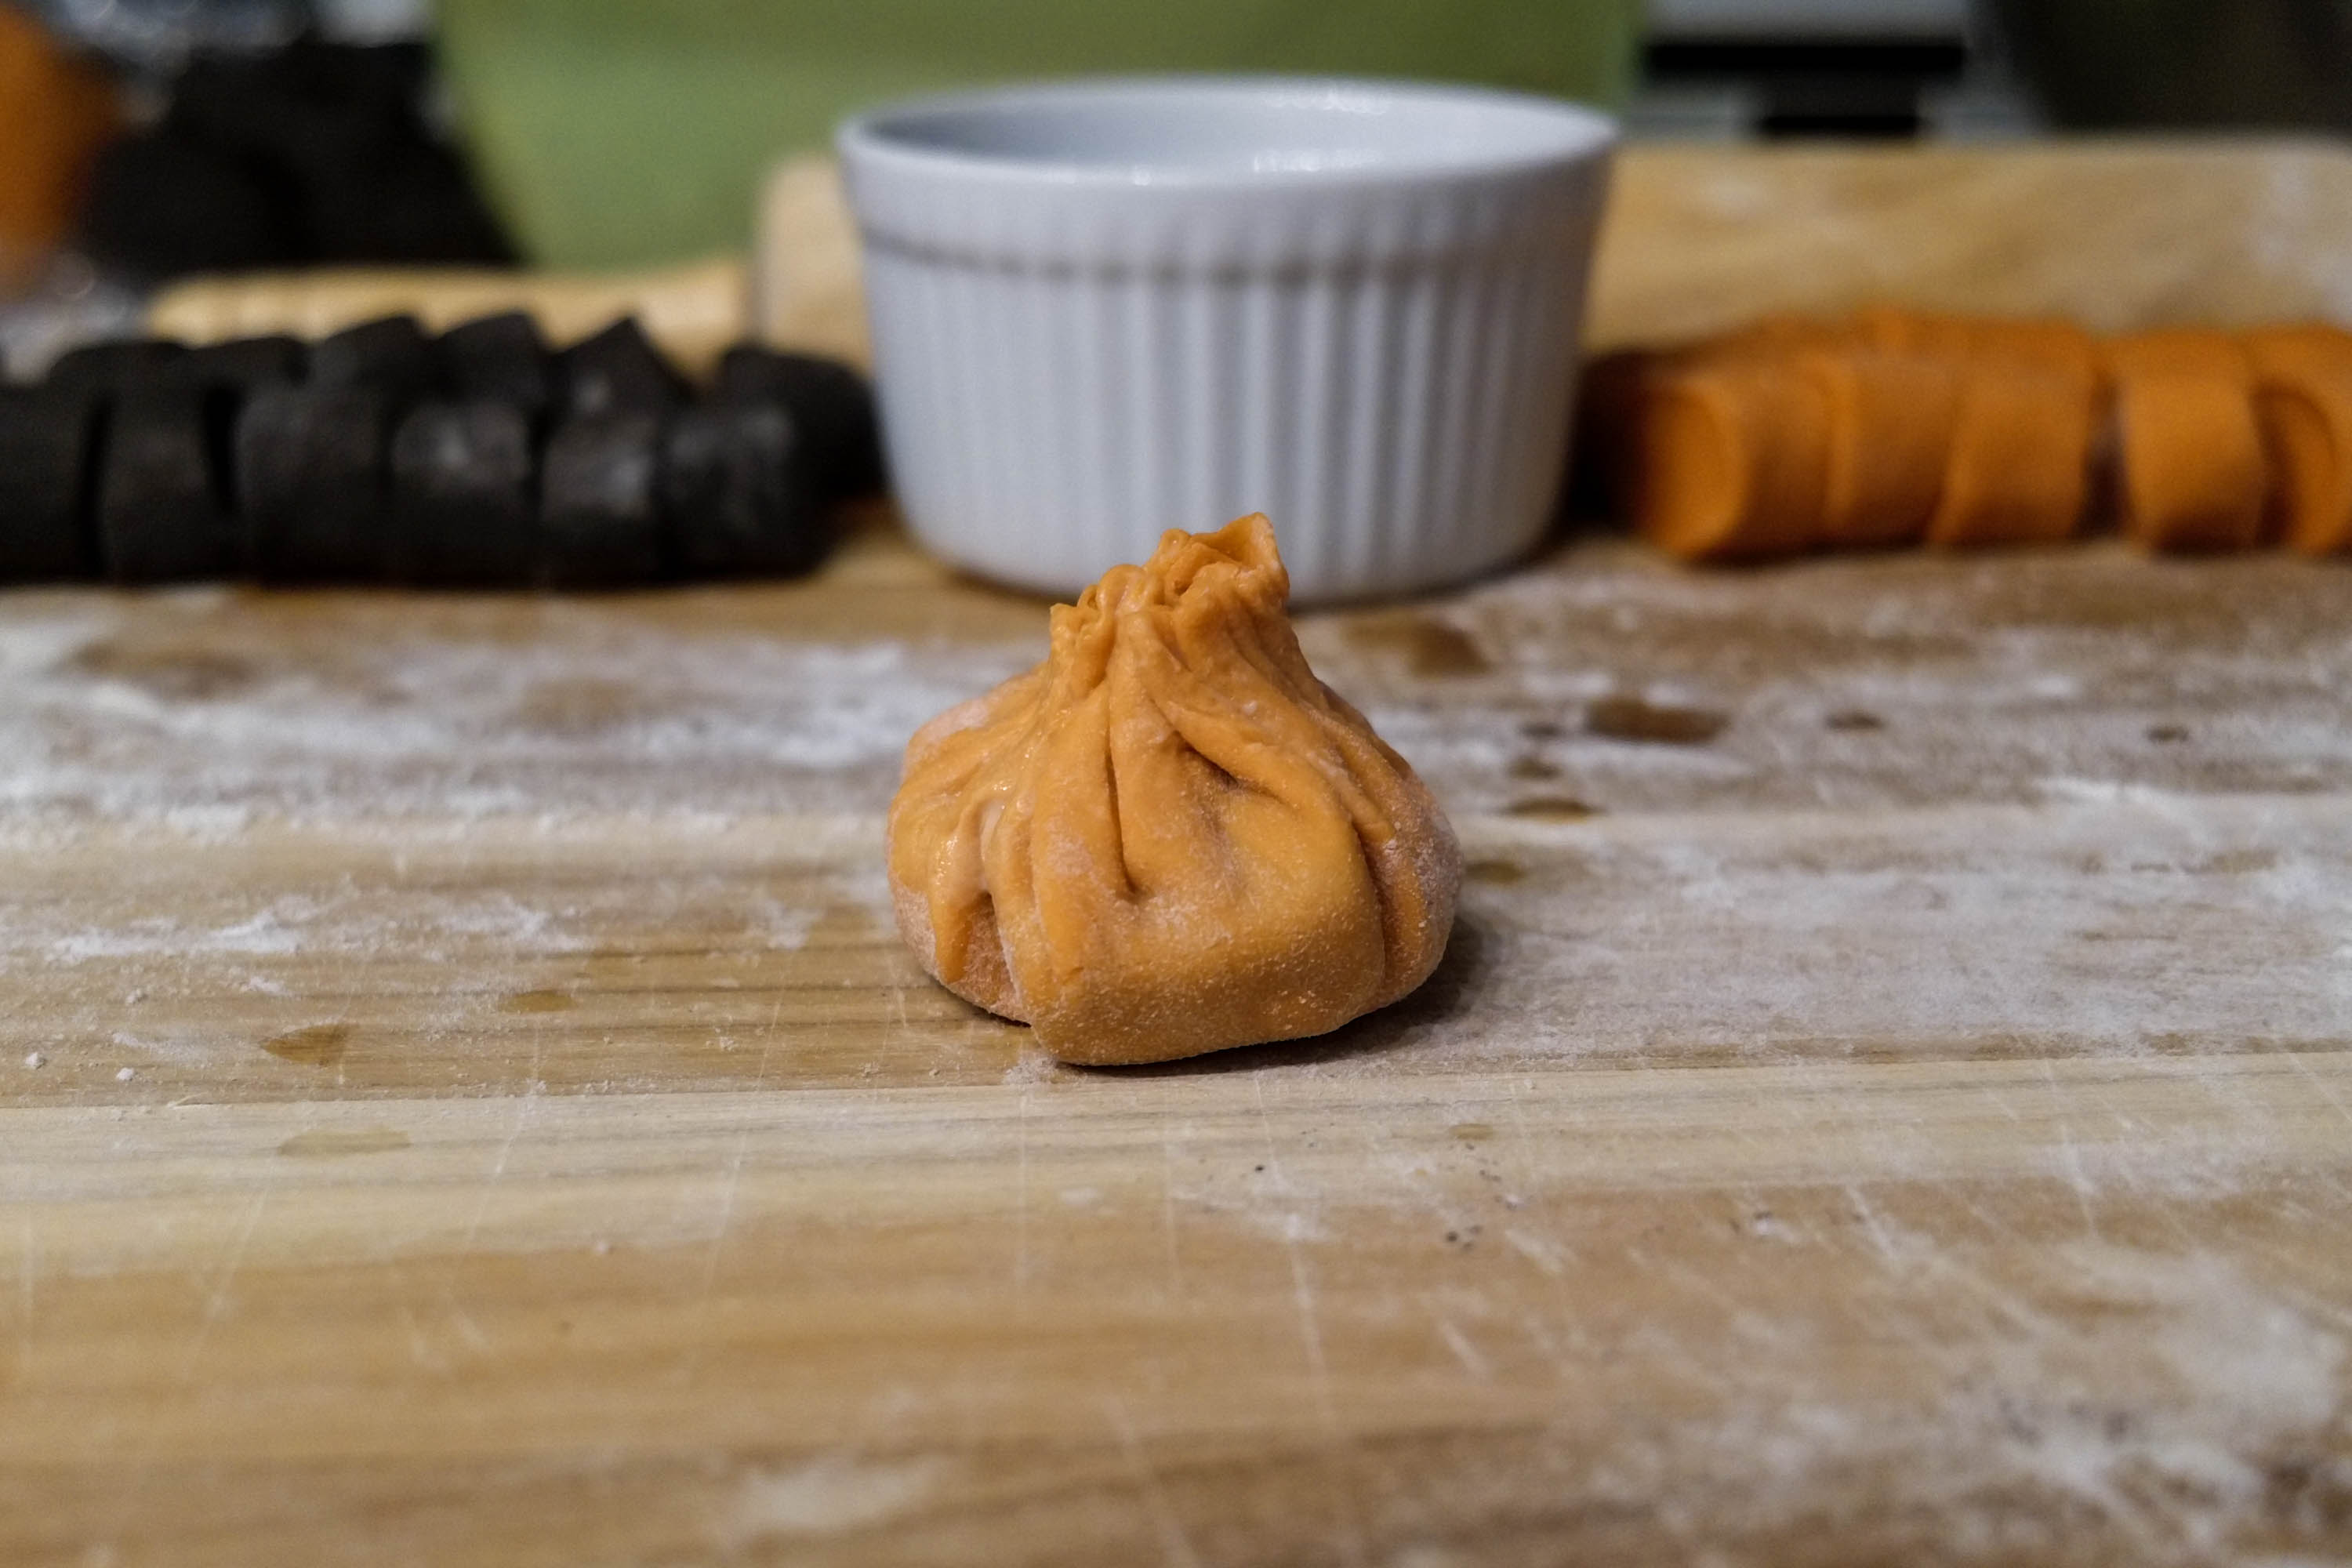
Luckily my girlfriend is much better at wrapping than I am and made some that were worthy of pictures. My hideous 小籠包 ended up on the lower un-pictured bamboo steamer.
STEP 5: Steam
Even cooking these is hard. You can’t just microwave, or bake, or pan-fry, or grill it. You NEED to steam it. Ideally with bamboo steamers so you look more legit and get more social media likes. Punny captions aren’t enough these days.
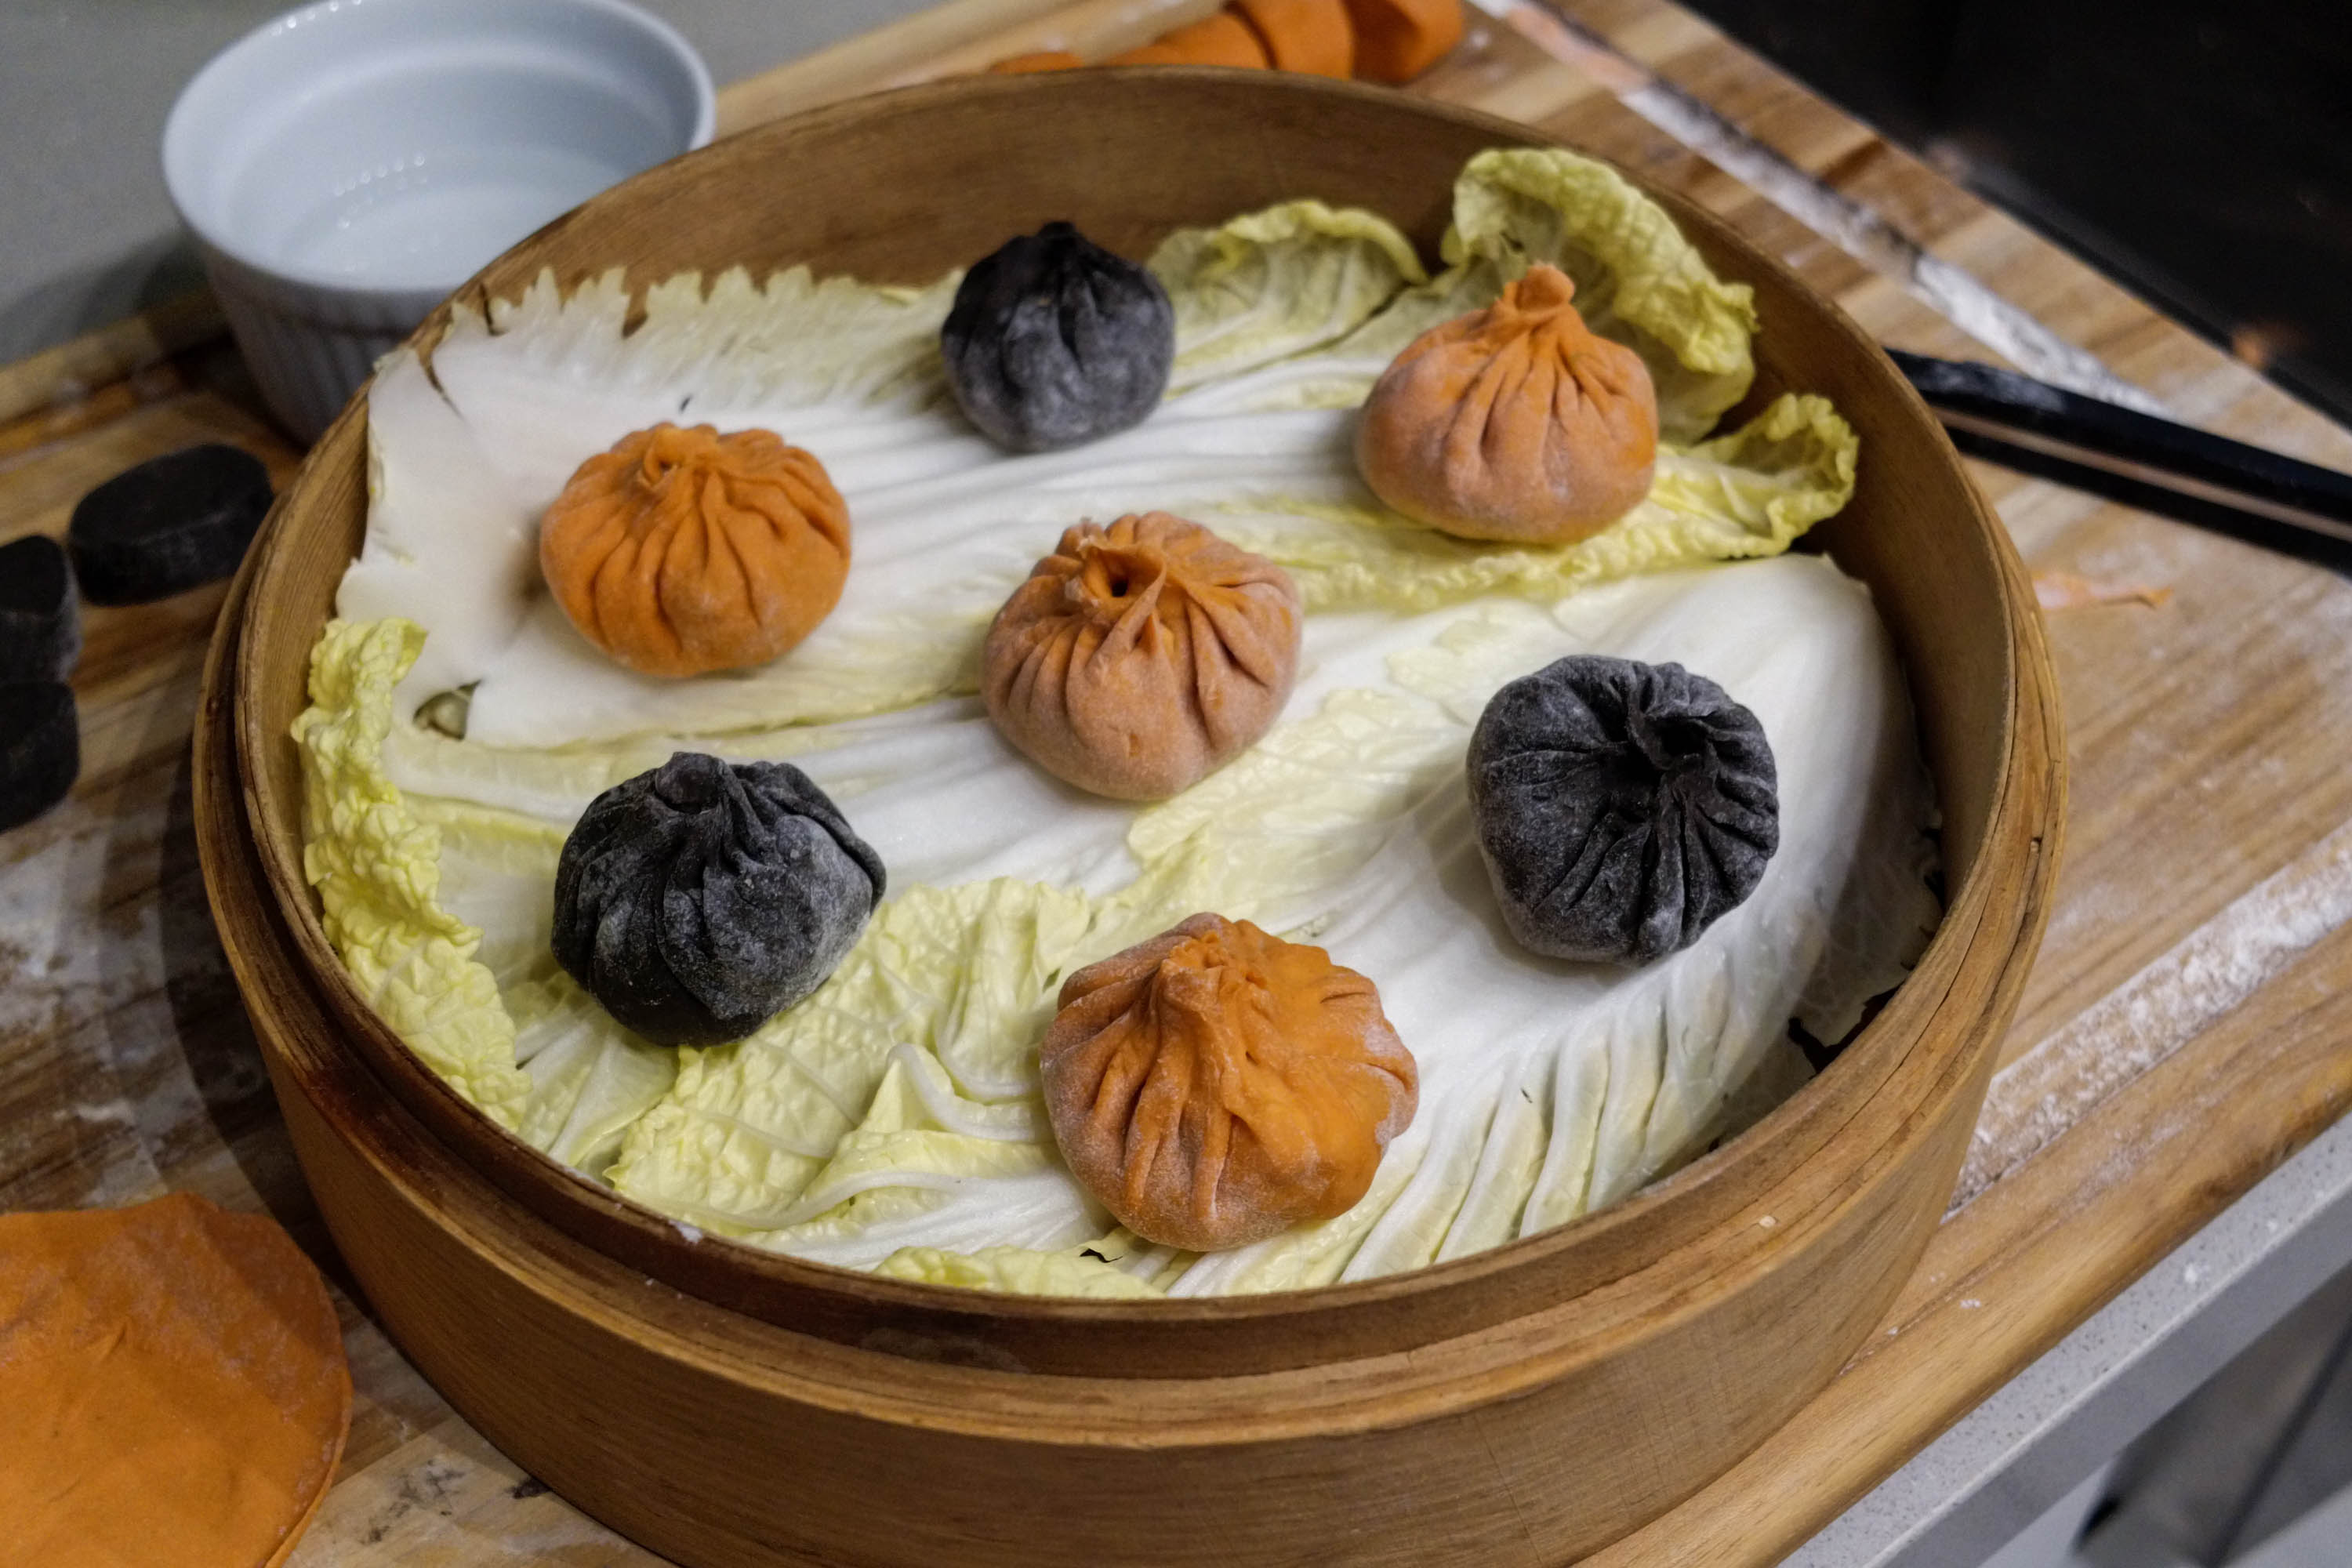
A lot of recipes and restaurants line their bamboo steamers with this parchment cloth material, but my mom has always steamed using napa cabbage as the liner, so that’s what I went with here.
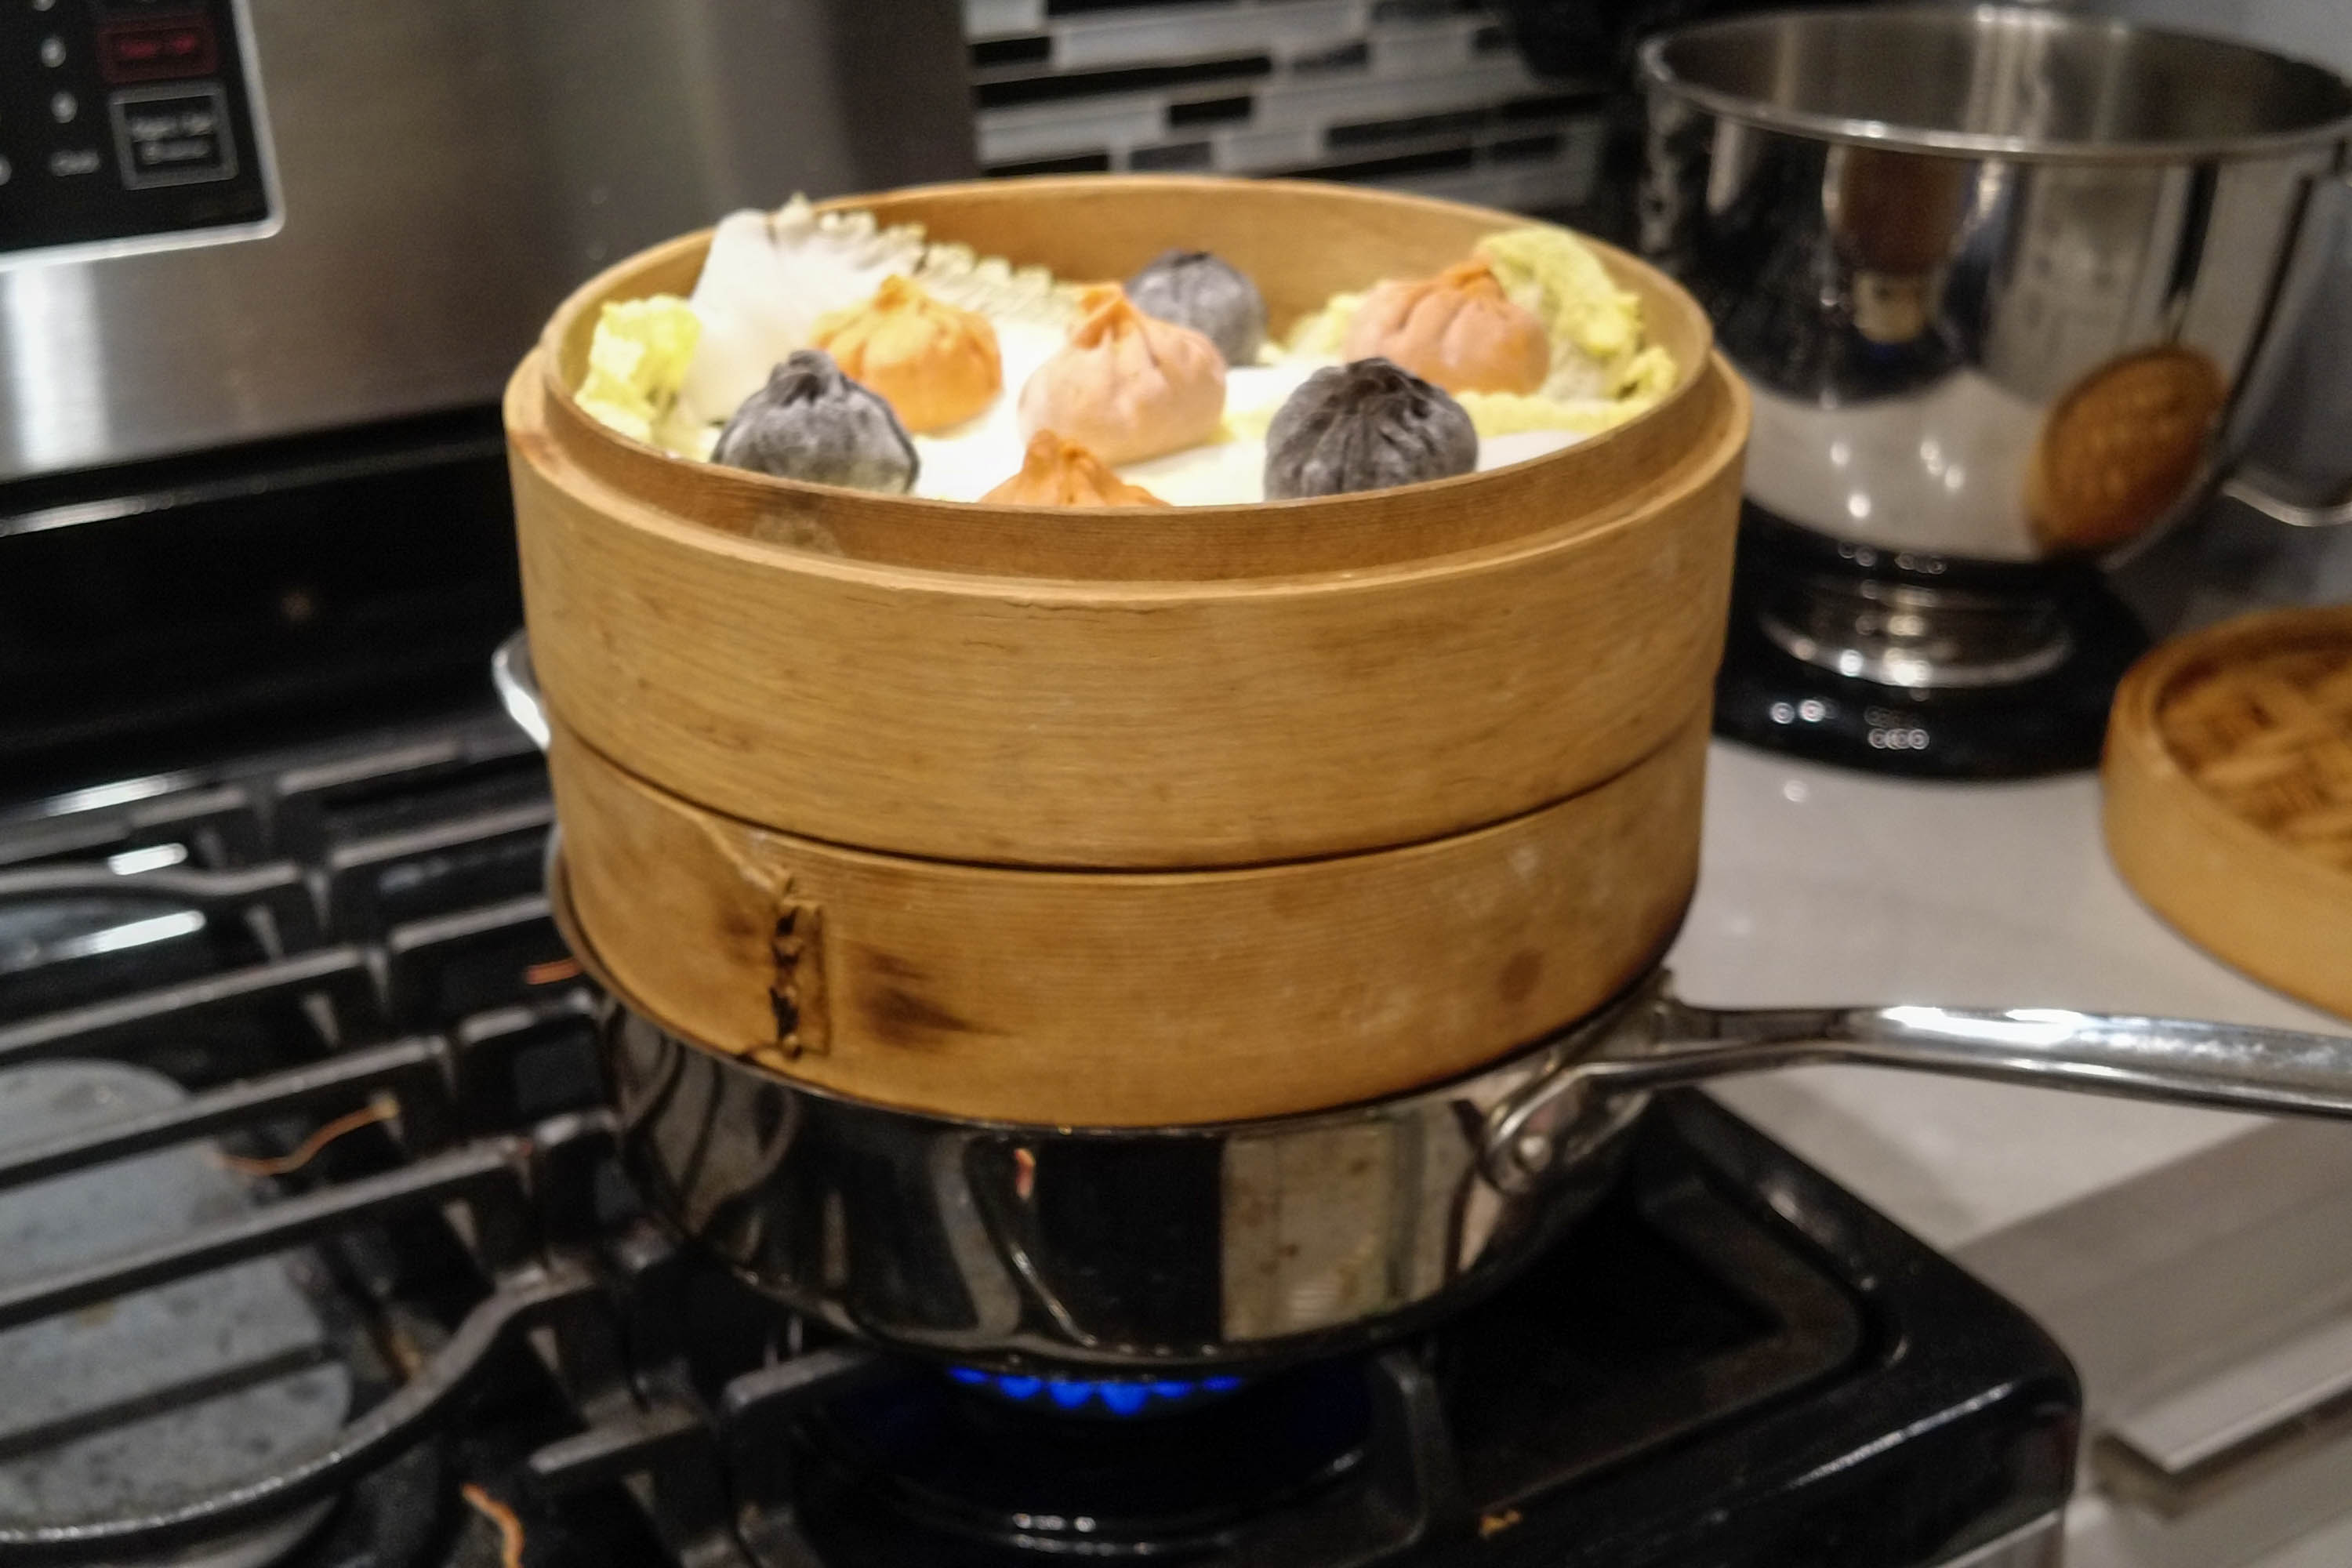
Steam for maybe 6-8 minutes. Then eat. If it’s your first time making these, either all of your 小籠包 fell apart and all the broth leaked out, or they’re all too thick and taste like shit. It took me damn near 10 individually steamed attempts to finally wrap and steam one that was respectable so I have 0 faith in you to get it perfect on the first try. Just go to Din Tai Fung instead.
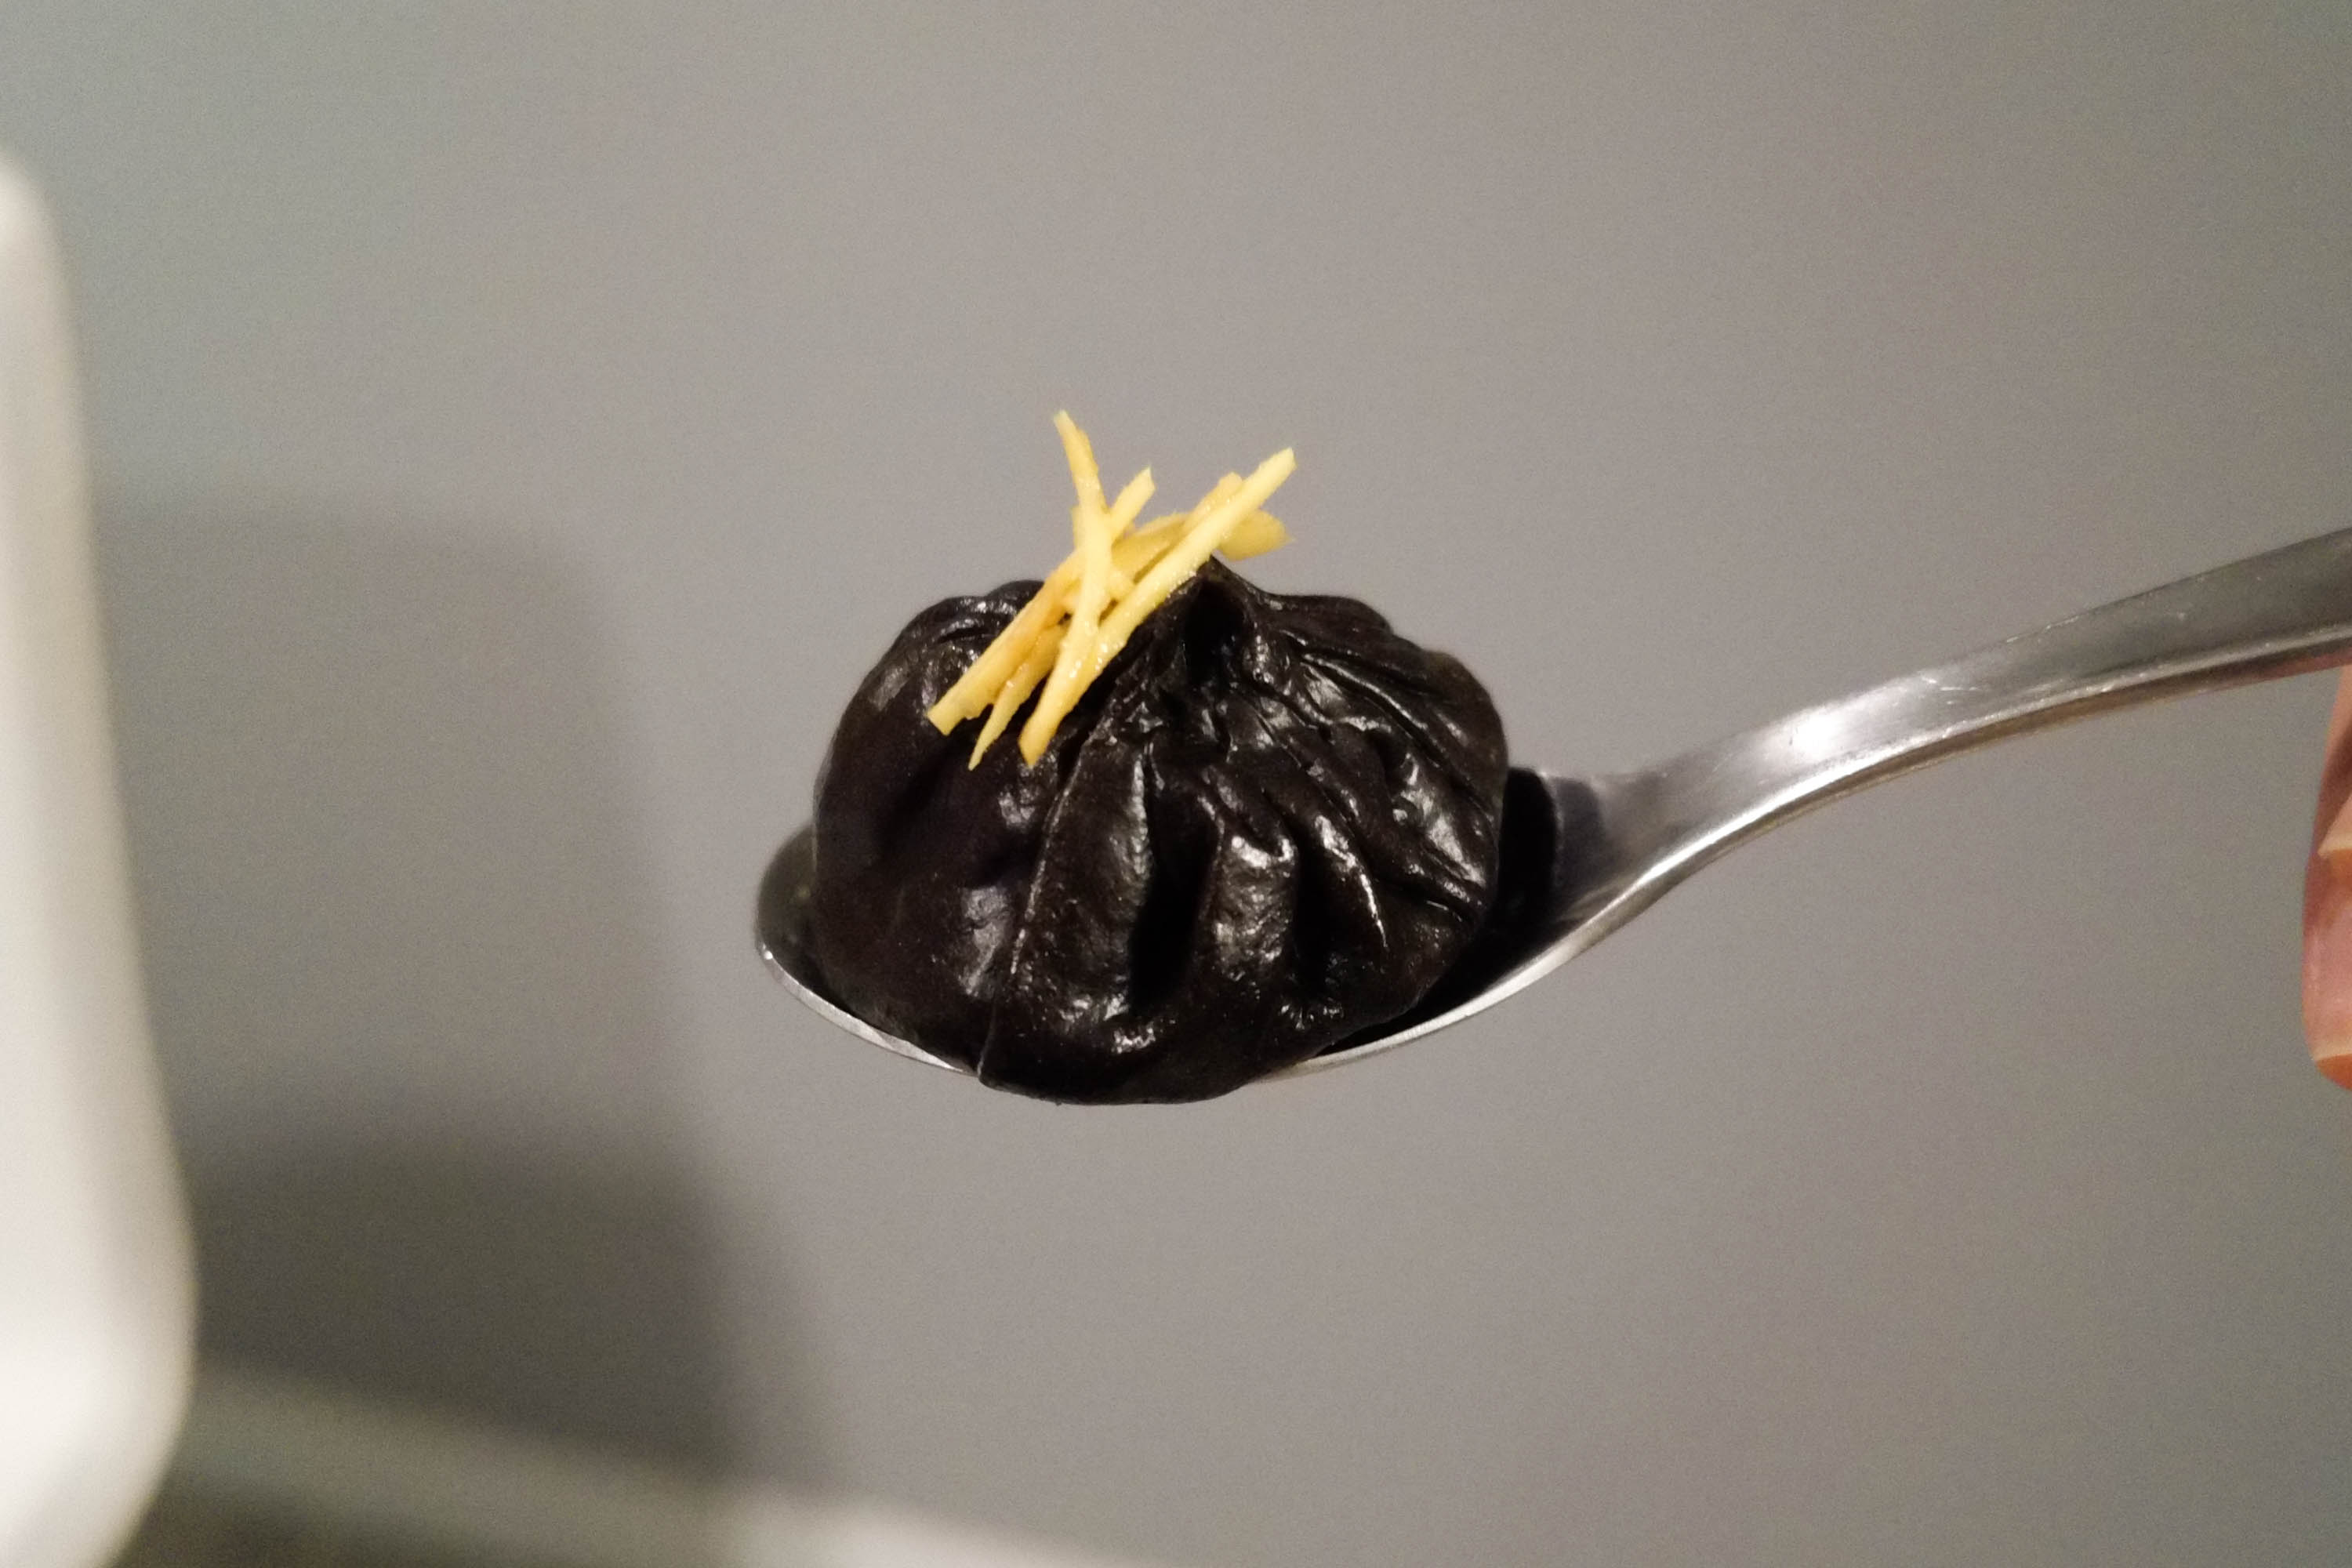
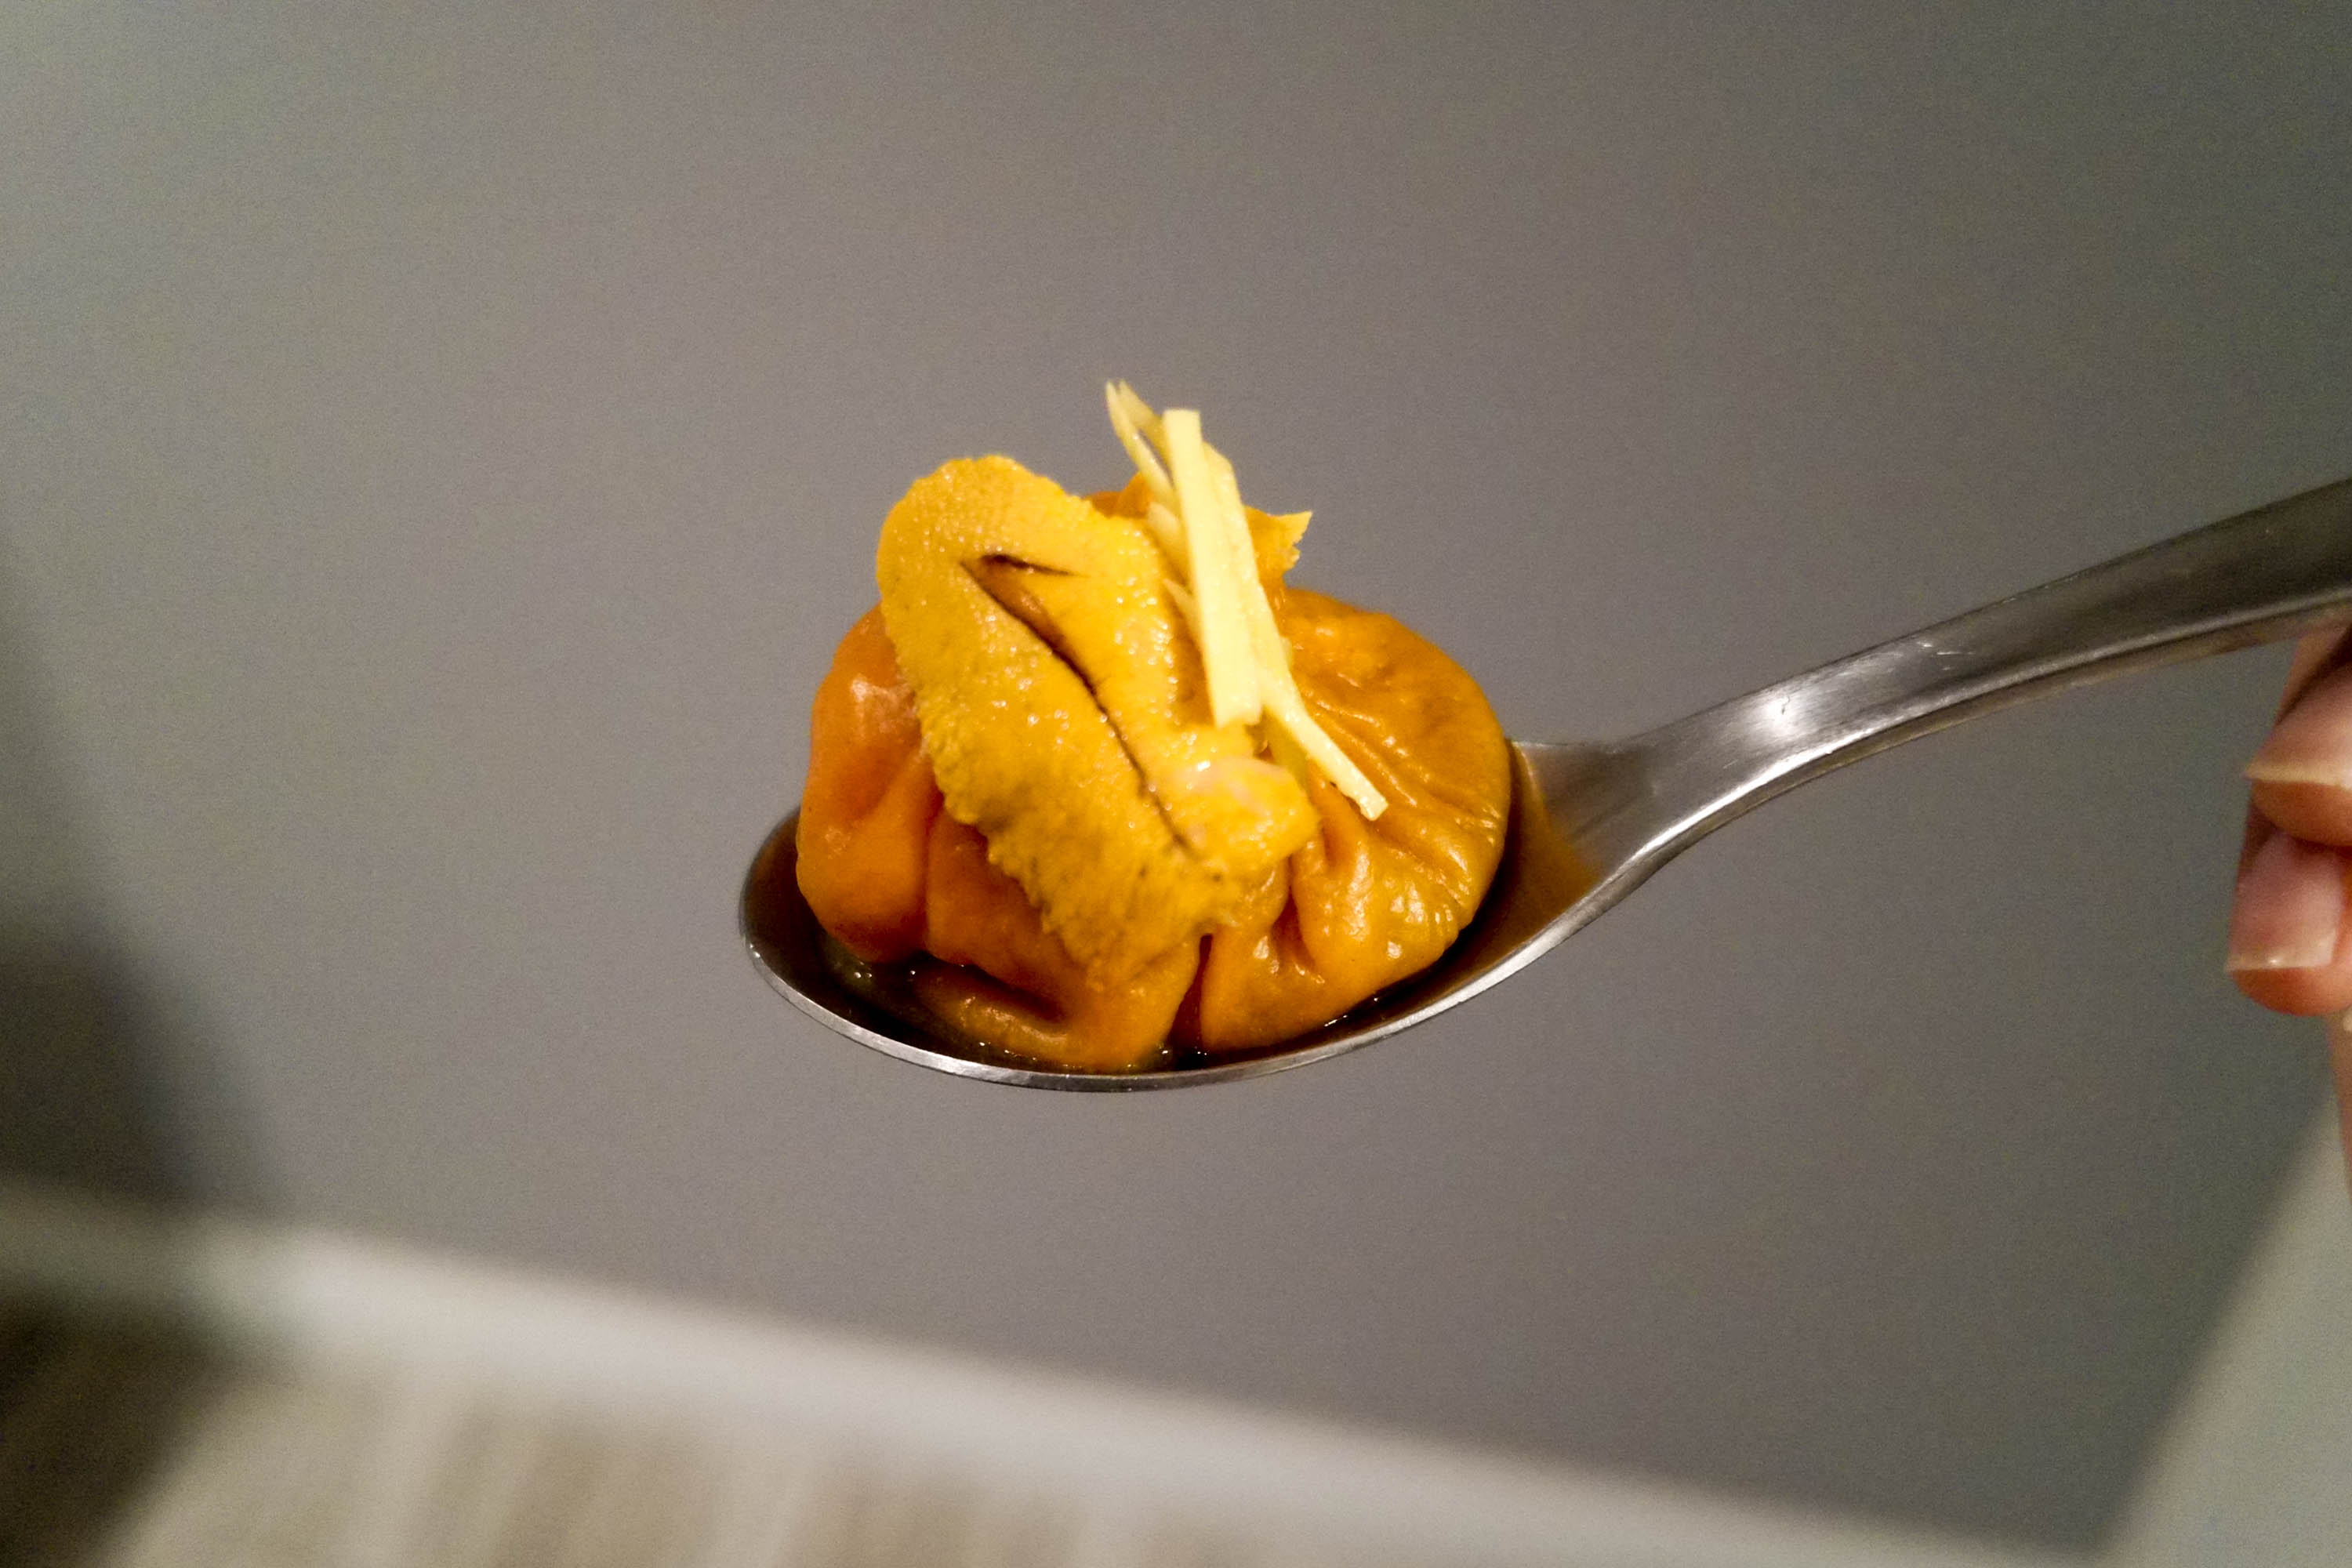
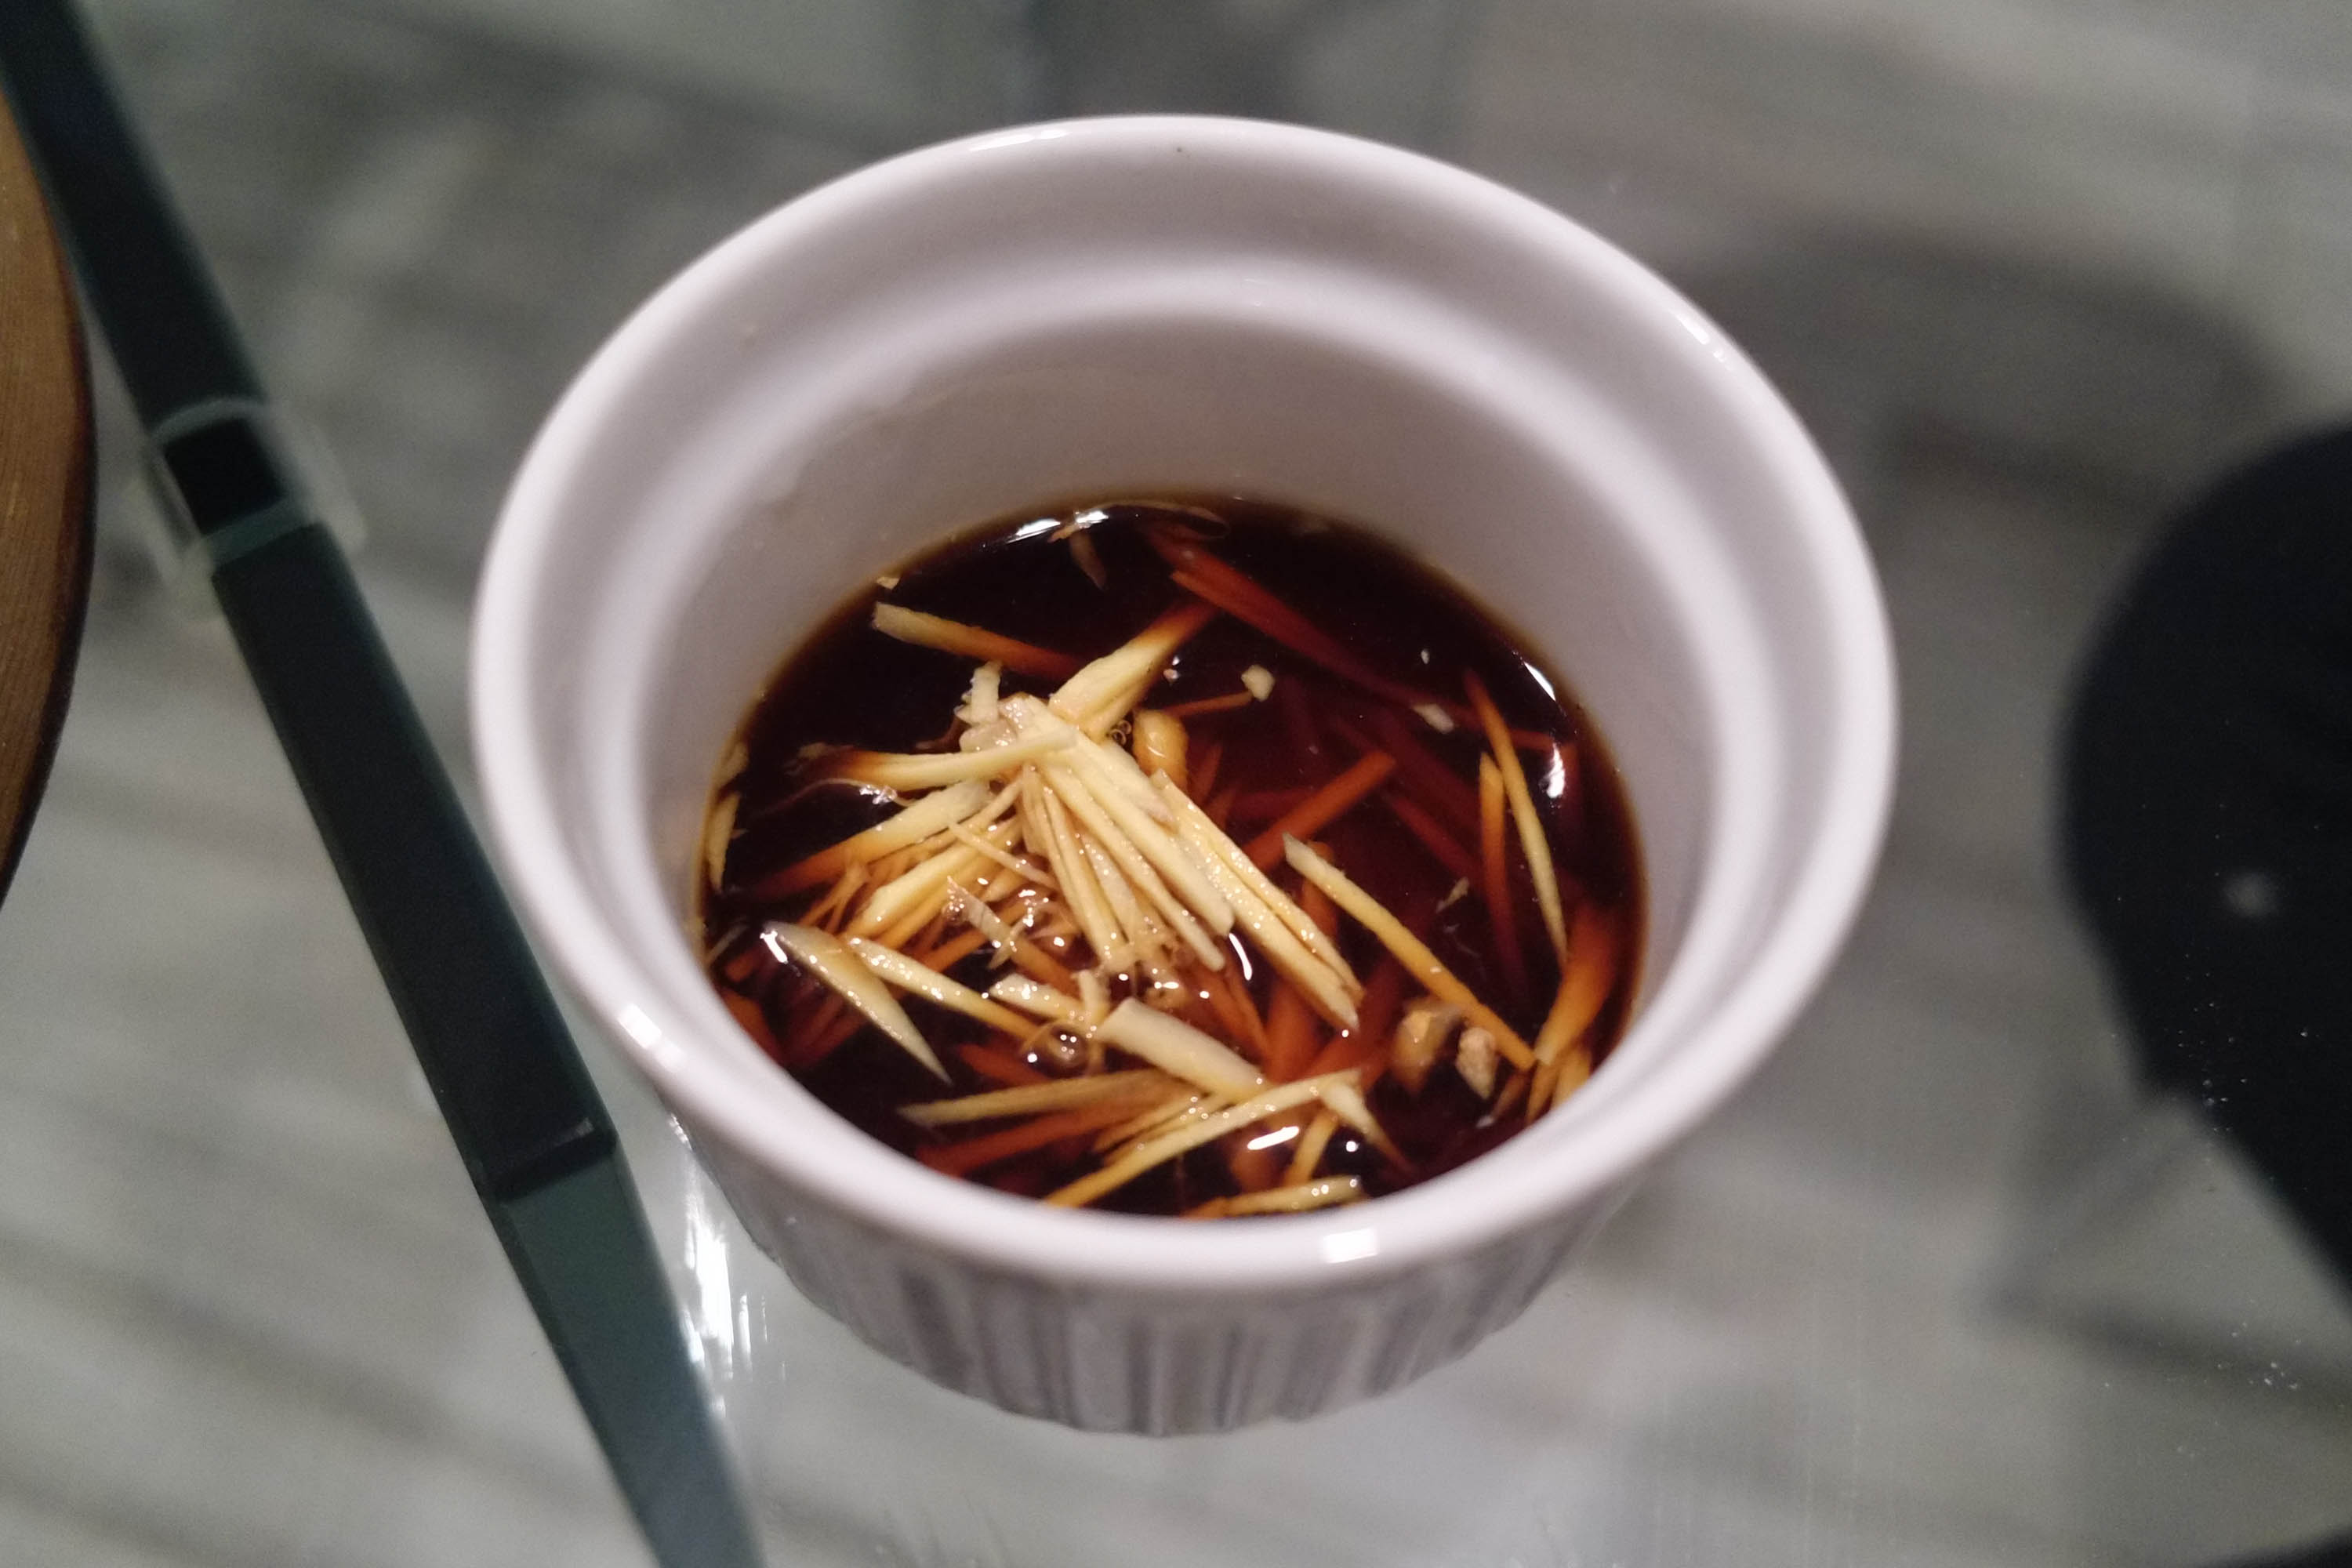
I topped the seafood ones with Uni after steaming because I can. Also don’t forget your black vinegar ginger sauce.
STEP 6: Post on social media
Seriously, if you made it this far you deserve the likes.
Conclusion
The seafood 小籠包 was too seafoody. In the end I think you still need to mix in pork and maybe use pork broth for that authentic 小籠包 taste. Topping it off with uni was a delicious surprise though - would definitely try that again.
The bone marrow pork meanwhile was delicious. The bone marrow added a nice soft fatty richness to the filling. Only thing I would probably change is to remove some of the oil, whether it’s sesame oil or pork fat and maybe add a tad more ginger.
Ingredients
Crab & Shrimp
1 cup finely chopped shrimp
1 cup chopped crabmeat
2 tablespoons tobiko
1/2 teaspoon sugar
2 teaspoon white wine
1 teaspoon sesame oil
Bone Marrow Pork
1lb pork
1/2 cup roasted bone marrow
2 small stalks green onion finely chopped
1/2 teaspoon ginger finely chopped or grated
1 teaspoon rice wine
1/2 teaspoon sesame oil
1 teaspoon pork fat rendered
2 tablespoon soy sauce
1 tablespoon sugar
